04LSHOCK
ABSORBER,
SWINGARM
56
Bleadinl
and
fillinl
the
damller
• Info
Alternative 2
Warning
Danler of accidents Modifications
to
the suspension settings
can
seri-
ously alter the vehicle's ride behavior.
- Extreme modifications to the adjustment of the spring elements can
cause a serious deterioration in the handling characteristics and
overload some components.
- Only make adjustments within the recommended range.
- After making adjustments, ride slowly at first
to
get the feel of the
new ride behavior.
- Mount adjusting screws
e,
•
and.
in the positions determined when disas-
sembling.
I Before working with the vacuum pump, carefully
read
the vacuum pump operating manual.
Completely open the adjusters of the rebound and compression damping.
"
•
200782-10
-
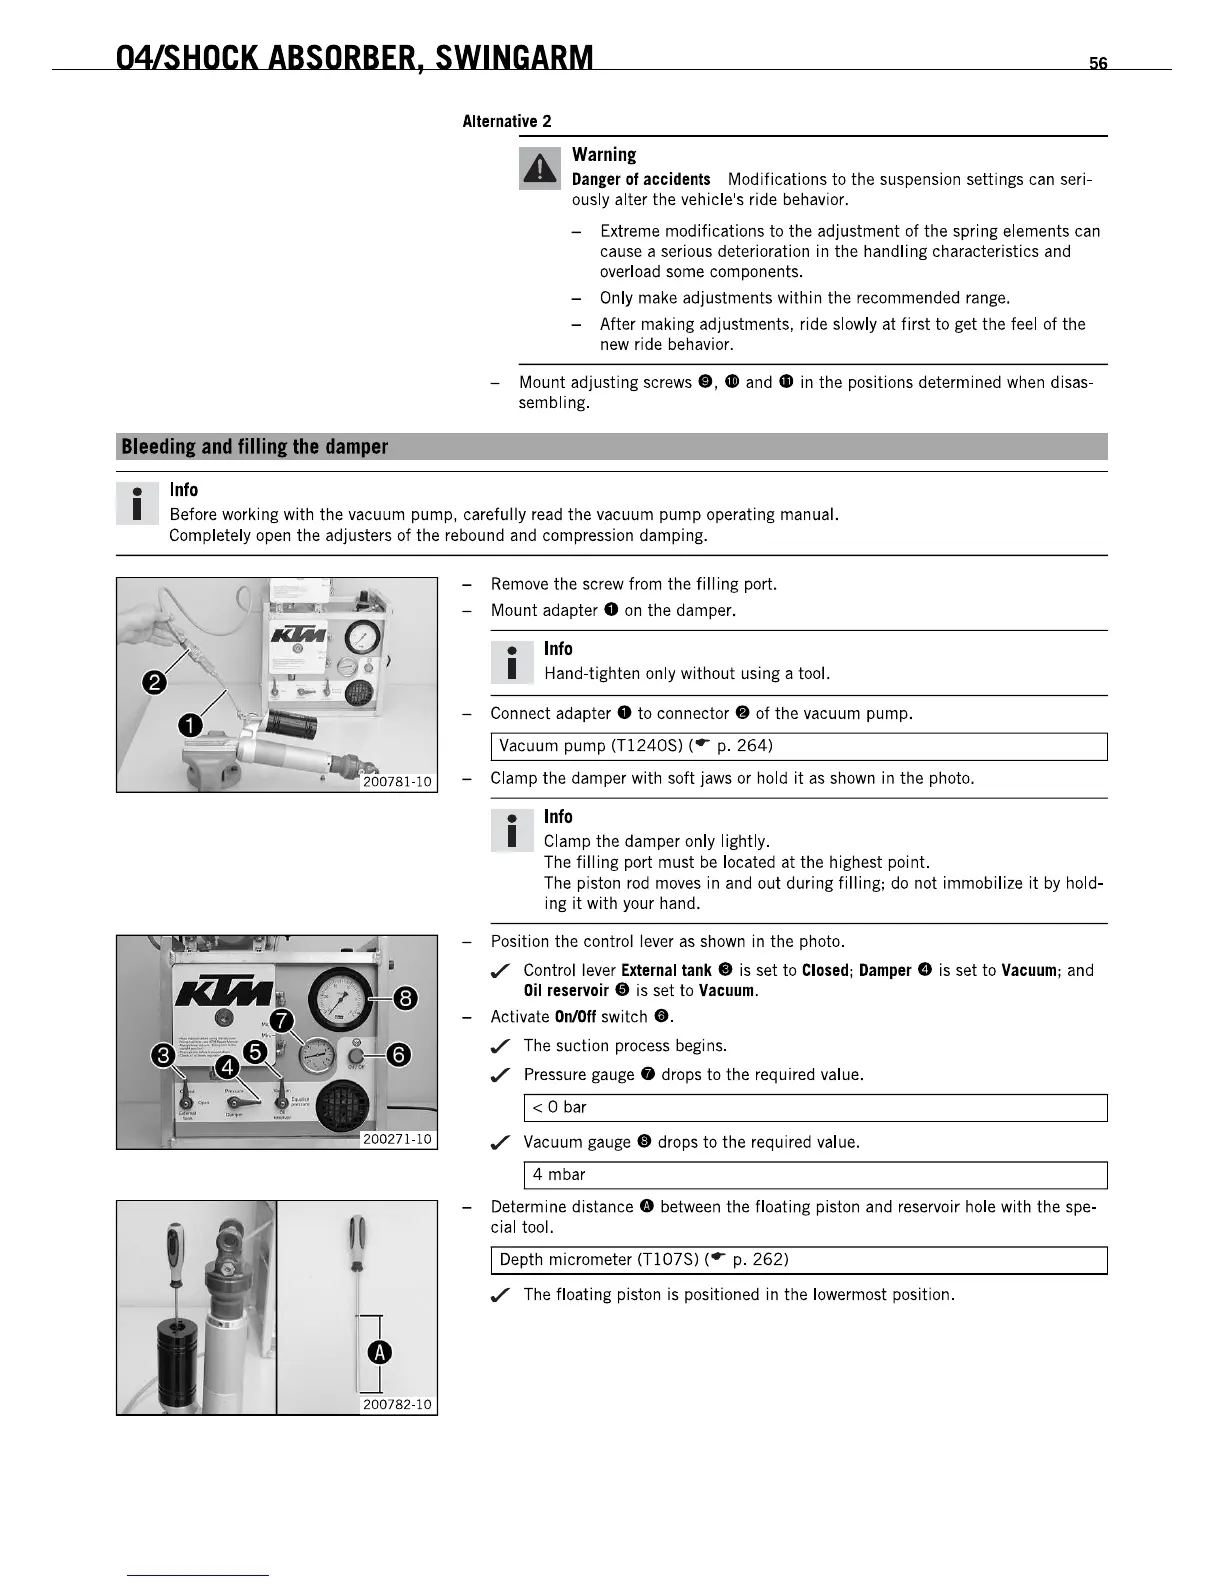
Remove
the screw from the
filling
port.
- Mount adapter 0
on
the damper.
• Info
I Hand-tighten only without using a tool.
- Connect
adapter.
to
connector.
of the vacuum pump.
1 Vacuum pump (Tl240S) (r
p.
264)
- Clamp the damper with soft jaws or hold
it
as
shown in the photo.
• Info
I Clamp the damper only lightly.
The
filling
port must
be
located at the highest point.
The piston
rod
moves
in and out during filling;
do
not immobilize
it
by
hold-
ing
it
with your hand.
- Position the control lever
as
shown in the photo.
,/
Control lever
External
tank.
is set
to
Closed;
Damper
0 is set
to
Vacuum;
and
Oil
reservoir.
is set
to
Vacuum.
- Activate
OnIDff
switch
•.
,/
The suction process begins.
,/
Pressure
gauge.
drops
to
the required value.
1 < 0 bar
,/
Vacuum
gauge.
drops
to
the required value.
14
mbar
- Determine
distance.
between the floating piston and reservoir hole with the spe-
ciallool.
1 Depth micrometer (Tl07S) (r
p.
262)
,/
The floating piston is positioned in the lowermost position.
04LSHOCK
ABSORBER,
SWINGARM
56
Bleadinl
and
fillinl
the
damller
• Info
Alternative 2
Warning
Danler of accidents Modifications
to
the suspension settings
can
seri-
ously alter the vehicle's ride behavior.
- Extreme modifications to the adjustment of the spring elements can
cause a serious deterioration in the handling characteristics and
overload some components.
- Only make adjustments within the recommended range.
- After making adjustments, ride slowly at first
to
get the feel of the
new ride behavior.
- Mount adjusting screws
e,
•
and.
in the positions determined when disas-
sembling.
I Before working with the vacuum pump, carefully
read
the vacuum pump operating manual.
Completely open the adjusters of the rebound and compression damping.
"
•
200782-10
-
Remove
the screw from the
filling
port.
- Mount adapter 0
on
the damper.
• Info
I Hand-tighten only without using a tool.
- Connect
adapter.
to
connector.
of the vacuum pump.
1 Vacuum pump (Tl240S) (r
p.
264)
- Clamp the damper with soft jaws or hold
it
as
shown in the photo.
• Info
I Clamp the damper only lightly.
The
filling
port must
be
located at the highest point.
The piston
rod
moves
in and out during filling;
do
not immobilize
it
by
hold-
ing
it
with your hand.
- Position the control lever
as
shown in the photo.
,/
Control lever
External
tank.
is set
to
Closed;
Damper
0 is set
to
Vacuum;
and
Oil
reservoir.
is set
to
Vacuum.
- Activate
OnIDff
switch
•.
,/
The suction process begins.
,/
Pressure
gauge.
drops
to
the required value.
1 < 0 bar
,/
Vacuum
gauge.
drops
to
the required value.
14
mbar
- Determine
distance.
between the floating piston and reservoir hole with the spe-
ciallool.
1 Depth micrometer (Tl07S) (r
p.
262)
,/
The floating piston is positioned in the lowermost position.
 Loading...