EasyManua.ls Logo

KTM 690 ENDURO EU 2008 User Manual

KTM 690 ENDURO EU 2008
231 pages
To Next Page IconTo Next Page
To Previous Page IconTo Previous Page
Page #40 background imageLoading...
Page #40 background image
04/SHOCK ABSORBER, SWINGARM 38
300564-11
– Mount and tighten screw .
Guideline
Screw, fuel tank, bottom M8 20 Nm
(14.8 lbf ft)
– Repeat the operation on the opposite side.
300563-11
– Lift the rear fairing.
– Mount and tighten screws .
Guideline
Screw, main silencer
holder on fuel tank
M8 25 Nm
(18.4 lbf ft)
Loctite
®
243â„¢
300562-11
– Mount and tighten screws .
Guideline
Screw, side cover M5 2 Nm (1.5 lbf ft)
– Mount the side cover. ( p. 59)
– Remove the motorcycle from the work stand. ( p. 10)
8.11Servicing the shock absorber
Danger
Danger of accidents Disassembly of pressurized parts can lead to injury.
– The shock absorber is filled with high density nitrogen. Adhere to the description provided.
Condition
The shock absorber has been removed.
201239-01
– Remove the spring. ( p. 39)
– Dismantle the damper. ( p. 39)
– Disassemble the piston rod. ( p. 40)
– Check the damper. ( p. 41)
– Remove the heim joint. ( p. 42)
– Install the heim joint. ( p. 43)
–
Assemble the piston rod. ( p. 44)
– Assemble the damper. ( p. 45)
– Install the spring. ( p. 49)

Table of Contents

Question and Answer IconNeed help?

Do you have a question about the KTM 690 ENDURO EU 2008 and is the answer not in the manual?

KTM 690 ENDURO EU 2008 Specifications

General IconGeneral
BrandKTM
Model690 ENDURO EU 2008
CategoryMotorcycle
LanguageEnglish

Summary

Front Fork and Triple Clamp Maintenance

Removing and Installing Fork Legs

Detailed steps for removing and installing the front fork legs.

Rear Suspension and Swingarm Maintenance

Removing and Installing Shock Absorber

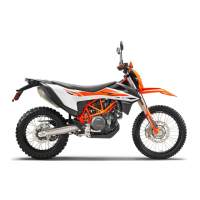
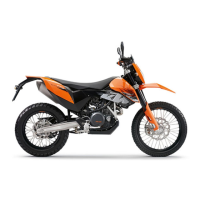
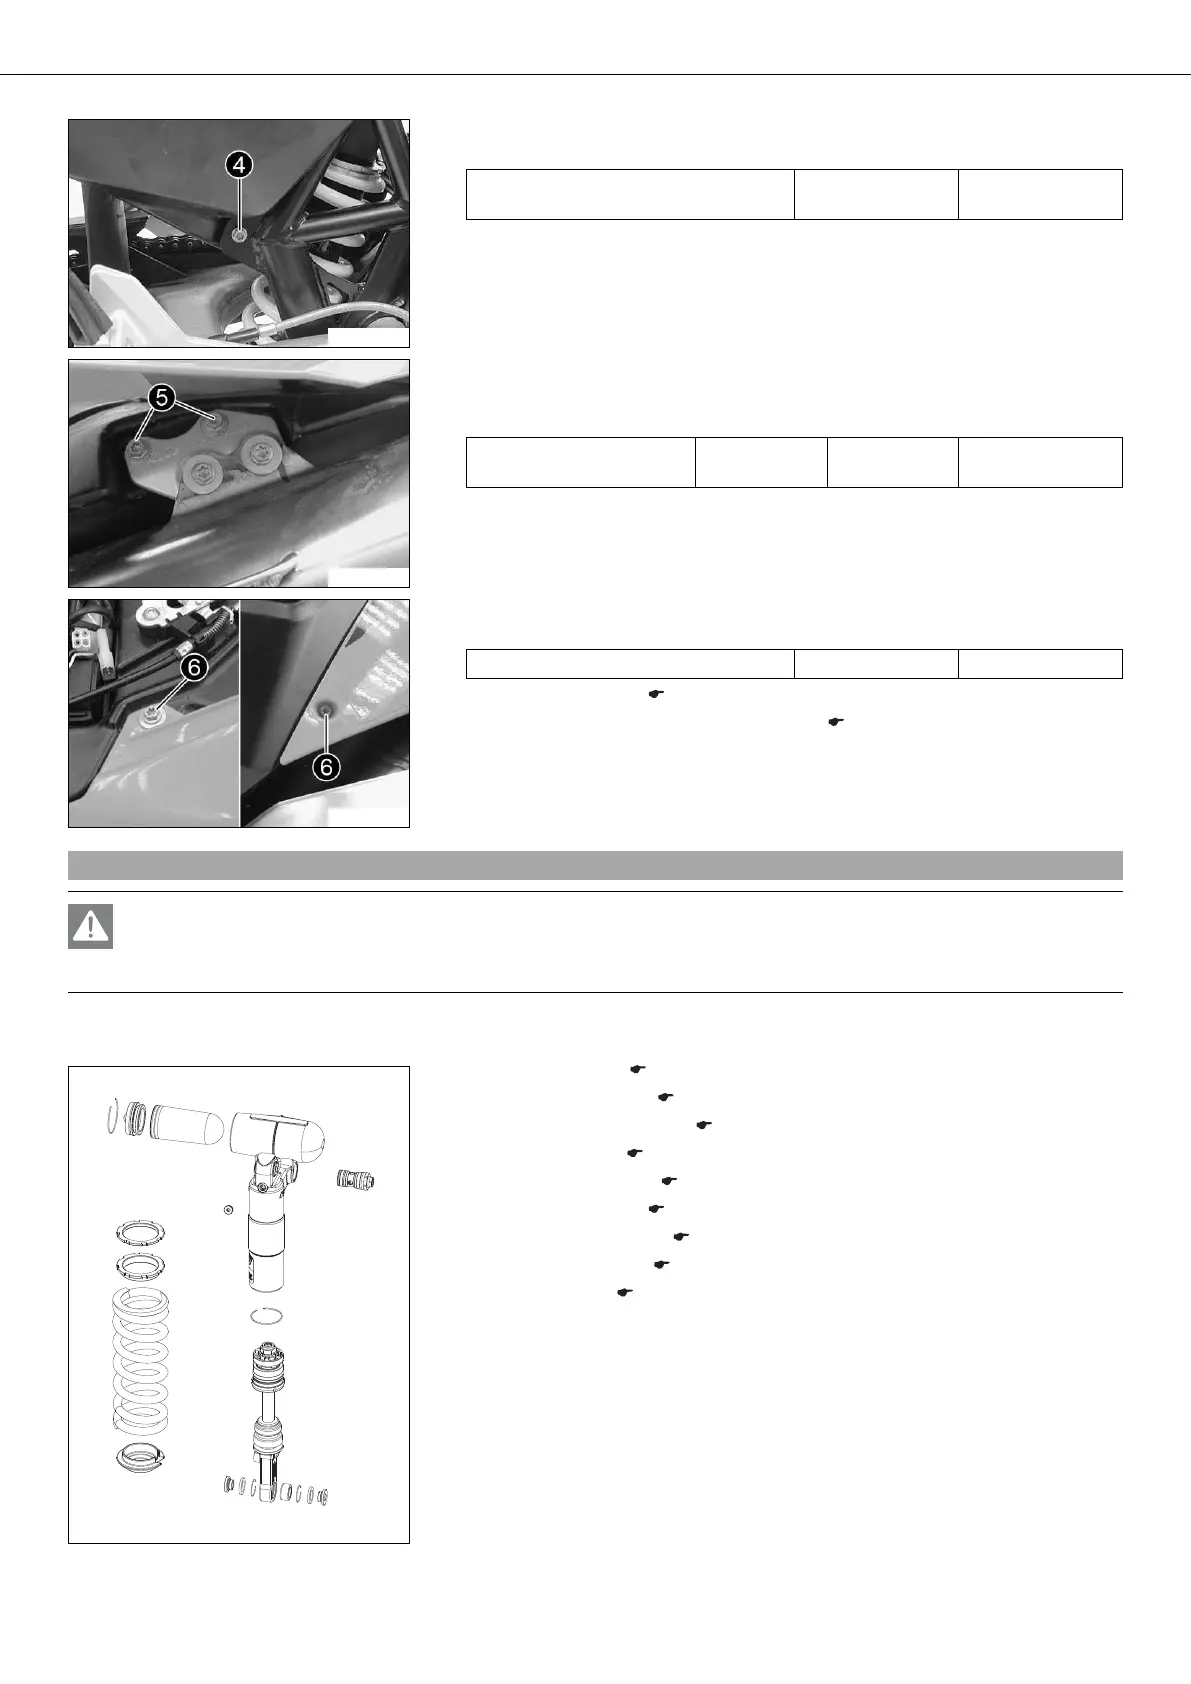
Detailed steps for removing and installing the rear shock absorber.

Front Wheel Maintenance

Front Wheel Removal and Installation

Detailed steps for removing and installing the front wheel.

Rear Wheel Maintenance

Rear Wheel Removal and Installation

Detailed steps for removing and installing the rear wheel.

Battery and Wiring Harness Maintenance

Brake System Maintenance

Front Brake System Maintenance

Procedures for front brake linings, lever, and fluid.

Rear Brake System Maintenance

Procedures for rear brake linings, lever, and fluid.

Engine Removal and Installation

Engine Removal Procedures

Detailed steps for removing the engine from the motorcycle.

Engine Installation Procedures

Detailed steps for installing the engine into the motorcycle.

Engine Disassembly Procedures

Engine Work on Individual Parts

Work on Engine Case Sections

Detailed procedures for working on the right and left engine case sections.

Crankshaft and Balancer Shaft Procedures

Procedures related to crankshaft and balancer shaft inspection and replacement.

Engine Assembly Procedures

Crankshaft and Balancer Shaft Installation

Procedure for installing the crankshaft and balancer shaft.

Engine Case, Oil Pumps, Locking Lever Installation

Procedures for installing engine case, oil pumps, and locking lever.

Engine Timing and Piston Installation

Procedures for setting engine timing and installing the piston.

Cylinder Head and Camshaft Installation

Procedures for installing the cylinder head and camshafts.

Timing Chain Tensioner and Valve Clearance

Procedures for installing timing chain tensioner and adjusting valve clearance.

Lubrication System Maintenance

Oil Circuit and Engine Oil Level Check

Diagram of oil circuit and procedure for checking engine oil level.

Engine Oil Pressure Check

Procedure for checking the engine oil pressure.

Engine Oil and Filter Change

Steps for changing engine oil, filter, and cleaning oil screens.

Throttle Valve Body Settings

Service Schedule

Related product manuals