10/REAR WHEEL 75
13.1Removing rear wheel
– Raise the motorcycle with the lift stand. ( p. 9)
100267-10
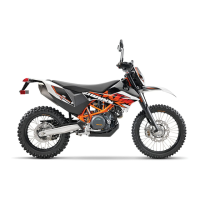
– Press the brake caliper by hand on to the brake disc in order to press back the
brake piston.
– Remove nut . Remove chain adjuster .
– Holding the rear wheel, withdraw the wheel spindle .
100268-01
– Push the rear wheel forwards as far as possible and take the chain off the rear
sprocket.
Warning
Danger of accidents Reduced braking efficiency caused by damaged brake
discs.
– Always lay the wheel down in such a way that the brake disc is not dam-
aged.
– Take the rear wheel out of the swing arm.
Info
Do not operate the foot brake when the rear wheel is removed.
13.2Installing the rear wheel
Warning
Danger of accidents Reduced braking efficiency due to oil or grease on the brake discs.
– Always keep the brake discs free of oil and grease, and clean them with brake cleaner when necessary.
Warning
Danger of accidents No braking effect when operating the rear brake.
– After installing the rear wheel, always operate the foot brake until the pressure point is reached.
– Check the rear hub rubber dampers. ( p. 79)
100269-10
– Check the wheel bearing for damage and wear.
» If the wheel bearing is damaged or worn:
– Replace the wheel bearing.
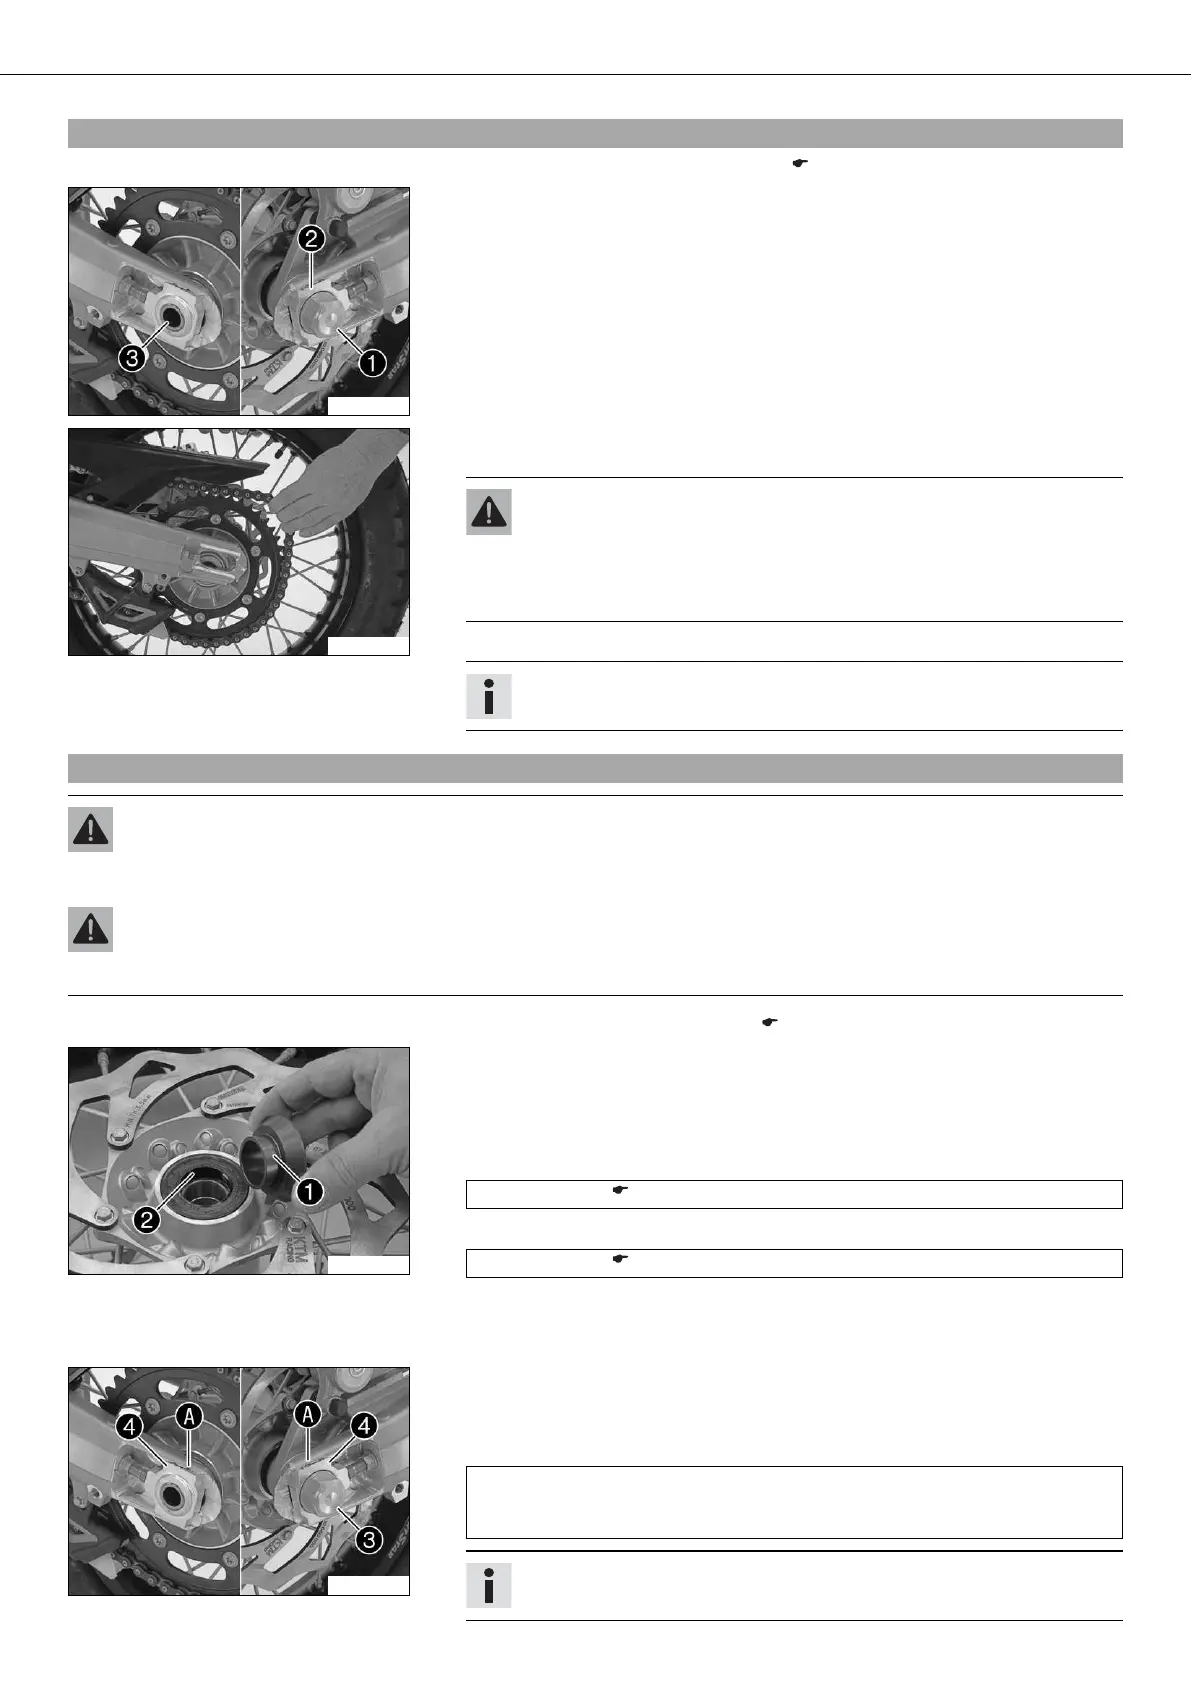
– Remove bushing . Clean and grease the working surfaces of the bushing and
shaft seal ring .
Long-life grease ( p. 244)
– Clean and grease the thread of the wheel spindle and nut .
Long-life grease ( p. 244)
– Install the rubber damper and rear sprocket carrier in the rear wheel.
– Place the rear wheel in the swingarm and bring the brake disc on the brake caliper
into contact.
100270-10
– Push the rear wheel forward as far as possible and lay the chain on the rear
sprocket.
– Install the wheel spindle, the chain adjusters and the nut.
Guideline
In order that the rear wheel is correctly aligned, the markings on the left and
right chain adjusters must be in the same position relative to the reference
marks .
Info
Mount the left and right chain adjusters in the same position.
 Loading...