Dividing and Cutting
4-25
4
Extended Functions – Cutting –
Cutting Data by Using the Dividing and Cutting Function
1
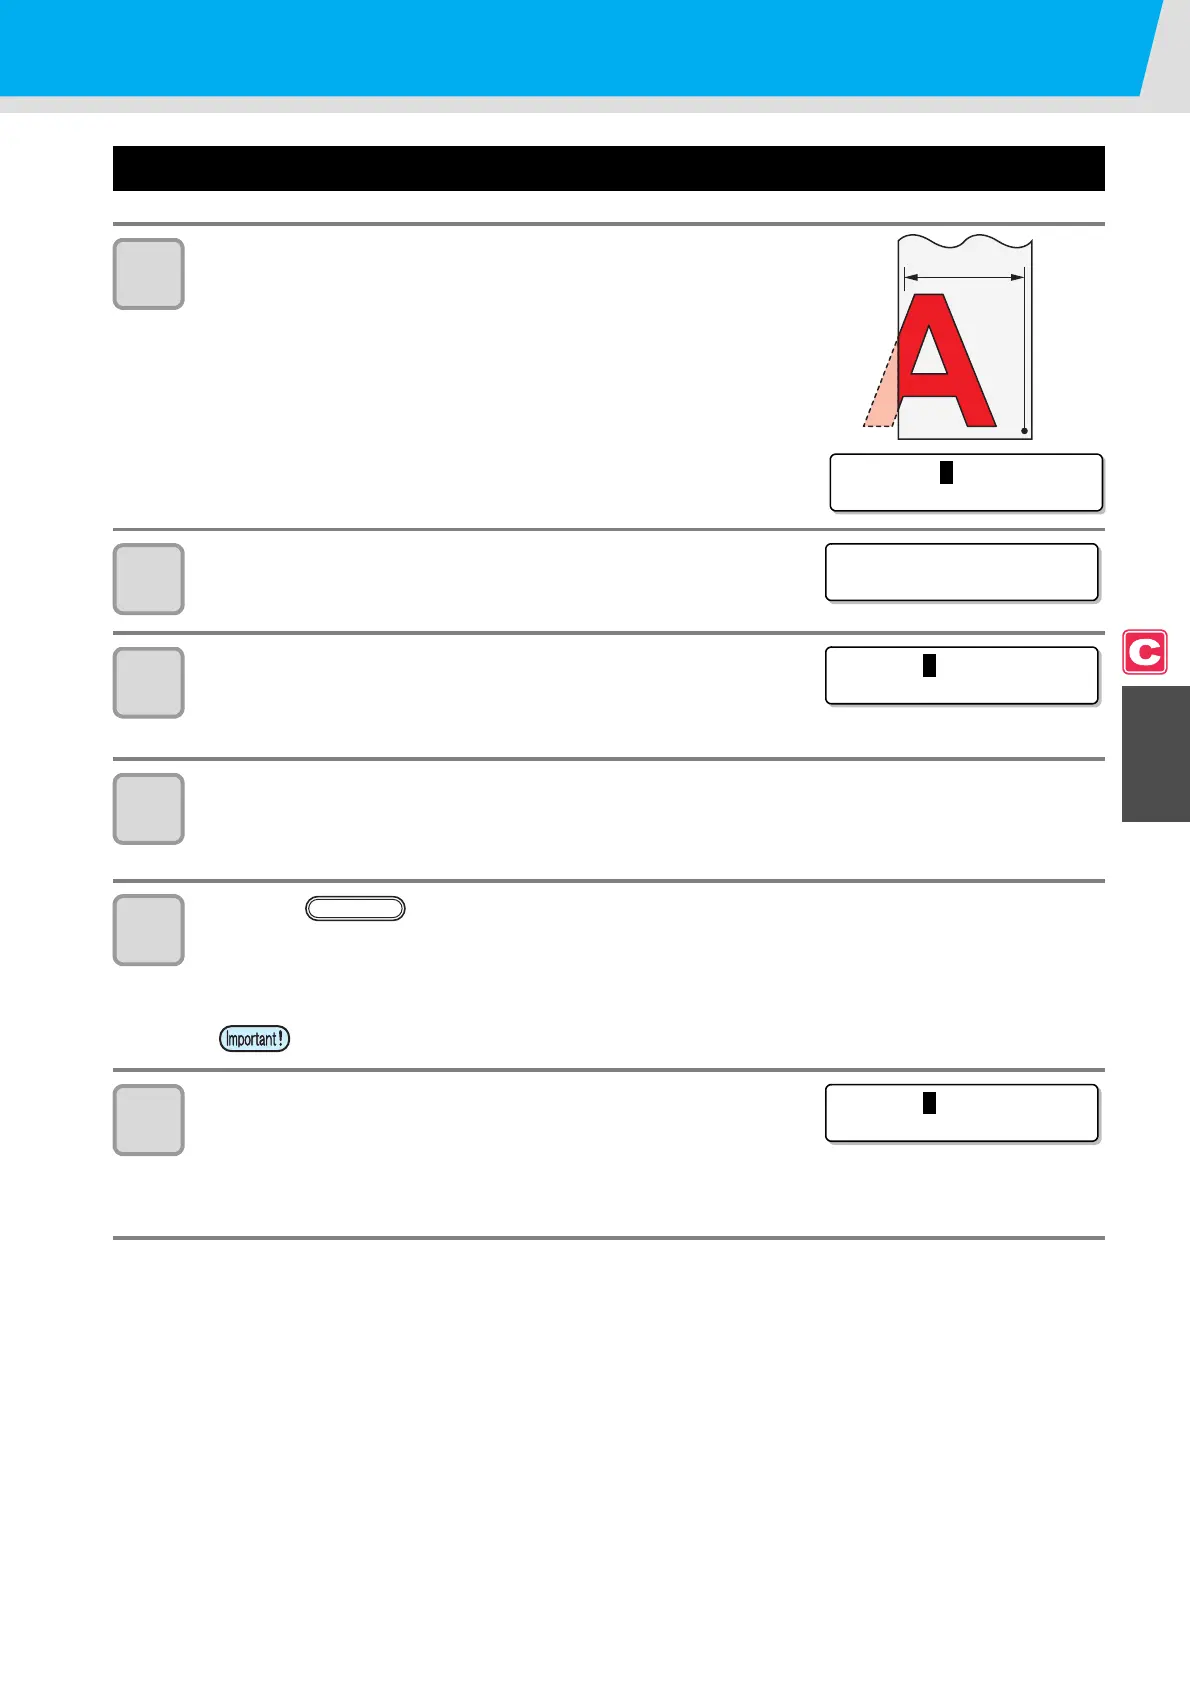
Data is received from the computer.
• When data has jutted out from the cut area, a screen shown
right appears.
2
When cutting has been complete, the frame and marks for
pasting are automatically cut.
3
When the frame has been cut, the screen returns to
LOCAL.
• Do not replace a medium when this screen does not appear.
4
Set a new origin.
• Move the carriage using the jog keys and set an origin.
• When there is no space to be cut, replace the medium.
5
Press the key to go to the remote mode.
• The medium is fed by the maximum medium length of the cut data and cut.
• When the medium is not fed or the length of the medium is short, replace the medium with a larger one in
Step 4.
6
Repeat the operations in Steps 4 and 5.
• Repeat the operations until there is no data that exceeds the width of
the medium.
• When the operations have been completed, tool conditions are displayed and the screen returns to
LOCAL.
• Cut does not start if new origin was not set in Step 4.
Effective area
Origin
*REMOTE.
C
*< 100KB>
** OFF SCALE **
** DIVISION **
<LOCAL .
C
> [ #01 ]
** DIVISION **
REMOTE
<LOCAL .
C
> [ #01 ]
[CUT1] 30 60 0.30
 Loading...


