Names of Parts and Functions
1-10
Pen-line Rubber
Cutting and printing with a pen are performed on the pen
line rubber.
If you want to perform dotted line cutting, follow the steps
below.
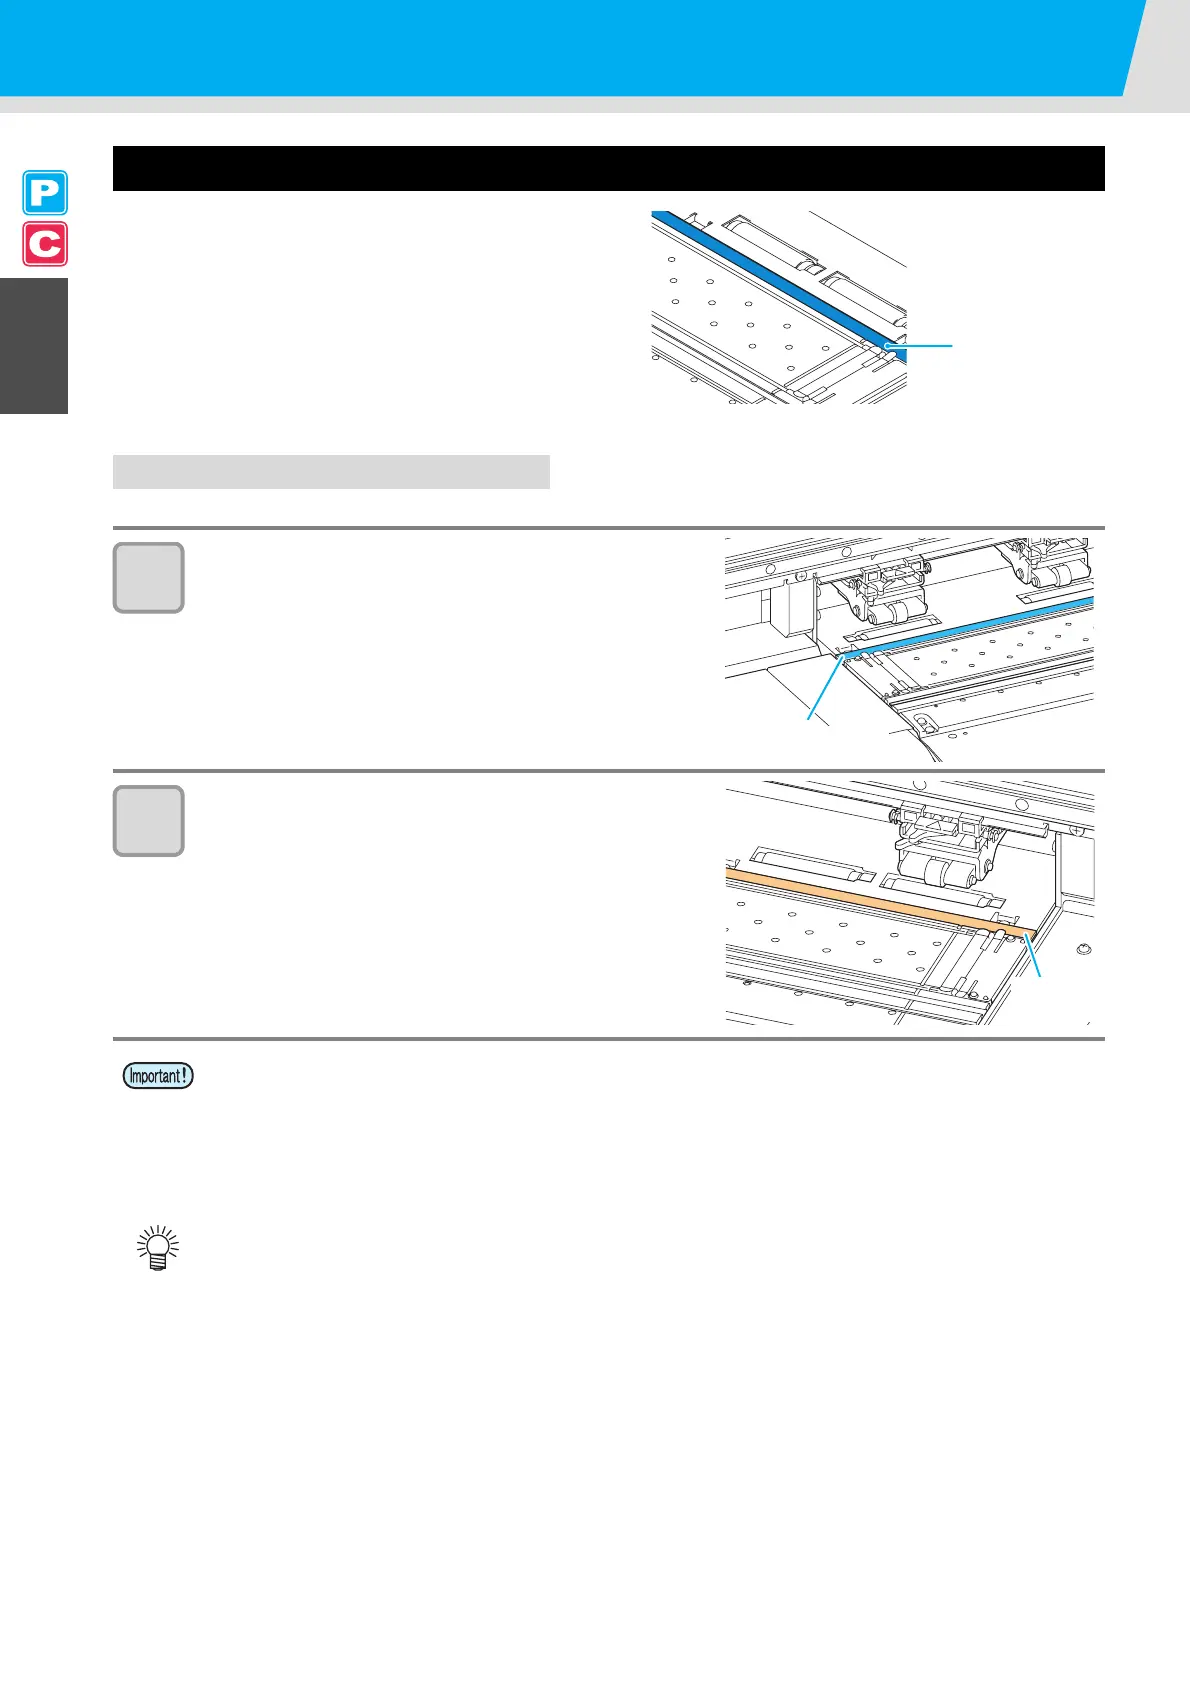
When performing dotted line cutting:
1
Remove the pen-line rubber.
(1)Insert a flathead screwdriver or equivalent tool into
the gap between the left end of the pen-line rubber
and the platen.
(2)Raise the pen-line rubber.
2
Install the pen-line sponge.
(1)Align the right end of the pen-line sponge with the
right end of the platen.
(2)Install the pen-line sponge.
Be careful of the following when installing the pen-line rubber.
• When installing the pen-line rubber, make sure to push it into the slot softly and avoid stretching it
forcibly.
• If pen line rubber is stretched forcibly, the edge of the pen line comes off and may decline the cutting
quality.
• Store the replaced pen line.
• The pen-line sponge and pen-line sponge are consumable. Replace it with a new one if necessary.
Pen-line
Rubber
Pen-line Rubber
Pen-line
sponge
 Loading...


