Paper Settings
QL-300 User Guide 84
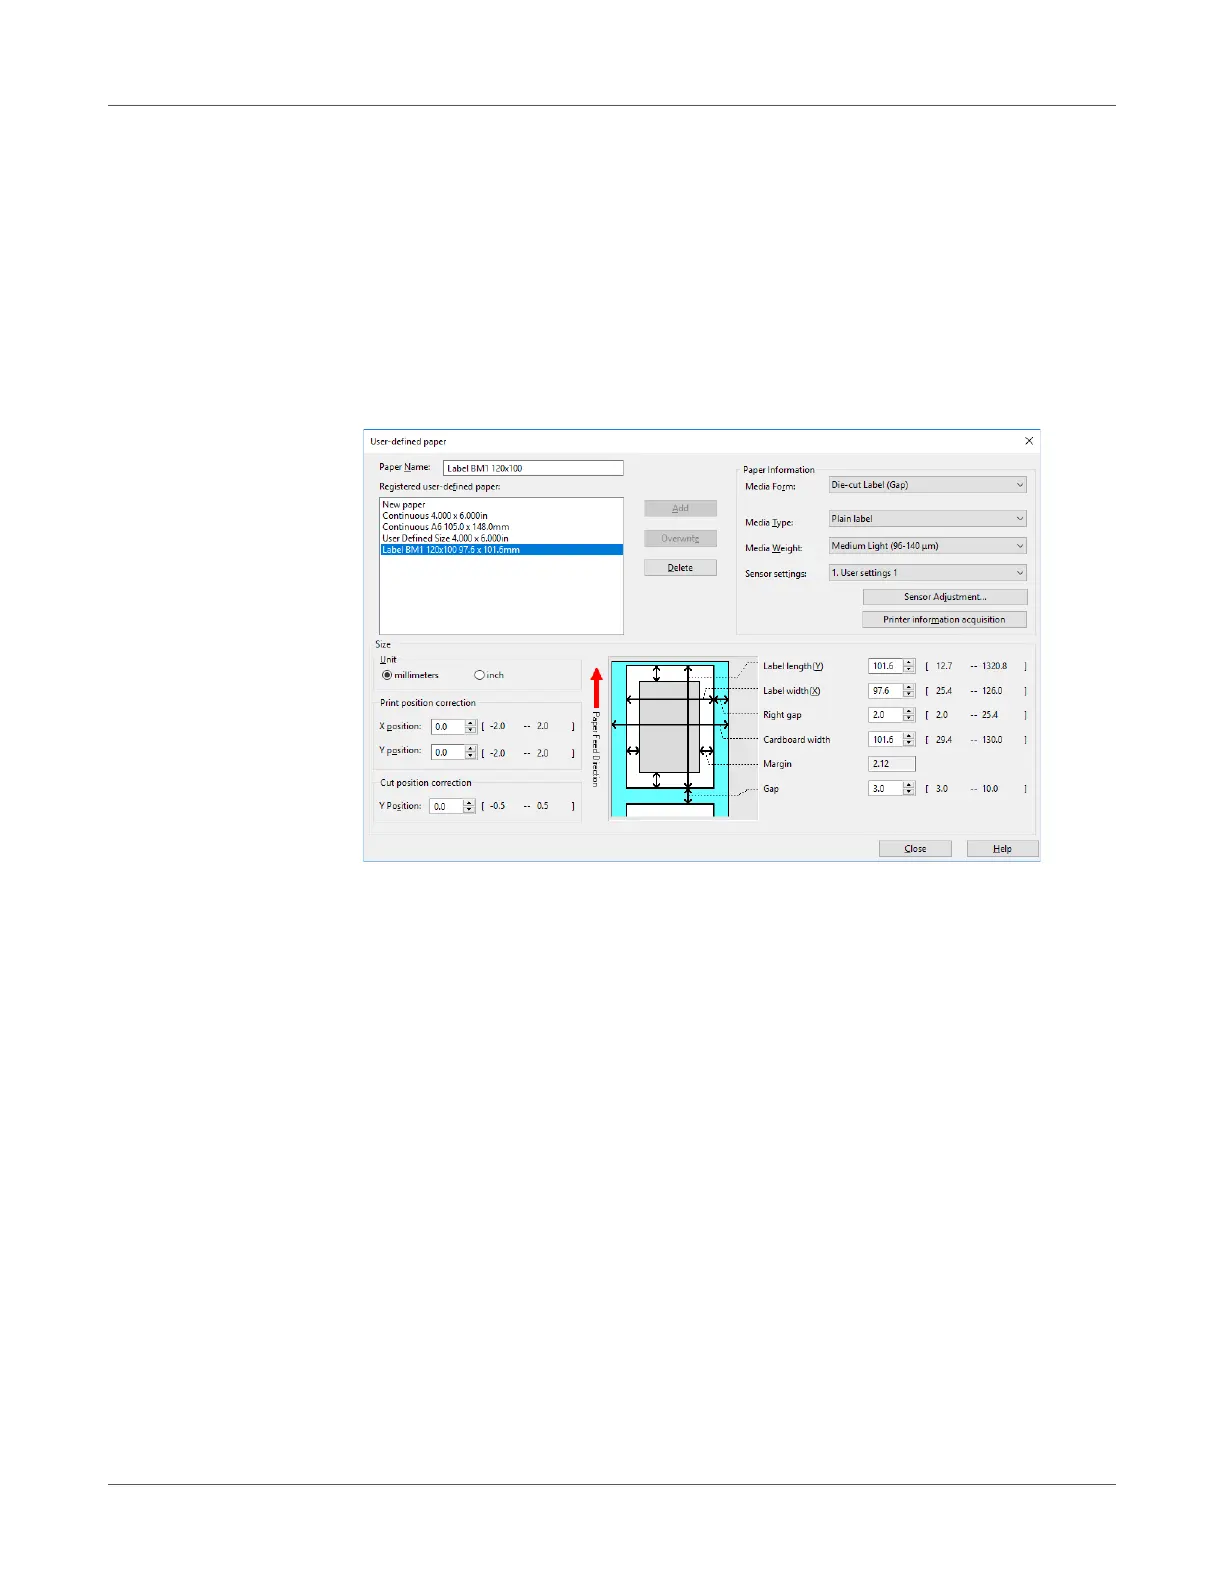
6 Enter other information as required.
a) If you performed sensor adjustment, select the sensor setting that was registered
to the device from Sensor settings.
For information about adjusting the sensor, refer to “Calibrating the Sensor” on
page 103.
b) If you want to fine-tune the image position, enter the position shift amount into Print
position correction.
c) If you want to fine-tune the paper cut position, enter the position shift amount into
Cut position correction.
7 When all the input is complete, click Add.
Using the Printer Driver to Fine-tune the Print Position
1 Click Start and select Control Panel in Windows.
2 Click View devices and printers.
3 Right-click the QL-300 icon, and then select Printing preferences.
 Loading...