Performing
3636
Dividing the Keyboard into Two Regions
(Split)
You can divide the keyboard into left-hand and right-hand ranges,
and play a dierent tone in each range.
This type of setup is called a “split”, and the point at which the
keyboard is divided is called the “split point”.
1. Select a scene for single play.
2. Press the [SPLIT] button to make it light.
High range (ZONE1)
Split point
Low range (ZONE4)
Split is enabled; you can play the ZONE 1 tone in the high
range, and the ZONE 4 tone in the low range.
3. To cancel split, press the [SPLIT] button to make it
go dark.
When you disable split, the high and low range settings (KEY
RANGE) are reset, and ZONE 1 and 4 are layered.
NOTE
On the FANTOM, the [SPLIT] button is lit whenever the high and
low range settings (KEY RANGE) of any zone are other than the
default values (low C-: high G9). Even if zones are layered, the
button is lit whenever the KEY RANGE settings are other than the
default. Making the [SPLIT] button go dark means that the KEY
RANGE settings of all zones are reset to the default values.
Changing the Keyboard’s Split Point
1. While holding down the [SPLIT] button, press the
key that is to become the new split point.
Split point
(included in ZONE 1)
When you press a key, the split point is shown.
When you release the [SPLIT] button, the previous display
will reappear.
The split-point key is included in the ZONE 1 section.
Selecting a Tone
(Split)
1. Press the [ZONE VIEW] button.
The ZONE VIEW screen appears.
Select the VIEW number that’s appropriate for the number of
zones that are split.
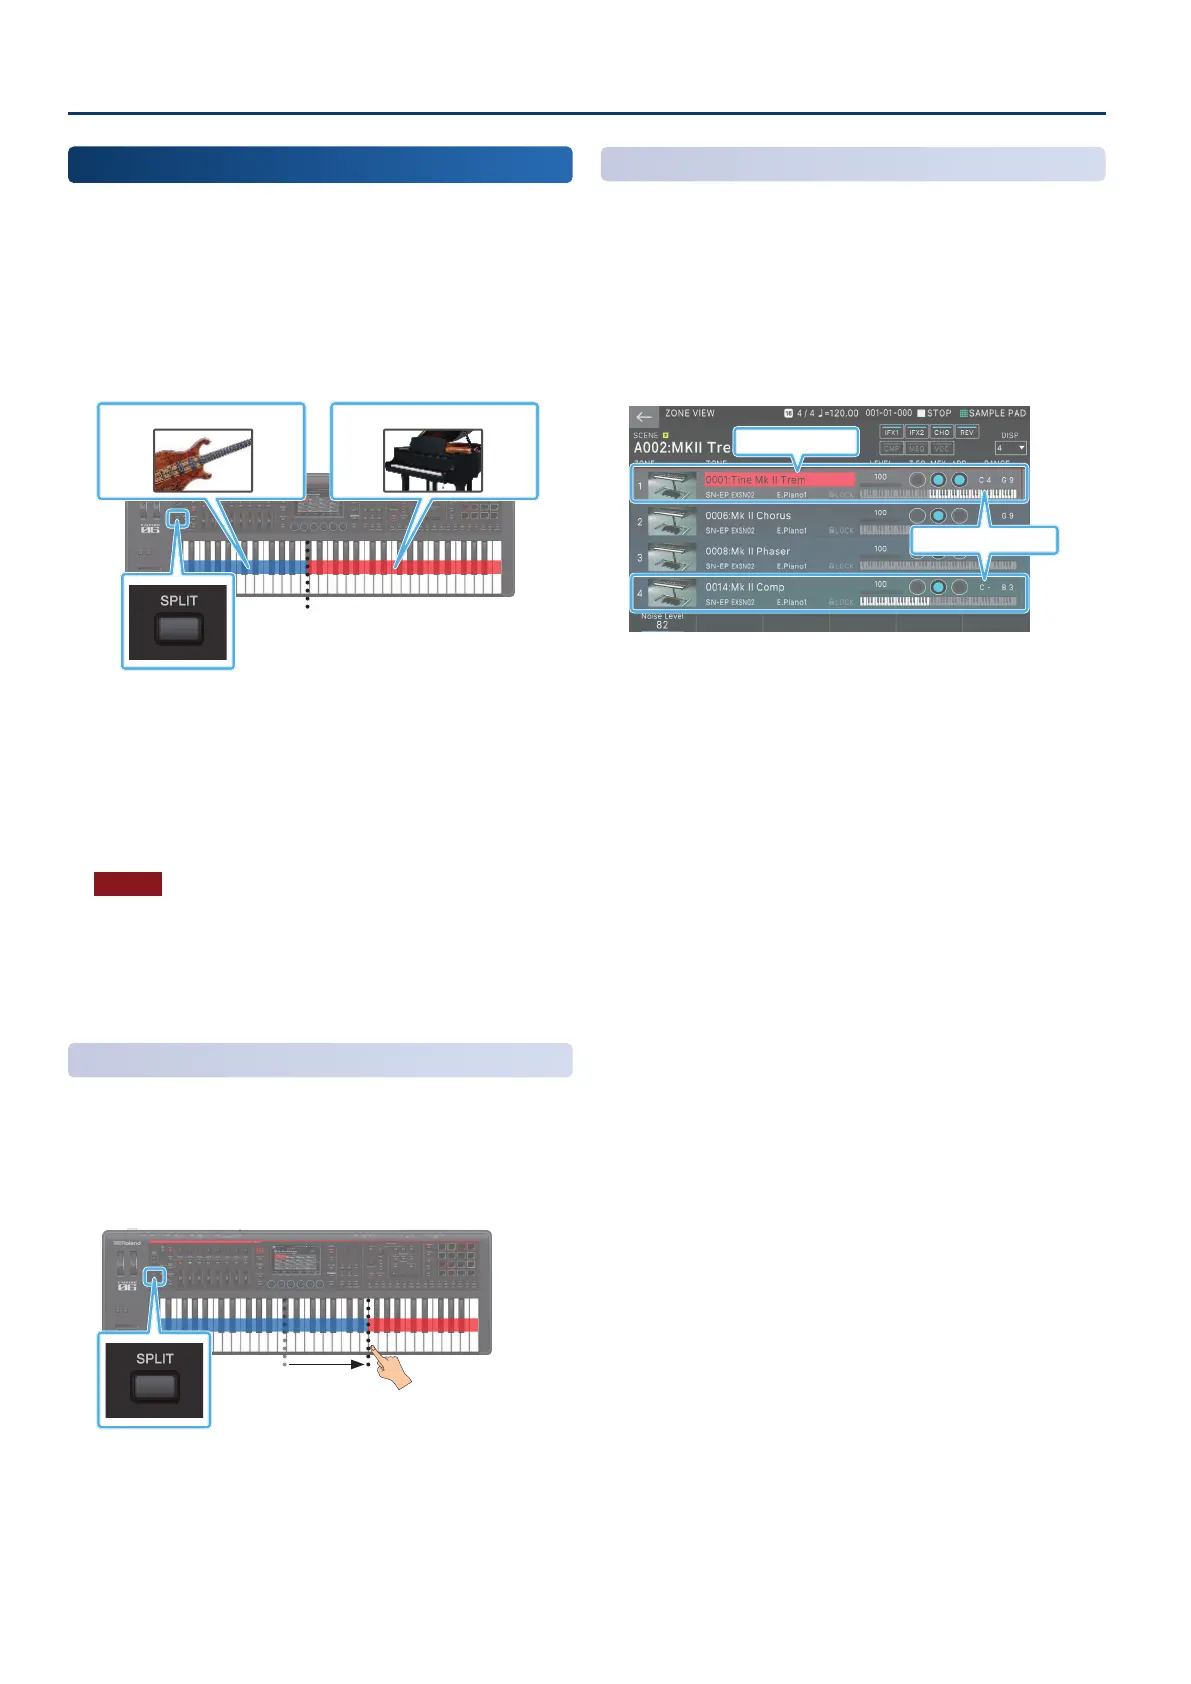
2. Switch the current zone and select a tone for each
zone.
Current Zone
Split zones
Hold down ZONE SELECT [1] if you want to change the tone
of the high range, or hold down ZONE SELECT [4] if you want
to change the tone of the low range, and then select a tone.
3. Save the scene as described in “Saving a Scene”
(p. 56).
 Loading...