8—The Home Screen
Roland VS-2000 Owner’s Manual www.RolandUS.com 125
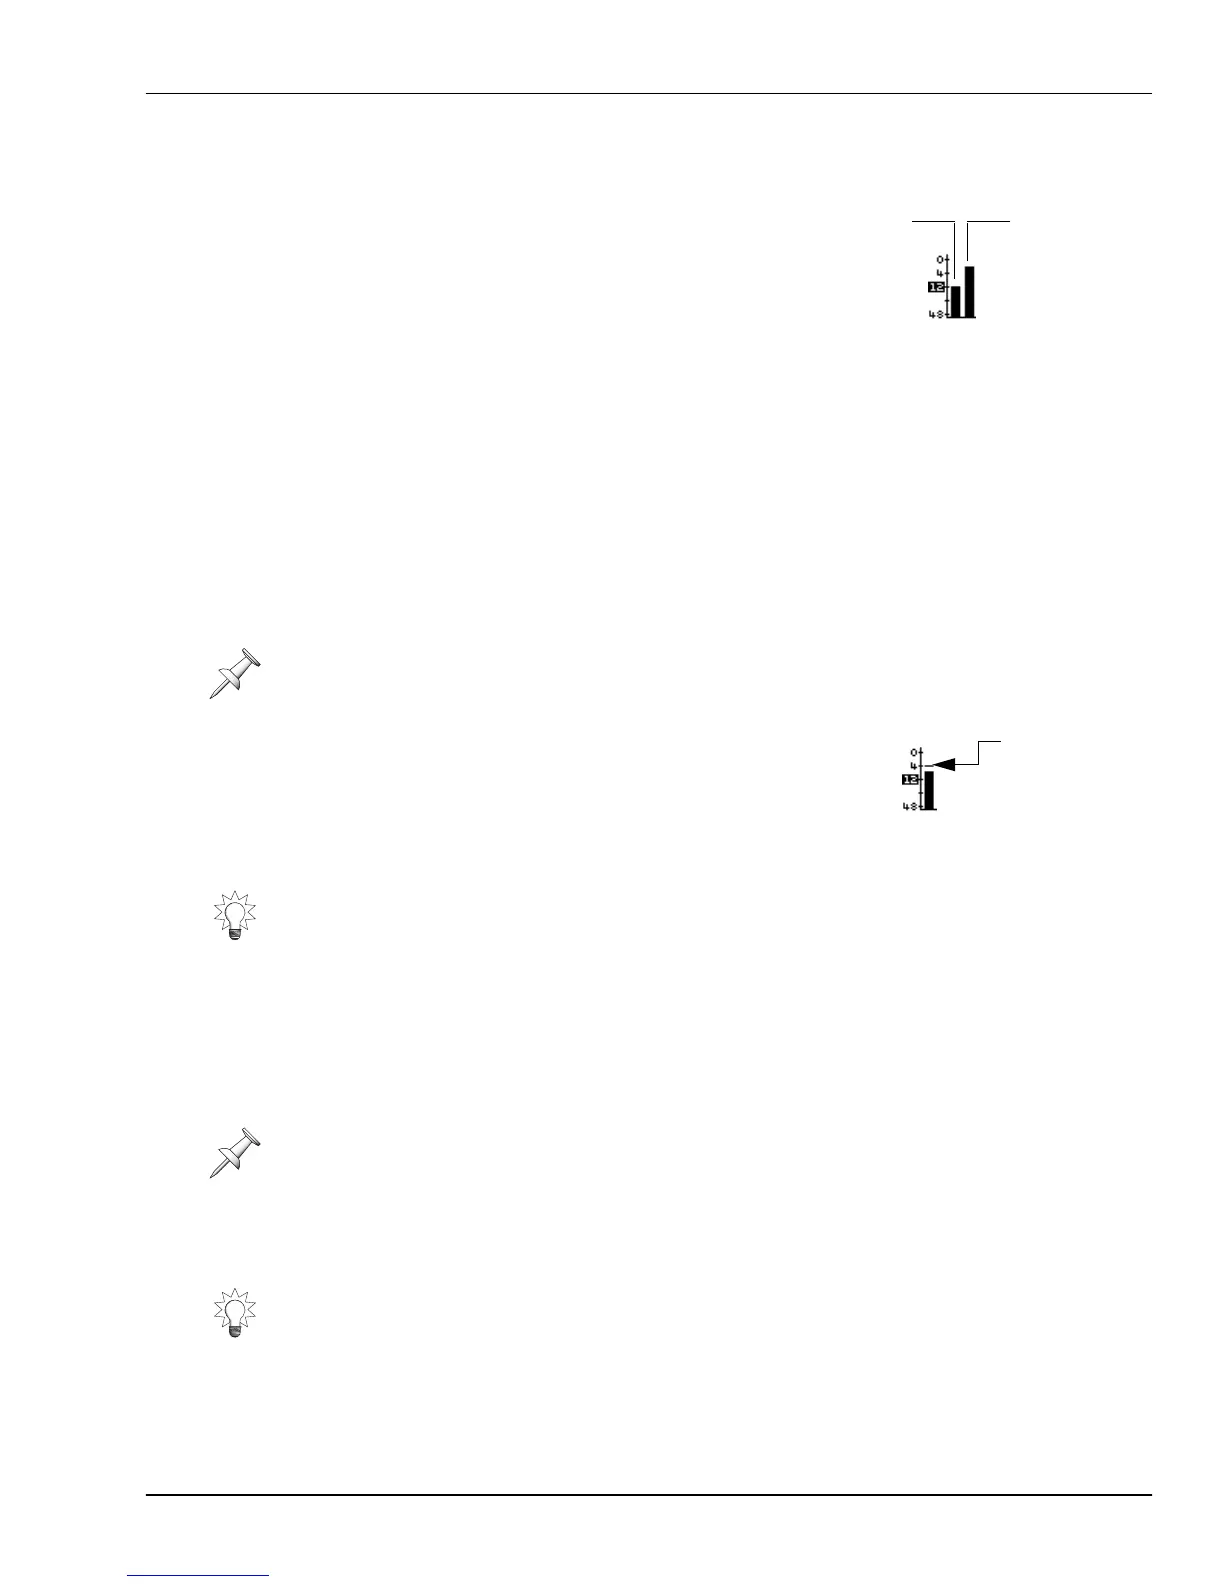
How the VS-2000 Meters Show Signals
Levels are shown on the VS-2000’s display in a
row of vertically oriented meters. Each meter’s
signal is shown as a thick black bar that grows
taller as its signal gets louder. The 48, 12, 4 and 0
markings to the left of the meters show you how
loud the signal is in dBs— -48 dB, -12 dB, -4 dB
and 0 dB—as the black bar varies in height.
How Loud Is Too Loud?
In general, you want each signal to be as loud as possible without exceeding 0 dB. 0 dB
is the loudest a digital signal can get without causing clipping—see Page 59.
Each signal should be in the -12 dB to 0 dB range when you’re setting:
•a signal’s input level • a track’s recording level
•Aux bus or FX bus levels • the overall level of a mix
• Direct path levels • output levels
To help you keep track of how loud your signals get, a
peak line representing each signal’s loudest level
remains for a few moments in its meter after the signal’s
level goes back down. This lets you look from meter to
meter without worrying that you’ve missed a too-loud
signal peak.
Pre- and Post-Fader Level Metering
You can meter the level of most any signal:
• when it’s traveled through its entire channel except its final fader level control. This
is called “pre-fader,” or “pre” for short.
• after its level has been adjusted by its fader. This is called “post-fader,” or “post.”
The meters display’s pre/post indicator shows you whether you’re viewing pre-fader or
post-fader signals, as shown in the illustration on Page 124. The meter switches
(Page 128) include a switch that lets you select a pre- or post-fader view.
When you’re mixing, the playback level of individual tracks is determined by how they
sound in the mix, not by metered levels. Fortunately, if you’ve set each track’s recording
level properly, it’ll be impossible to set its playback level so that it exceeds 0 dB.
You can set the peak lines so they “stick” at their loudest levels until you release them,
to make sure you don’t miss anything important—see “PEAK HOLD Sw” on Page 383.
You can’t meter input signals pre- or post-fader because they haven’t yet traveled
through an input channel. You
can
meter an input channel’s signal this way, however.
In general, you’ll want to view signal levels post-fader. However, it can be helpful to
view pre-fader levels when you’re experiencing a problem and need to track down the
precise spot in the signal’s signal flow at which the problem is occurring.
This signal’s
volume is
-12 dB
This signal’s
volume is
around -2 dB
The peak
line shows
that the
signal
peaked at
-4 dB before
dropping in
level.
VS2000OMUS.book 125 ページ 2004年10月20日 水曜日 午後3時3分
 Loading...