12—Working with Input Channels
172 www.Roland.com Roland VS-2000 Owner’s Manual
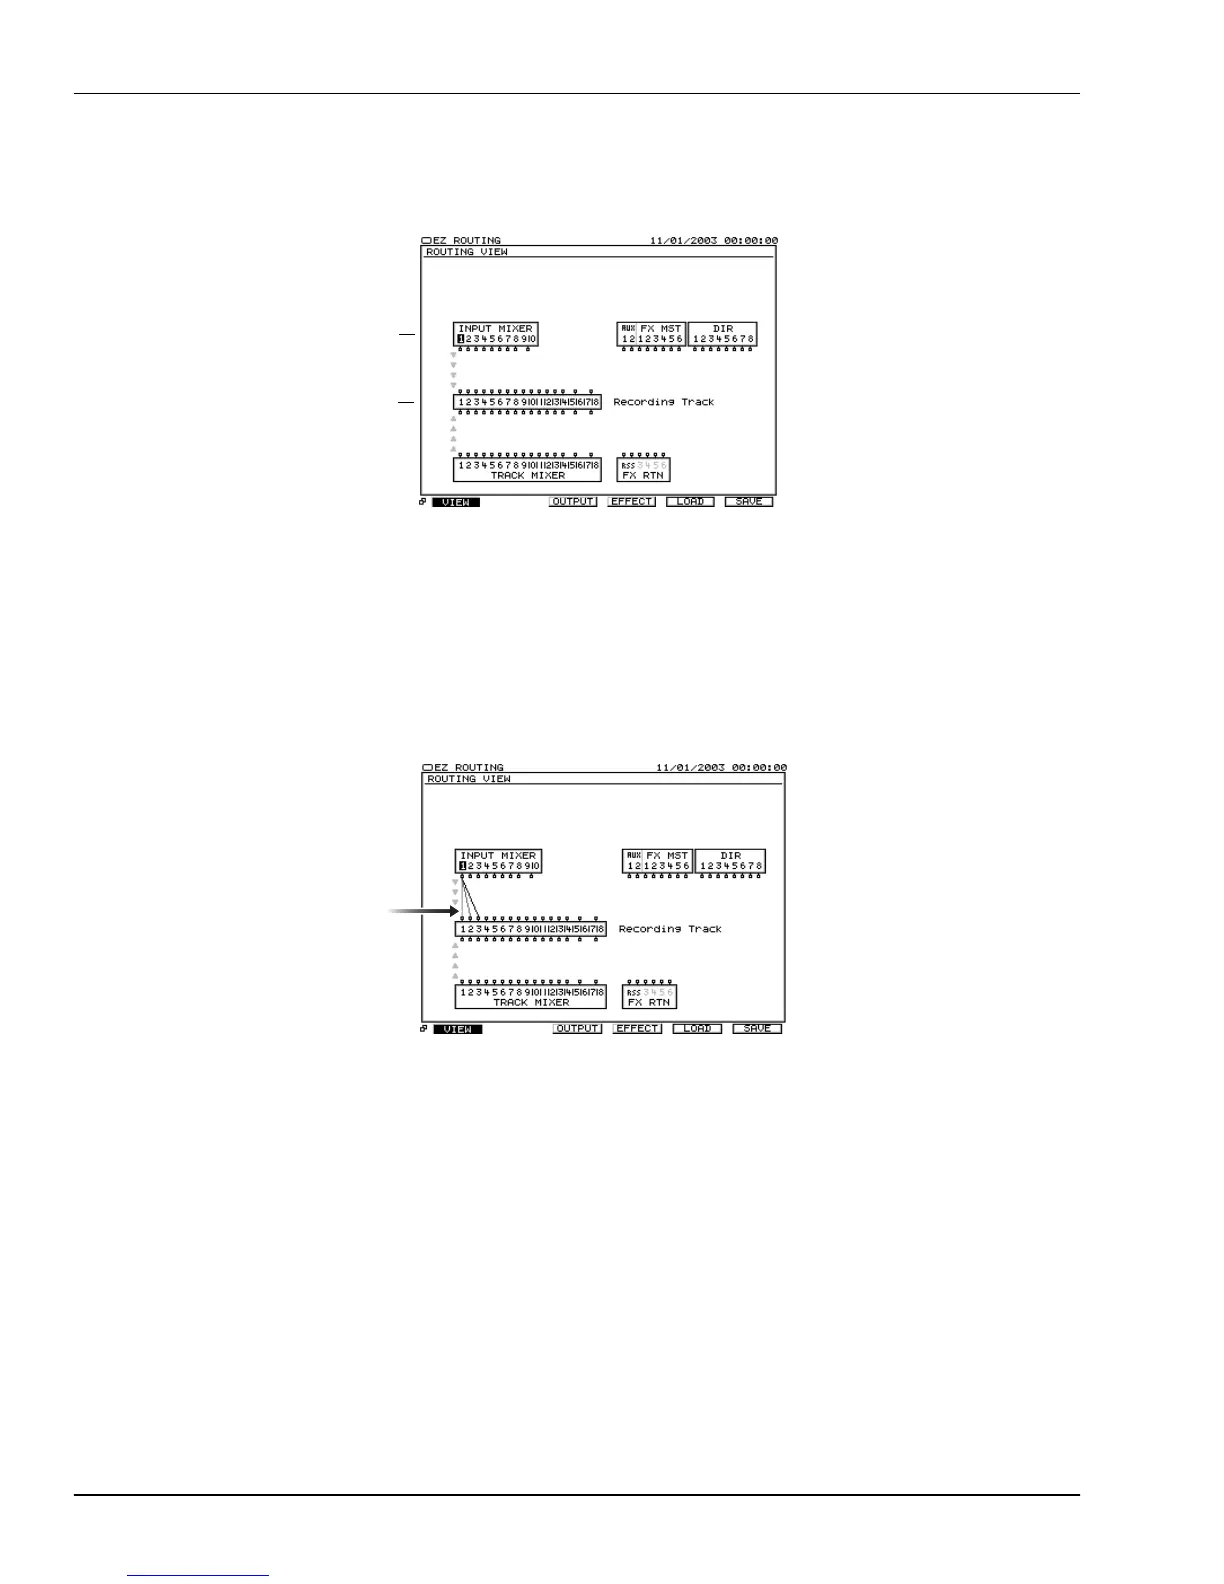
Input Signal Routing on the EZ ROUTING VIEW Screen
1. Press EZ ROUTING.
2. If the ROUTING VIEW screen doesn’t appear, and you see “VIEW” above F1, press
F1 (VIEW)—if you don’t see “VIEW” above F1, press PAGE and then F1 (VIEW).
The INPUT MIXER block provides connections for the outputs of the 10 input
channels at the bottom of the block.
3. Use
,
,
and/or
to select the desired input channel’s output along the lower
edge of the INPUT MIXER block. We’ve selected Input Channel 1’s output in the
illustration above.
4. Turn the Time/Value dial clockwise—as you turn it, a wire appears that connects the
input channel to one track after another in the RECORDING TRACKS block.
5. Turn the dial in either direction to select the desired destination track.
6. To break the connection between an input channel and a track, repeat Steps 3 and
4, and turn the Time/Value dial counter-clockwise until no connections exist.
Input Channel Signals and the Main Mix
Removing Input Channel Signals from the Main Mix
When you create a new project, the VS-2000’s input channels are routed into the
MASTER mix to help ensure that you can easily hear their signals even before you
route them to tracks. Once you
have
routed them to tracks, and recorded their signals, it
can be a good idea to remove them from the main mix. When you play back your
In this illustration,
we’ve cleared all track
connections for visual
clarity. When you
create a new project,
Input Channels 1-10
are already routed to
Tracks 1-10.
Input
channels
1-10
Hard Disk
Recorder
Tracks
1-18
The gray arrows at the
left edge of the screen
show the direction in
which signal flows.
VS2000OMUS.book 172 ページ 2004年10月20日 水曜日 午後3時3分
 Loading...