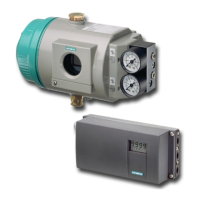
3. Place the new pneumatic block on the base plate.
Make sure that the pneumatic block engages with the centering elements ④ on the
baseplate.
4. Screw the supplied fixing screws ③ into the pneumatic block.
5. Tighten the fixing screws with a torque of 1.1 Nm.
6. Place the new basic electronics onto the four holders of the adapter.
7. Tighten the two fixing screws of the basic electronics.
8. Tighten the fixing screws.
9. Close the positioner as in the description depending on the device version:
– Closing the standard and and intrinsically safe version (Page 53)
– Closing the device version with "flameproof enclosure" (Page 58)
10.For a positioner with order option -Z F01 "Fail in Place", adjust the parameter '51.PNEUM'
Pneumatics type (Page 160) from "Std" to "FIP".
11.Switch on the supply pressure PZ.
12.Initialize the positioner as described in section "Commissioning (Page 105)".
10.6 Replace the pressure sensor module
Condition
● You have a positioner with a built-in pressure sensor module, order suffix -Z P01.
● You are familiar with the procedure described in the section "Replace pneumatic block
(Page 202)".
Service and maintenance
10.6 Replace the pressure sensor module
SIPART PS2 with 4 to 20 mA/HART
Operating Instructions, 11/2019, A5E00074631-AE 203
 Loading...
