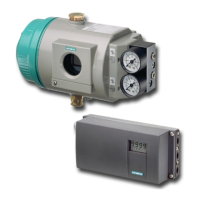
4.5.1.4 Closing the device version with "flameproof enclosure"
Procedure
1. Now start with the assembly. Place on the module cover ①. Make sure that the ribbon cable
is not trapped.
2. Turn the fixing screws ② counterclockwise until they noticeably engage in the thread pitch.
Carefully tighten both fixing screws ② in a clockwise direction.
The module cover protects and locks the optional modules mechanically.
Note
Untimely wear
The module cover is fastened using a self-tapping screw for the pneumatic block.
● In order to avoid premature wear of the pneumatic block, proceed as described here.
3. Check whether the position of the O-rings is correct before inserting the adapter into the
enclosure.
– With an enclosure made from aluminum, O rings are inside the enclosure and on the rear
of the adapter.
– With an enclosure made from stainless steel, O-rings are on the rear of the adapter.
4. Make sure no loose items in the enclosure interfere with the assembly.
5. Push the adapter ⑪ fully into the enclosure .
The positioner comes with a clip and a pin (feedback lever bracket) ⑰ which interlock
and ensure backlash-free position feedback. To ensure backlash-free position feedback,
insert the adapter ⑪ carefully into the enclosure.
6. Screw in the four fixing screws ⑳ of the adapter ⑪. Tighten the screws.
Check carefully whether the feedback shaft ⑲ can be smoothly turned by 360°. If you feel
resistance, do not continue to turn but turn the feedback shaft ⑲ back again to the point of
removal.
7. Mount the positioner on the actuator.
8. Unscrew the screw cap ⑮.
9. Close the safety catch .
10.Connect the power supply lines or supply the power supply lines with voltage.
Installing/mounting
4.5 Installing option modules
SIPART PS2 with 4 to 20 mA/HART
58 Operating Instructions, 11/2019, A5E00074631-AE
 Loading...
