BLEEDING BRAKES
NOTE:
Brake fluid is extremely damaging to paint. If
fluid should accidentally touch painted surface,
immediately wipe fluid from paint and clean
painted surface.
With this vehicle, air bleeding is required at four
places: right and left front wheels, P
&
B valve
and rear wheel cylinder on left side as marked
with dot
(0)
in Fig. 19-8-10. And at each of these
places, there is air bleeder plug.
Whenever brake pipe or hose has been discon-
nected at any place, carry out air bleeding so as
to make sure that no air remains in brake circuit.
CAUTION:
Upon completion of air bleeding at four
places, be sure to tighten each air bleeder
plug to specified torque and check entire
brake circuit to make sure that no fluid
leakage exists.
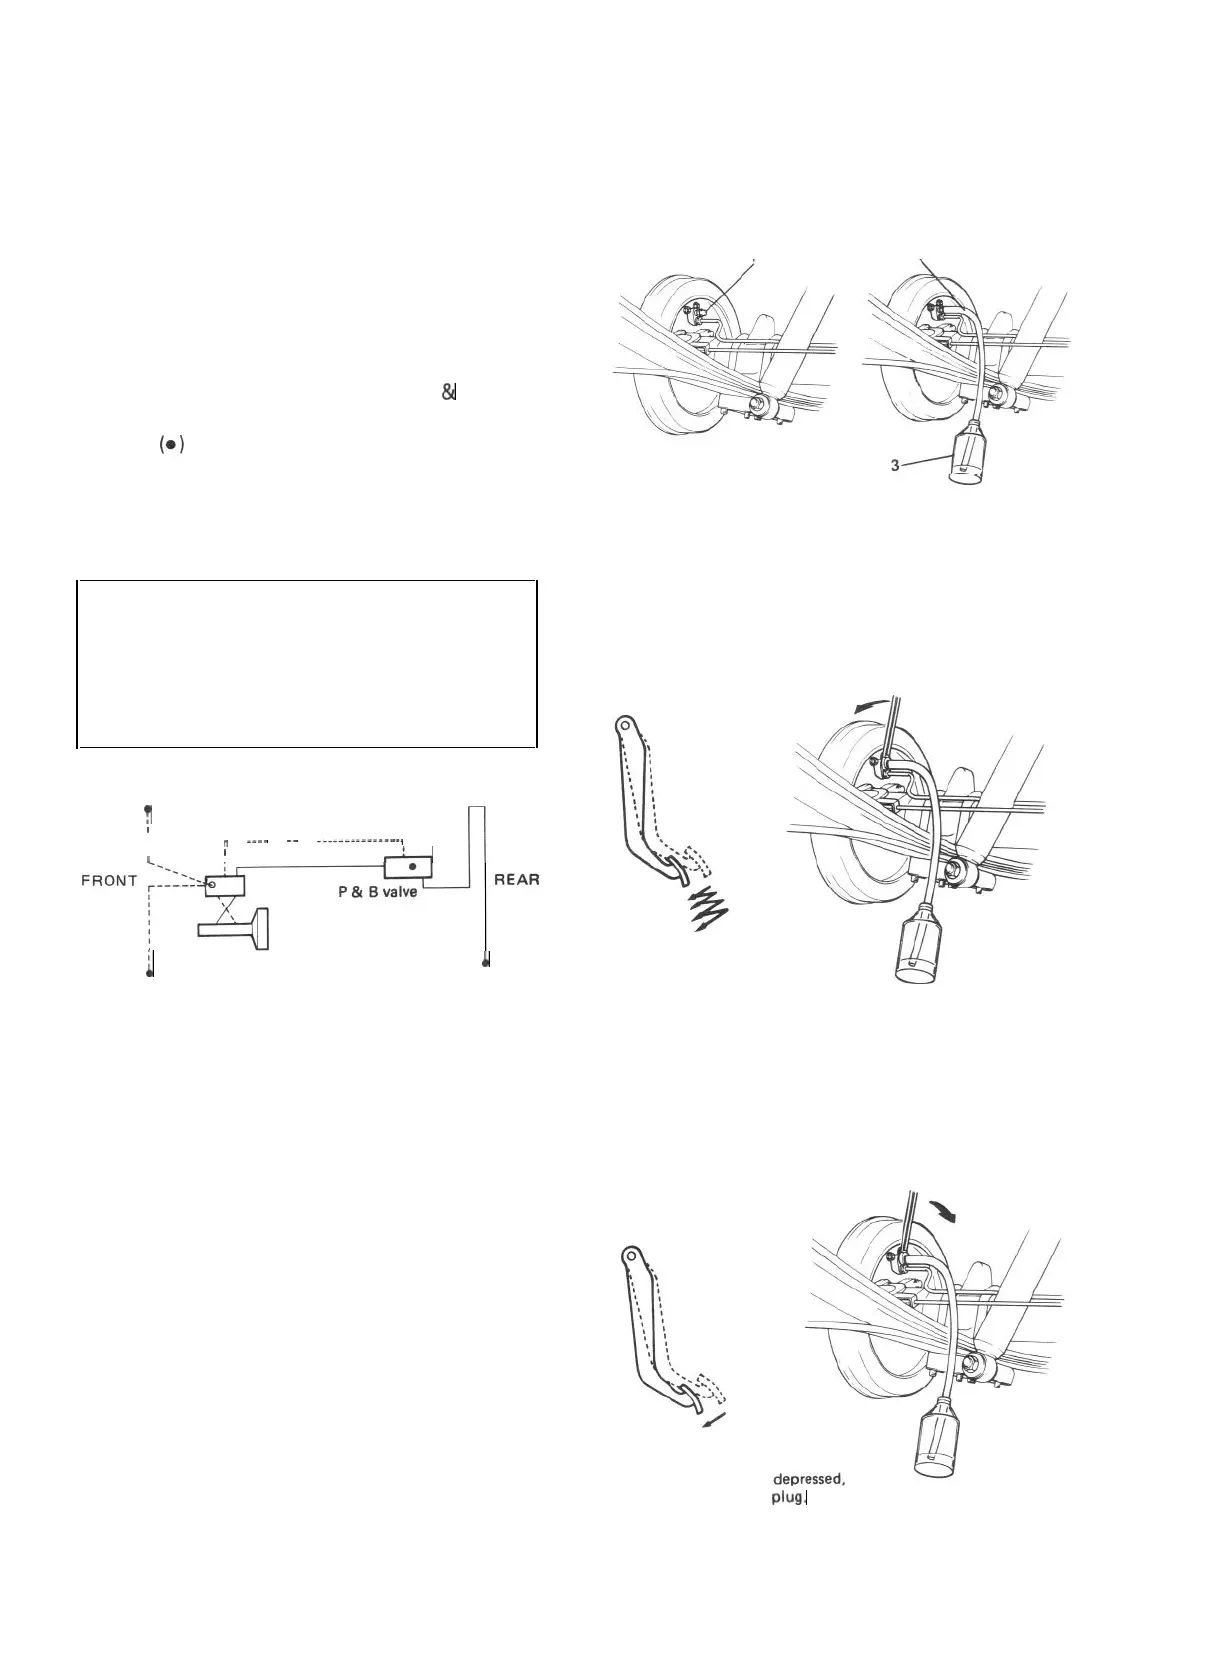
Right brake caliper
?
I
r
____
--
---------------,
I
I
A
n
i
Left brake caliper
1
Left wheel cylinder
Fig. 19-8-10
1) Fill master cylinder reservoir with brake fluid
and keep at least half filled during bleeding
operation.
2) Remove bleeder plug cap.
Attach vinyl tube to bleeder plug of wheel
cylinder, and insert the other end into contai-
ner.
See-through tube
1. Plug cap
2. Vinyl tube
2
3. Container
1
Fig. 19-8-11
3) Depress brake pedal several times, and then
while holding it depressed, loosen bleeder
plug about one-third to one-half turn.
Depress brake
pedal
several times and with
pedal depressed, loosen bleeder plug a little.
Fig. 19-8-12
4) When fluid pressure in the cylinder is almost
depleted, retighten bleeder plug.
With brake pedal
retighten bleeder
plug.
Fig. 19-8-13
19-46

 Loading...