© 2003 - 2008 TOSHIBA TEC CORPORATION All rights reserved e-STUDIO350/352/353/450/452/453
ADJUSTMENT
3 - 25
3
3.4 Image Quality Adjustment (Printing Function)
3.4.1 Adjustment of smudged/faint text
The smudged/faint text can be set at the following codes.
< Adjustment Mode (05) >
<Procedure>
(1) While pressing [0] and [5] simultaneously, turn the power ON.
(2) Key in a code and press the [START] button.
(3) Key in an adjustment value. (To correct the keyed-in value, press the [CLEAR] button.)
(4) Press the [ENTER] or [INTERRUPT] button to store the value. The equipment goes back to the
ready state.
(5) Let the equipment restarted and perform printing job.
(6) If the desired text density has not been attained, repeat step (2) to (5).
3.4.2 Adjustment of image density
The image density level is adjustable both at standard and toner saving modes.
< Adjustment Mode (05) >
<Procedure>
(1) While pressing [0] and [5] simultaneously, turn the power ON.
(2) Key in a code and press the [START] button.
(3) Key in the sub code (0, 1, 2, 3 or 4), and press the [START] button.
(4) Key in an adjustment value. (To correct the keyed-in value, press the [CLEAR] button.)
(5) Press the [ENTER] or [INTERRUPT] button to store the value in memory. The equipment goes
back to the ready state.
(6) For resetting the value, repeat step (2) to (5).
(7) Let the equipment restarted and perform printing job.
(8) If the desired image density has not been attained, repeat step (2) to (7).
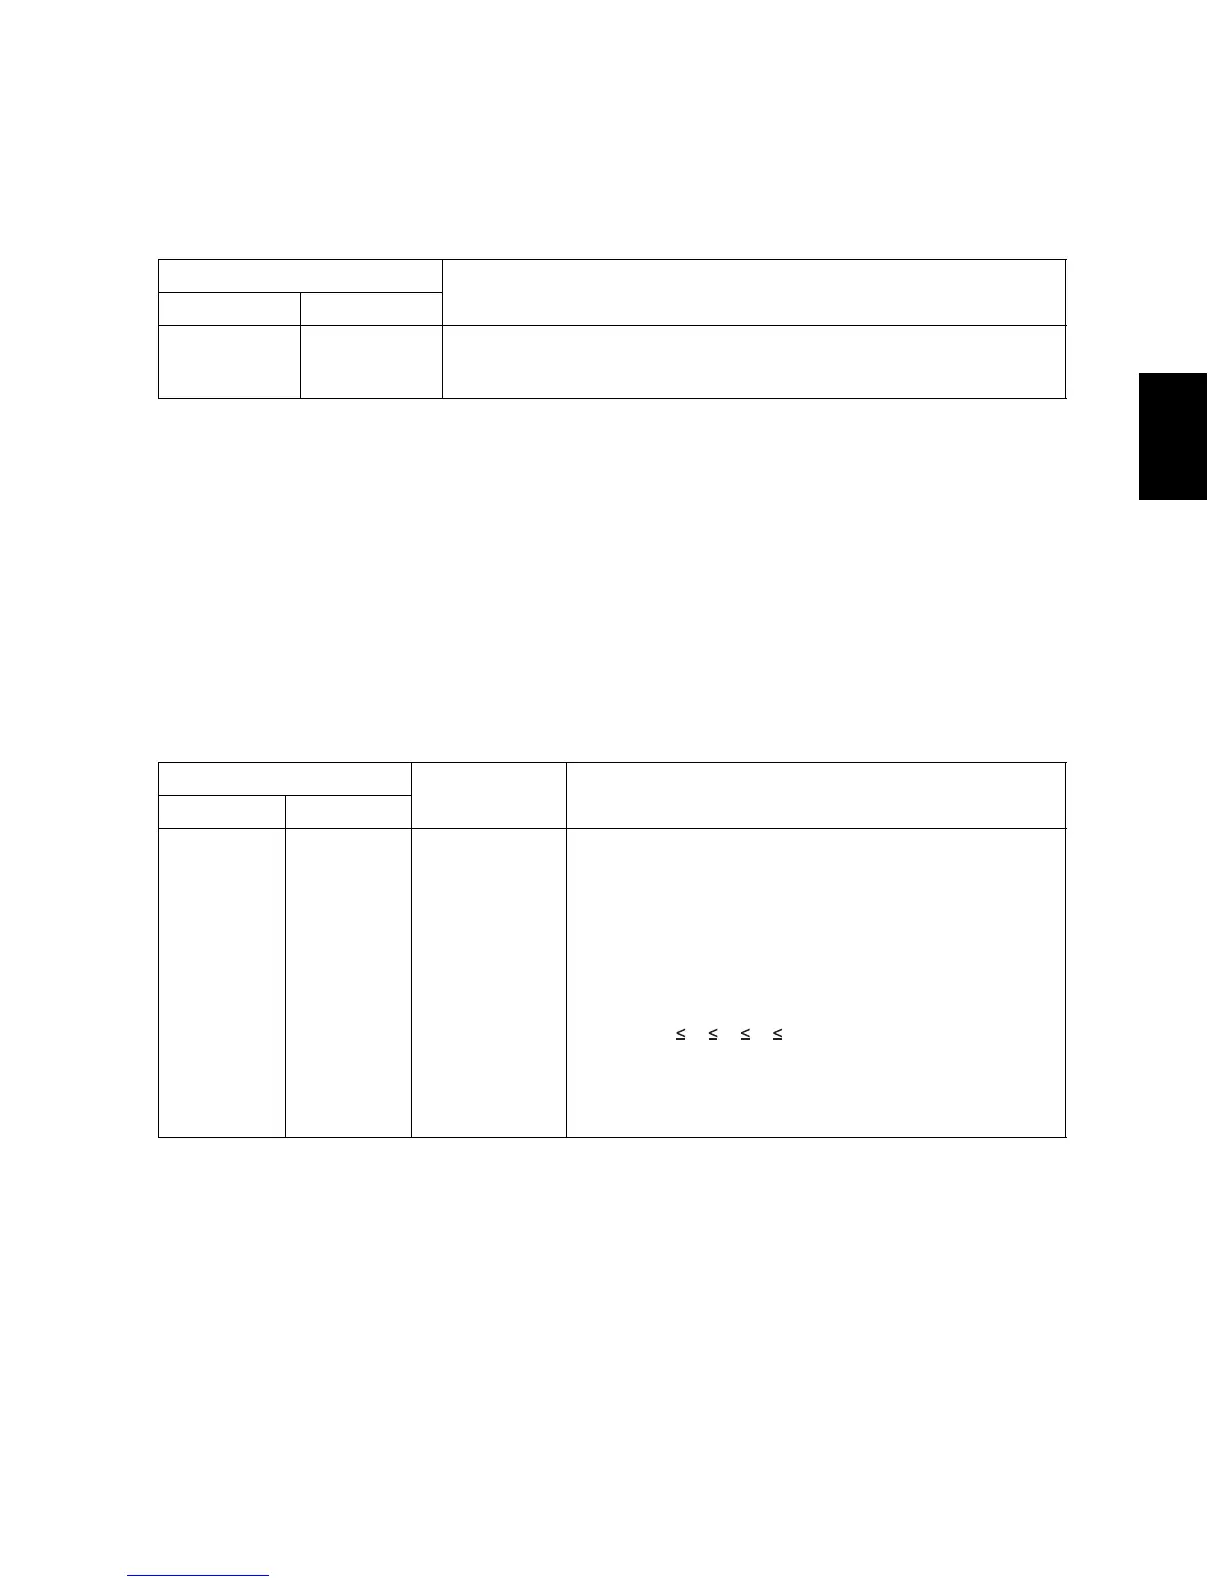
Language
Remarks
PS PCL
654 655 When the value increases, the smudged text is improved. When the value
decreases, the faint text is improved.
Acceptable values: 0 to 9 (Default: 5)
Toner mode
Item to be
adjusted
Remarks
Standard Toner saving
672-0 to 4 676-0 to 4 Adjustment of
image density
When the value is decreased, text becomes lighter.
Acceptable values: 0 to 10
Notes:
1. Set not to reverse the large and small number of
the setting value corresponding to the sub code.
Ex.) When the image density level for 672-0, 672-
1, 672-2, 672-3, and 672-4 is assumed to be
"A","B", "C", "D", and "E" respectively, they should
have the following correlation:
2. Remember that the image specifications and life
span of the replacing parts may not meet the stan-
dard when the setting value is changed from the
default value.
 Loading...


