EasyManua.ls Logo

Toshiba e-STUDIO350 User Manual

Toshiba e-STUDIO350
764 pages
To Next Page IconTo Next Page
To Previous Page IconTo Previous Page
Page #575 background imageLoading...
Page #575 background image
© 2003 - 2008 TOSHIBA TEC CORPORATION All rights reserved e-STUDIO350/352/353/450/452/453
TROUBLESHOOTING
5 - 139
5
5.3.5 Replacing or clearing NVRAM
<<Caution in replacing or clearing NVRAM>>
When NVRAM has been replaced or cleared (”System all clearing (08-669)”), the setting must be per-
formed according to the following procedure.
<After replacing or clearing NVRAM>
(1) Take off the FAX board if installed.
(2) Start up with the Setting Mode (08).
(3) Check the serial number after performing 08-995 (Equipment number display). If the number is
different from the one on the label attached to the rear cover of the equipment, enter the correct
serial number again with 08-995.
Note: Note:
The MAC address of the equipment is generated based on this serial number. Entering the incor-
rect serial number may result in an inability to access the network due to an invalid MAC
address.
(4) Perform 08-693 (initialization of the NIC information).
(5) Perform “1: Electrical counter -> Backup counter” of 08-257 (Counter copy) to recover the total
counter.
(6) Shut down the equipment.
(7) Install the FAX board taken off in step (1).
* If the FAX board has not been installed, the following steps are not necessary.
(8) Start up with the Setting Mode (08).
(9) Set the destination with 08-701 (Destination setting of FAX machine).
(10) Start up with the FAX Clearing Mode (1*).
(11) Perform 1*-100 (FAX Set Up).
(12) Turn the power OFF.
(13) Turn the power ON.
(14) Set the dial type. [USER FUNCTIONS] [ADMIN] [FAX] [INITIAL SETUP]

Table of Contents

Other manuals for Toshiba e-STUDIO350

Question and Answer IconNeed help?

Do you have a question about the Toshiba e-STUDIO350 and is the answer not in the manual?
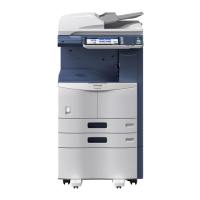
Toshiba e-STUDIO350 Specifications

General IconGeneral
BrandToshiba
Modele-STUDIO350
CategoryAll in One Printer
LanguageEnglish

Summary

GENERAL PRECAUTIONS REGARDING THE INSTALLATION AND SERVICE FOR E-STUDIO350/352/353/450/452/453

1) Transportation / Installation

Procedures for safe transportation and installation of the equipment, including weight and clearance requirements.

2) Service of Machines

8) Precautions Against Static Electricity

2. ERROR CODE AND SELF-DIAGNOSTIC MODE

2.1 Error Code List

Comprehensive list of error codes displayed on the screen, their classification, contents, and troubleshooting steps.

2.2 Self-diagnosis Modes

Control Panel Check Mode

Procedure to check all LEDs and LCD pixels on the control panel.

Adjustment mode (05) <e-STUDIO350/450>

Adjustment mode (05) <e-STUDIO352/353/452/453>

3. ADJUSTMENT

3.1 Adjustment of Auto-Toner Sensor

Procedure for adjusting the auto-toner sensor after replacing the developer material.

3.2 Image Dimensional Adjustment

3.3 Image Quality Adjustment (Copying Function)

3.4 Image Quality Adjustment (Printing Function)

3.5 Image Quality Adjustment (Scanning Function)

3.5.2 Sharpness adjustment

3.6 Adjustment of High-Voltage Transformer

3.6.1 Adjustment

Steps for checking and adjusting output for main charger, developer bias, transfer charger, and separation charger.

3.7 Adjustment of the Scanner Section

3.8 Adjustment of the Paper Feeding System

3.9 Adjustment of Developer Unit

3.9.1 Doctor-to-sleeve gap

Instructions for adjusting the doctor-to-sleeve gap for the developer unit using a doctor-sleeve jig.

3.10 Adjustment of the RADF (MR-3015)

3.10.2 Adjustment of RADF height

3.10.3 Adjustment of skew

Step 1

Adjusting aligning position to rear side '-' and '+' for simplex copying.

Step 2

Adjusting aligning position by loosening hinge screws and turning adjustment screw.

Step 3

Adjusting reverse aligning position to rear side '-' and '+' for duplex copying.

3.10.4 Automatic adjustment of sensors and initialization of EEPROM

3.11 Adjustment of the RADF (MR-3018)

3.11.2 Adjustment of RADF height

3.11.3 Adjustment of skew

3.11.4 Adjustment of the Leading Edge Position

Simplex Copying Adjustment

Procedure to adjust the leading edge position of the RADF for simplex copying.

Duplex Copying Adjustment

Procedure to adjust the leading edge position of the RADF for duplex copying.

3.11.5 Adjustment of Horizontal Position

Checking Horizontal Position

Procedure to check the center line alignment for horizontal position.

3.11.6 Adjustment of Copy Ratio

3.12 Adjustment of the Finisher (MJ-1022)

3.12.1 Adjusting the jogging plate width

Procedure to adjust the jogging plate width for the MJ-1022 finisher.

3.13 Adjustment of the Finisher (MJ-1023/1024)

3.13.1 Adjusting the alignment position (Finisher unit)

Procedure to adjust the alignment position for the MJ-1023/1024 finisher.

3.13.2 Adjusting the stapling position (Finisher unit)

Procedure to Adjust Stapling Position

Procedure to adjust the staple position for the finisher unit.

3.13.3 Adjusting the folding position (Saddle stitcher unit)

Procedure to Adjust Folding Position

Procedure to adjust the folding position for the saddle stitcher unit.

3.13.5 Sensor output adjustment (Puncher unit)

Procedure for Sensor Output Adjustment

Procedure for adjusting sensor output for the puncher unit.

3.13.6 Registering the number of punch holes (Puncher unit)

Procedure for Registering Punch Holes

Operation to register the number of punch holes for finisher identification.

3.15 Key Copy Counter (MU-8, MU-10)

3.16 Adjustment of Dogleg

Adjustment Procedure

Procedure to adjust dogleg image deformation that occurs on the output paper.

4. PREVENTIVE MAINTENANCE (PM)

4.1 PM Support Mode

Overview of the PM support mode, enabling viewing of part usage and counter clearing.

4.2 General Descriptions for PM Procedure

4.5 Preventive Maintenance Checklist

4.9.2 Checking and cleaning of photoconductive drum

4.9.3 Checking and cleaning of drum cleaning blade

4.9.4 Checking and cleaning of fuser roller and pressure roller

5. TROUBLESHOOTING

5.1 Diagnosis and Prescription for Each Error Code

A systematic guide for diagnosing and resolving various error codes encountered with the equipment.

5.1.1 Paper transport jam

E010/E020 Paper Path Jams

Troubleshooting steps for paper jams related to registration and exit sensors.

5.1.1.3 Cover open jam

E400 Jam access cover opened

Troubleshooting steps for jams caused by the jam access cover being opened.

5.1.1.4 Paper jam in finisher section

EA10 Paper transport delay jam

Troubleshooting steps for paper transport delay jams in MJ-1022 finisher.

5.1.1.5 Paper jam in saddle stitcher section

EA80 Stapling jam

Troubleshooting steps for stapling jams in MJ-1023/1024 finishers.

5.1.14 Finisher related service call

5.1.17 Image control related service call

5.1.9 Fuser unit related service call

[C410] Thermistor or heater abnormality at power ON

Troubleshooting steps for fuser unit abnormalities detected at power ON.

6. FIRMWARE UPDATING

9. DATA CLONING with USB STORAGE DEVICE (e-STUDIO352/353/452/453)

8. REMOTE SERVICE

8.2 Service Notification

Related product manuals