Disassembly
Note:
• All numbers given within brackets in the
procedure below, refer
directly
to
the
numbered items in
the
above diagram.
Make
a note or mark the orientation
of
all parts prior
to removal.
1.
Remove the ball bearing
(1)
and washer (2).
2.
Remove first gear
(3)
and
its needle roller
bearing
(4).
3.
Remove the first gear thrust washer
(5).
4.
Remove fifth gear
(6),
revealing a circlip
(7)
that
secures fourth
and
third gears.
5.
Remove the circlip
(7).
6.
Slide off
the
thrust washer
(8)
from
in
front
of
fourth gear
(9),
then slide off fourth
gear.
7.
Slide off third gear (10), the splined third/fourth
gear
bush
(11)
and
the thrust washer (12).
8.
Remove the circlip
(13)
from
in
front
of
the
splined
dog
ring (14).
9.
Slide off the splined
dog
ring
(14).
10. Remove the circlip
(15)
from
in
front
of
second
gear (17).
11. Slide off the second gear thrust washer (16),
then second gear
(17)
and
its
bush
(18).
12. Working
now
from the other
end
of
the
shaft,
remove
the
large
nut
(20)
Bellville washer
(21)
and flat washer
(22).
13.
Slide off
the
ball bearing
(23),
output gear
(24)
and
spacer (25).
When using a
press,
always wear overalls,
eye
face
and hand protection. Objects such
as
bearings
frequently break-up under load
and
the debris
caused during break-up
may
cause damage
and
injury to unprotected parts
of
the
body.
Transmission
Never wear loose clothing, which could become
trapped
in
the press and cause crushing injury to the
hand, arms or other parts
of
the anatomy.
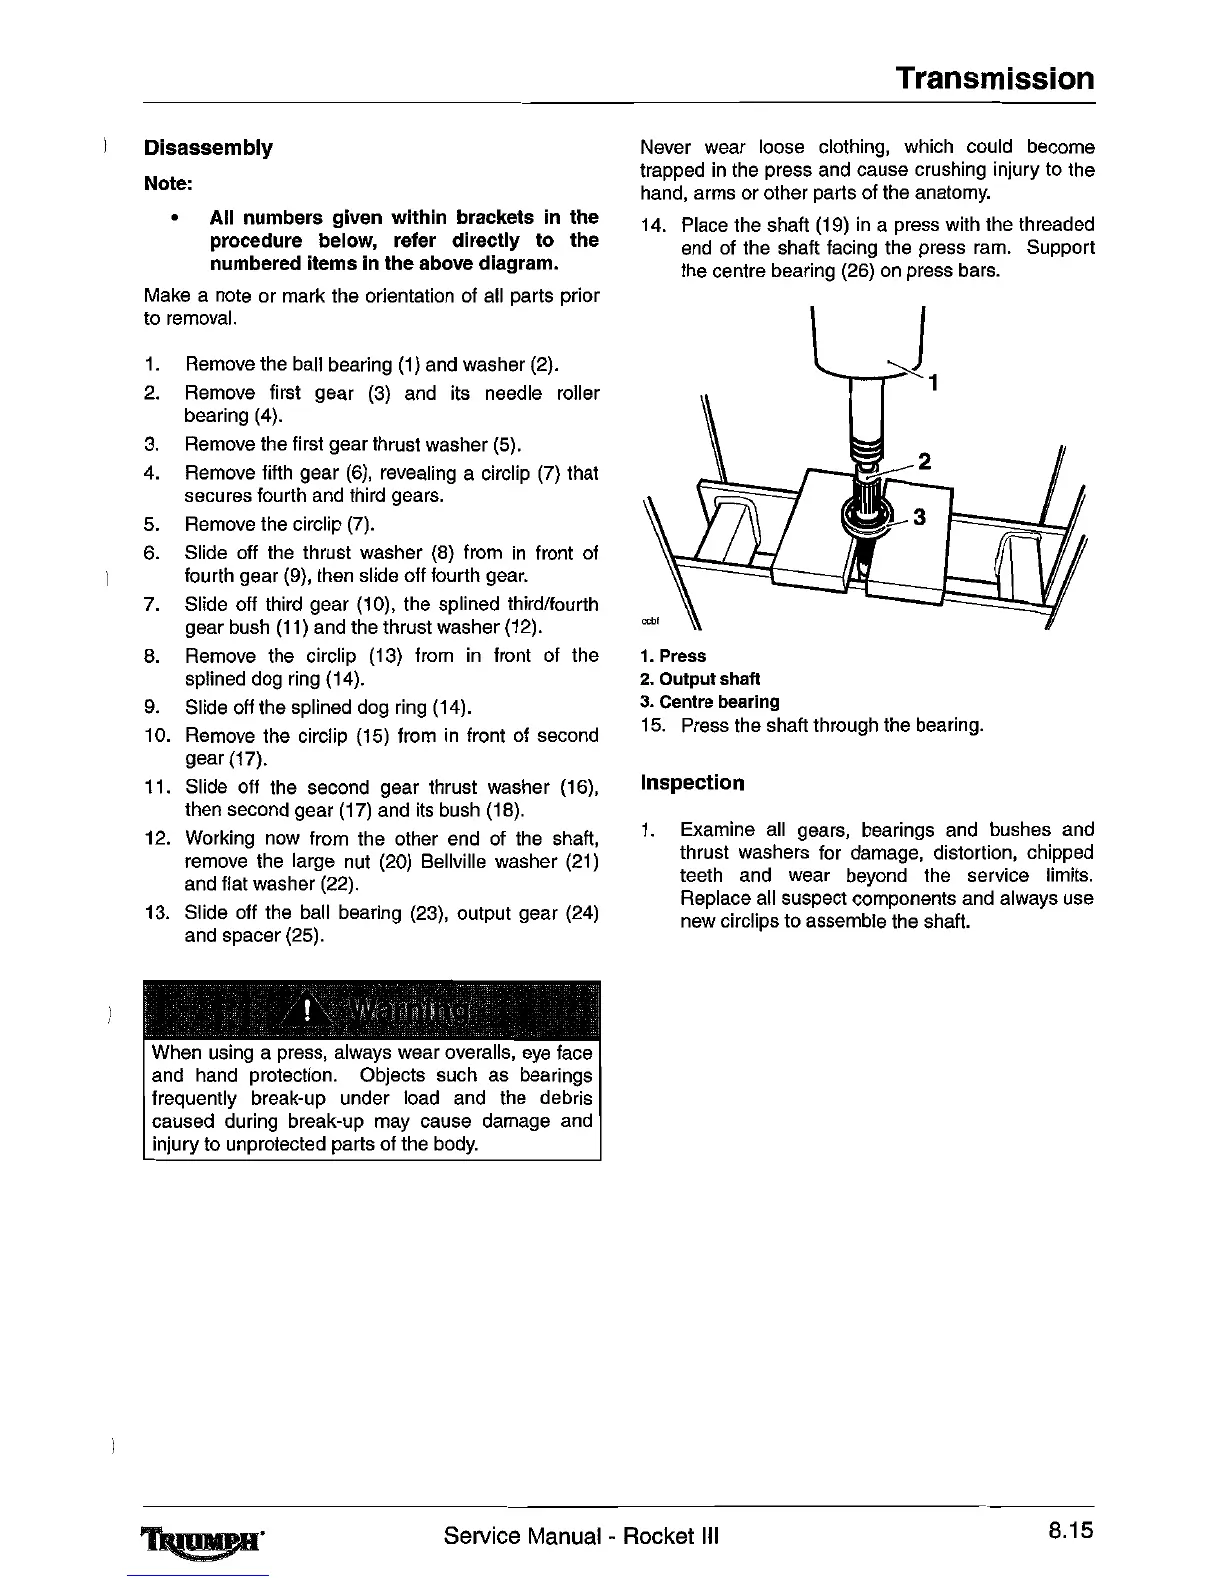
14.
Place the shaft
(19)
in
a press with the threaded
end
of
the shaft facing the press
ram.
Support
the centre bearing
(26)
on
press
bars.
J
-...--...
1
1.
Press
2.
Output shaft
3.
Centre
bearing
15.
Press the shaft through the bearing.
Inspection
1.
Examine
all
gears, bearings
and
bushes and
thrust washers for damage, distortion, chipped
teeth
and
wear
beyond
the
service limits.
Replace all suspect components and always use
new circlips to assemble the shaft.
~.
Service Manual - Rockellll
8.15
 Loading...