Rear Suspension
Rear Suspension Units
Adjustment
The rear suspension
is
adjustable for pre-Ioad
only.
To
change the rear suspension spring pre-Ioad
setting, insert the adjustment tool supplied
in
the tool
kit
into the hole provided
in
the adjuster
ring.
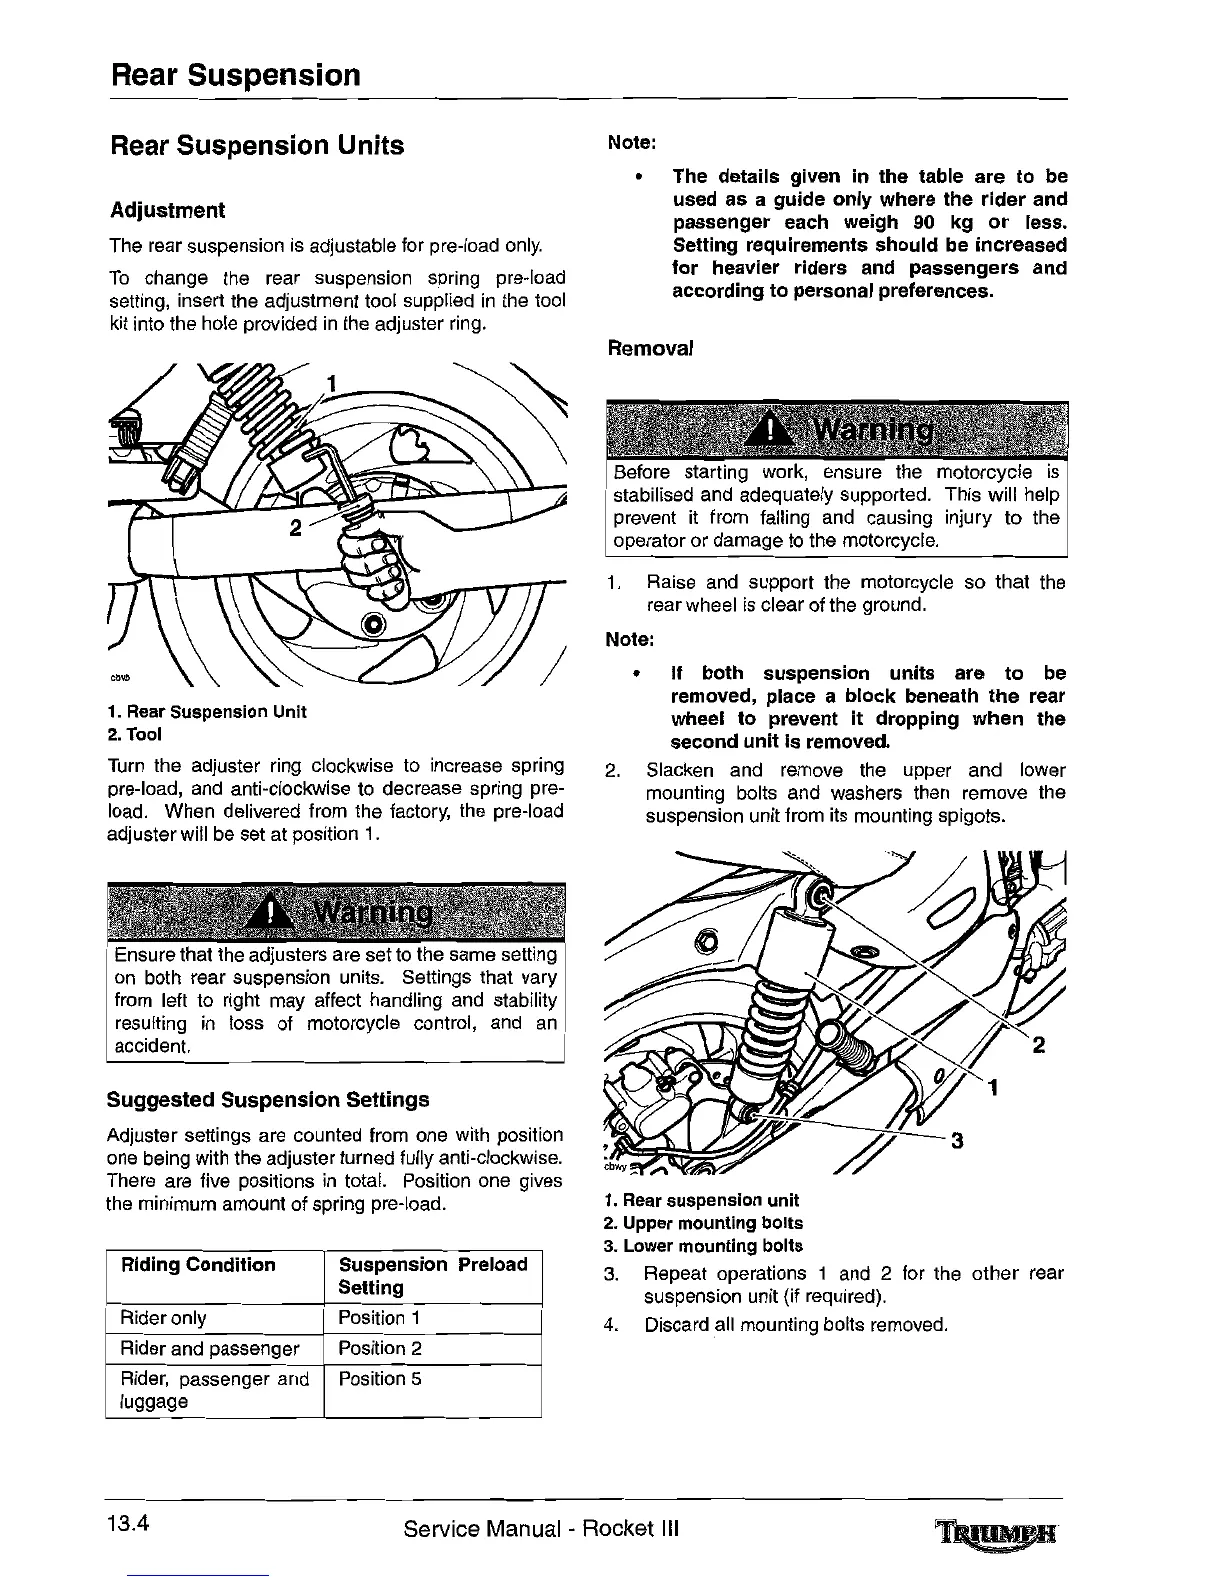
1.
Rear
Suspension Unit
2.
Tool
Turn
the adjuster ring clockwise
to
increase spring
pre-Ioad, and anti-clockwise
to
decrease spring pre-
load. When delivered from the factory, the pre-Ioad
adjuster will
be
set at position
1.
Ensure that the adjusters are set
to
the same setting
on
both rear suspension units. Settings that vary
from left
to
right may affect handling
and
stability
resuiting
in
loss of motorcycle control, and
an
accident.
Suggested
Suspension
Settings
Adjuster settings are counted from one with position
one
being with the adjuster turned fully anti-clockwise.
There are five positions
in
total. Position one gives
the minimum amount of spring pre-Ioad.
Riding
Condition
Suspension Preload
Selting
Rider only
Position 1
Rider and passenger Position 2
Rider,
passenger and Position 5
luggage
Note:
• The details given in the table
are
to
be
used as a
guide
only
where the
rider
and
passenger each weigh 90 kg
or
less.
Selting requirements
should
be increased
for
heavier riders and
passengers
and
according
to
personal preferences.
Removal
Before starting work, ensure the motorcycle
is
stabilised and adequately supported. This will help
prevent it from falling
and
causing injury to the
operator or damage
to
the motorcycle.
1. Raise
and
support the motorcycle so that the
rear wheel
is
clear of the ground.
Note:
•
If
both
suspension
units
are
to
be
removed, place a
block
beneath
the
rear
Wheel
to
prevent
it
dropping
when
the
second
unit
is
removed.
2.
Slacken and remove the upper and lower
mounting bolts and washers then remove the
suspension unit from its mounting spigots.
1.
Rear
suspension unit
2.
Upper
mounting bolts
3.
Lower
mounting bolts
3.
Repeat operations 1 and 2
for
the other rear
suspension unit (if required).
4.
Discard all mounting bolts removed.
13.4
Service Manual - Rocket
III

 Loading...