Clutch Cover
Removal
Before starting work, ensure
the
motorcycle
is
stabilised
and
adequately supported. This will help
prevent it from falling and causing injury to
the
operator or damage
to
the motorcycle.
1. Remove
the
radiator
as
described
on
page
12.11.
2. Remove
the
water pump
as
described on
page
12.7.
3. Remove the coolant pipe running between
the
crankcase
and
water
pump.
4.
Disconnect
the
clutch cable
as
described
on
page 4.5.
5.
Release the
ring
of
bolts securing the clutch
cover
to
the crankcases.
6. Place
an
oil
catch tray beneath
the
clutch cover
to
collect
any
oil
that
may
spill out
on
removal.
7. Carefully withdraw
the
cover disengaging
the
litter arm
as
it
is
eased forward.
Installation
1. Thoroughly clean the cover
and
crankcase
mating faces.
2. Position a
new
gasket
to
the crankcase.
3. Refit
the
cover ensuring that the gasket does not
become dislodged.
Note:
• Ensure that
the
litter piece engages
correctly with
the
litter arm during
assembly. It way be necessary
to
pull the
litter arm forward
to
allow assembly
to
take
place.
4. Fit and tighten the bolts
to
9 Nm. Tighten
the
bolts
in
a diagonal sequence.
5. Refit
the
coolant
pipe,
tightening its fixing
to
9Nm.
6.
Refit the water pump
as
described
on
page
12.8.
7.
Refit the radiator
as
described
on
page
12.13.
Clutch
Clutch
Removal
Before starting work, ensure the motorcycle
is
stabilised
and
adequately supported. This will help
prevent
it
from falling
and
causing injury to the
operator or damage to the motorcycle.
1.
Remove
the
clutch cover
as
described
on
page
4.5.
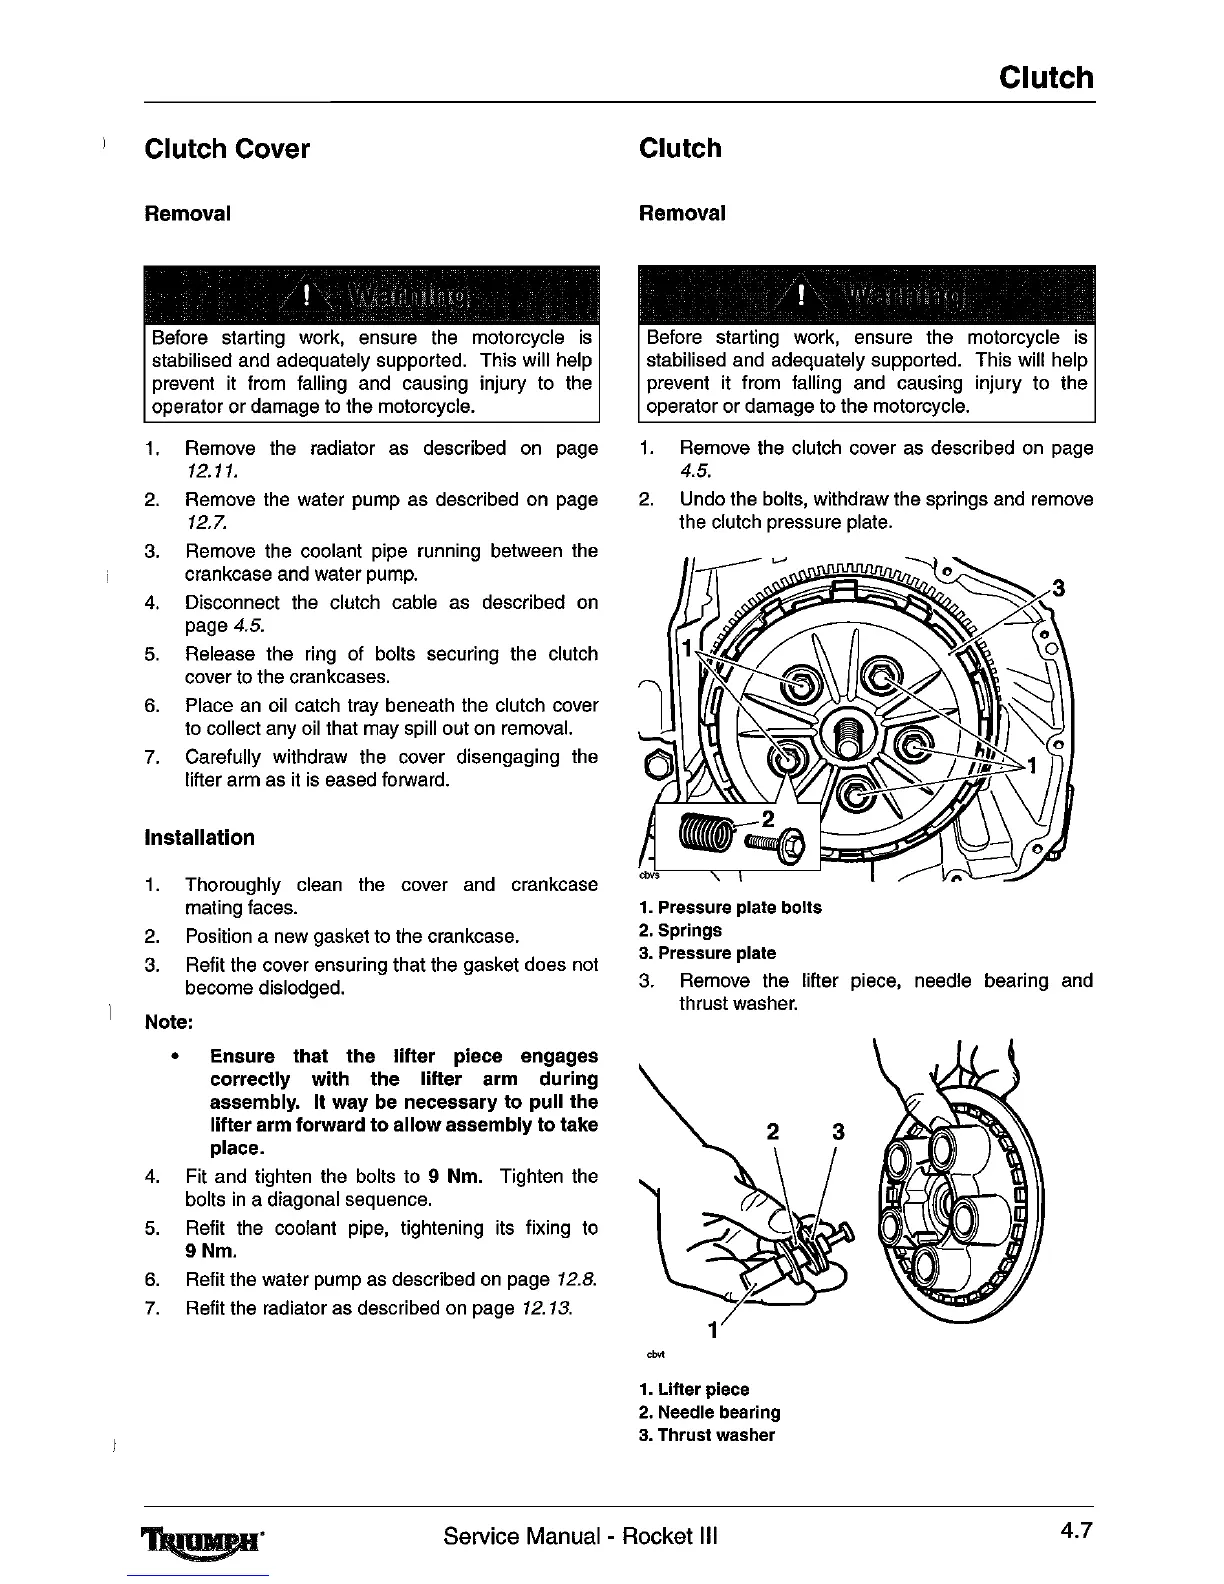
2.
Undo the bolts, withdraw the springs
and
remove
the clutch pressure plate.
1.
Pressure
plate
bolts
2. Springs
3.
Pressure
plate
3. Remove the litter piece, needle bearing
and
thrust
washer.
1.
Llfler
piece
2.
Needle
bearing
3. Thrust
washer
Service Manual - Rocket III
4.7
 Loading...