Pistons
Crankshaft
Note:
Disassembly
1.
Remove
the
cylinder head
and
liners (see page
3.5).
•
The rings may be removed using a
proprietary piston ring expander
tool
or,
if
a tool
is
not
available, carefully spread
the
ring opening using
thumb
pressure then
push
up
on the opposite side
of
the ring
to
remove
it
from
the
piston.
The cylinder liners
and
pistons are made
of
aluminium alloy and
can
therefore
be
easily
damaged. Handle the cylinder liner
and
piston
with
care, ensuring the internal bore
of
the liner and
the
piston skirt
are
not
scratched.
Note:
• It
is
not necessary
to
remove the
connecting rods from the crankshaft, but
the
piston
should
be at the
top
of
its
stroke.
2.
Remove
the
gudgeon pin circlip from one side
of
the piston.
1. GUdgeon pin circlip
3.
Remove the gudgeon pin
by
pushing the pin
through the piston and
rod
toward the side from
which
the
circlip
was
removed.
Note:
Piston
Wear
Check
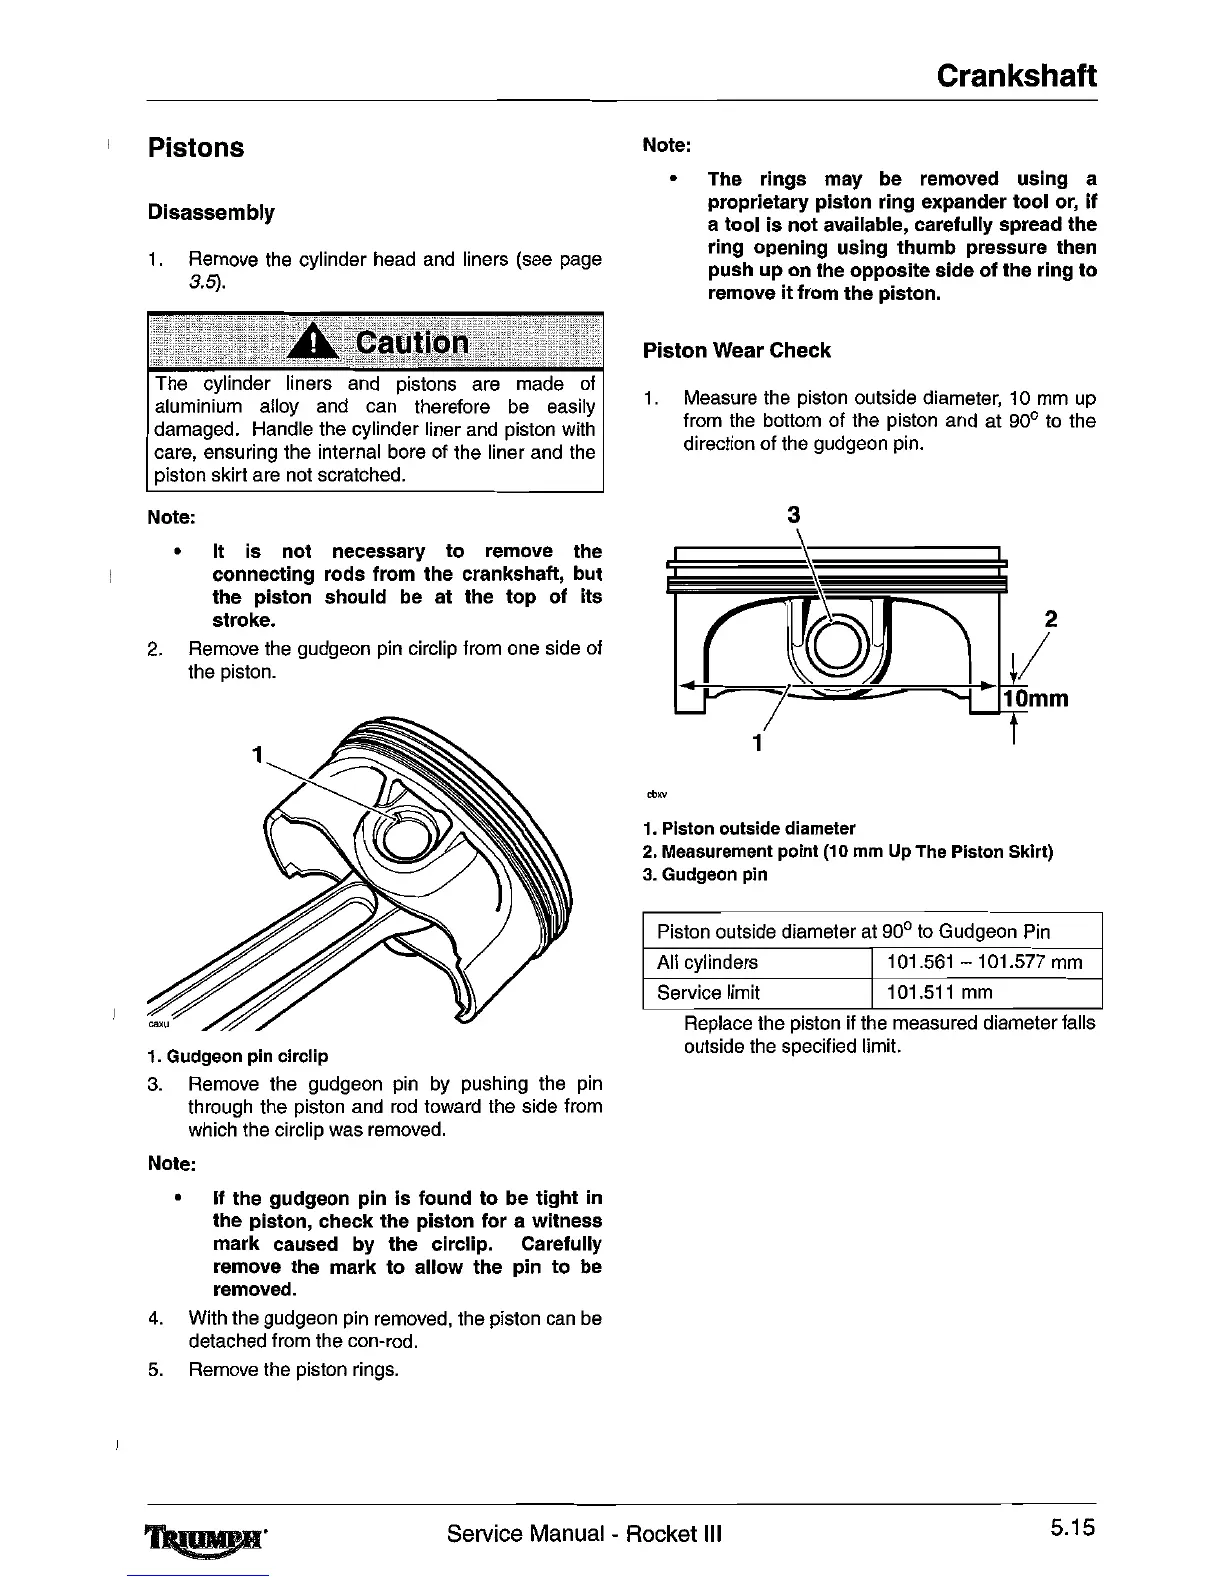
1. Measure
the
piston outside diameter,
10
mm
up
from
the
bottom of the piston
and
at 90°
to
the
direction of
the
gudgeon pin.
3
2
~/
•
7:::::S1iiiiiOi~==:;;;;::j-·
'h
1
iilO
mm
1
1.
Piston outside diameter
2.
Measurement point (10 mm Up The Piston Skirt)
3.
Gudgeon pin
Piston outside diameter at 90°
to
Gudgeon
Pin
All cylinders
101.561
- 101.577
mm
Service limit
101.511
mm
Replace the piston
If
the
measured diameter falls
outside
the
specified limit.
4.
5.
•
If the gudgeon pin
is
found
to
be
tight
in
the
piston, check the piston for a witness
mark caused by
the
circlip. Carefully
remove the mark
to
allow the pin
to
be
removed.
With the gudgeon pin removed, the piston
can
be
detached from the con-rod.
Remove the piston rings.
Service Manual - Rocket III
5.15
 Loading...