Cooling
Coolant Level Inspection
Before starting work, ensure the motorcycle
is
stabilised
and
adequately supported. This will help
prevent
it
from falling and causing injury
to
the
operator or damage
to
the
motorcycle.
Do
not
remove
the expansion tank or radiator
pressure cap when the engine
is
hot.
When the
engine
is
hot,
the coolant inside the expansion tank
will
be
hot
and
also under pressure. Contact with
hot coolant will cause scalds
and
skin damage.
1.
Position the motorcycle
on
level
ground
and
in
an
upright position.
Note:
2.
•
The coolant level within
the
expansion
tank can be inspected, without removing
any covers, by looking between the luel
tank
and Irame headstock on
the
left hand
side
01
the motorcycle. Always inspect the
coolant level
with
the engine cold.
The coolant
level
must
be
between the 'MAX'
(upper line)
and
'MIN' (lower line) marks
in
the
expansion tank.
1.
Allow the engine to cool for at least
30
minutes.
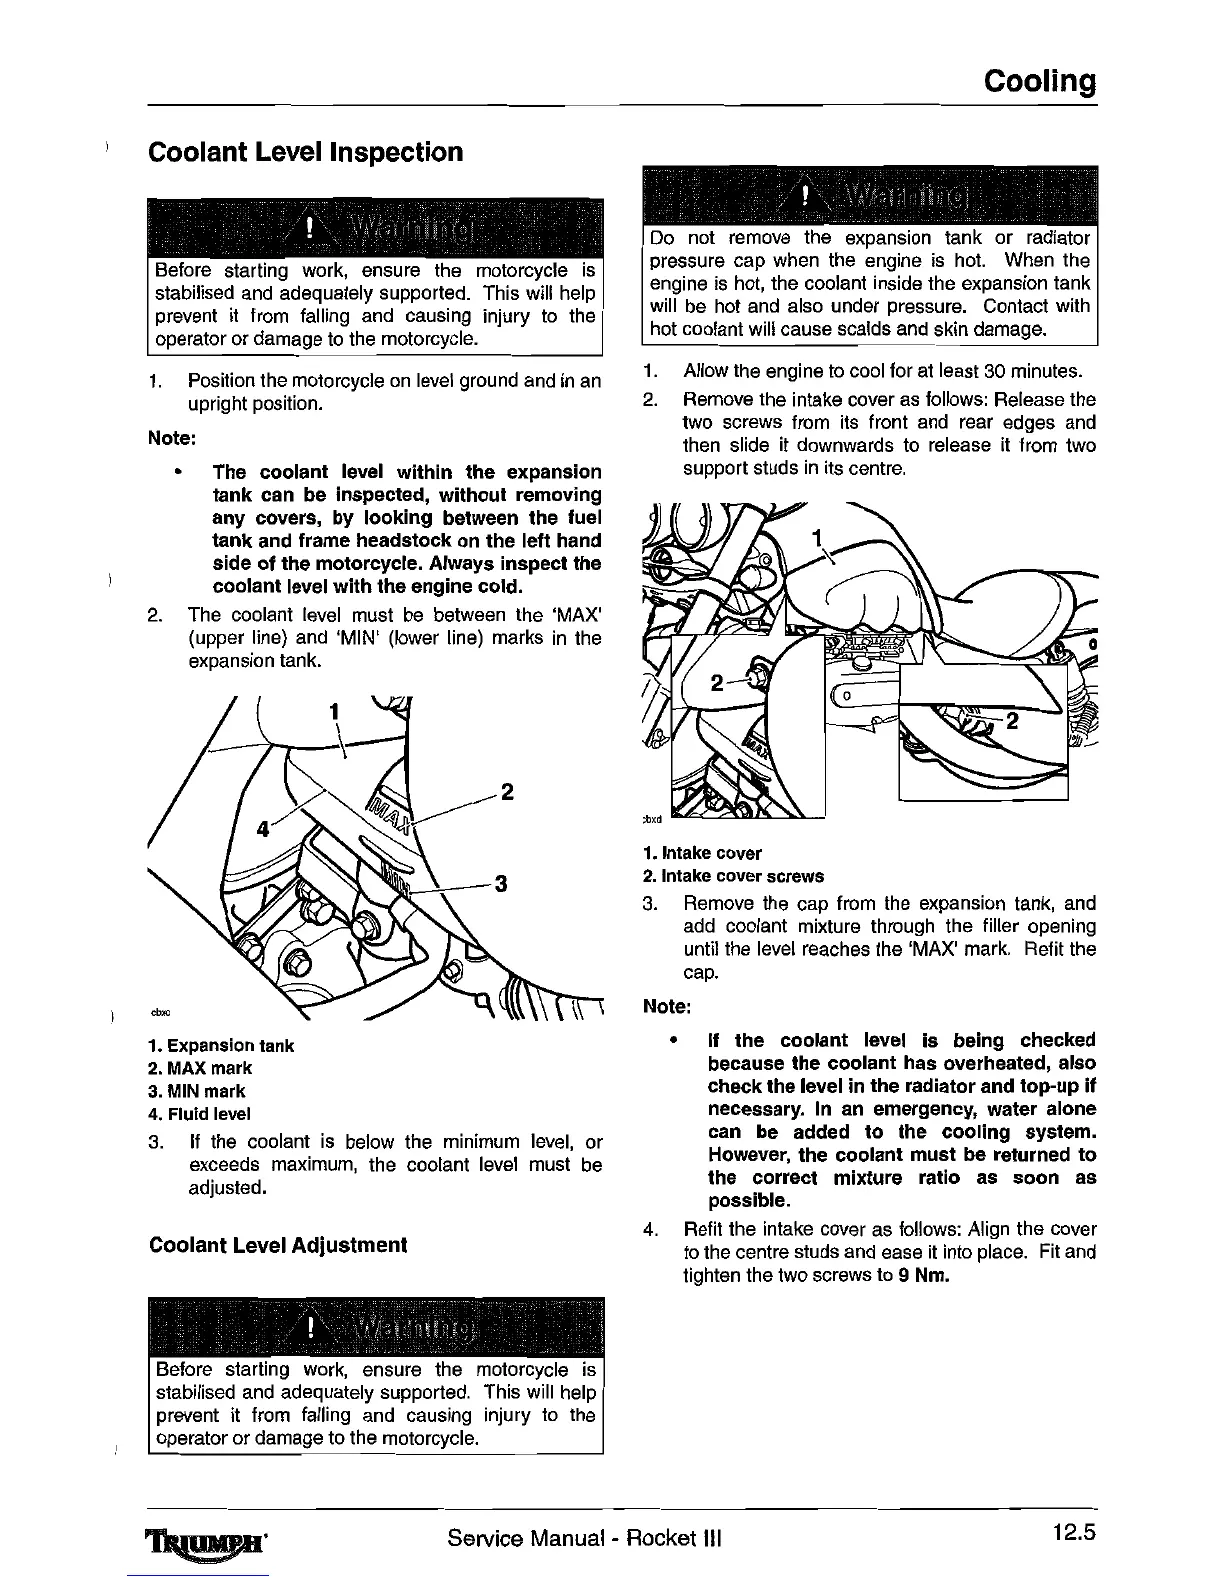
2.
Remove the intake cover
as
follows: Release the
two screws from
its
front
and
rear edges
and
then slide
it
downwards to release
it
from two
support studs
in
its centre.
1.
Intake cover
2.
Intake cover screws
3.
Remove
the
cap from
the
expansion tank,
and
add
coolant mixture through the filler opening
until the
level
reaches the 'MAX' mark. Refit the
cap.
Note:
1.
Expansion tank
2.
MAXmark
3.
MIN
mark
4.
Fluid
level
3.
If
the coolant
is
below the minimum
level,
or
exceeds maximum, the coolant
level
must
be
adjusted.
Coolant Level Adjustment
Before starting work, ensure the motorcycle
is
stabilised
and
adequately supported. This will help
prevent it from falling
and
causing injury
to
the
operator or damage to the motorcycle.
4.
•
II
the
coolant level
is
being checked
because
the
coolant has overheated, also
check
the
level in the radiator and top-up
il
necessary.
In
an emergency, water alone
can be added
to
the cooling system.
However, the coolant must be returned
to
the
correct mixture ratio as soon as
possible.
Refit the intake cover
as
follows: Align the cover
to
the
centre studs
and
ease
it
into place.
Fit
and
tighten the two screws
to
9 Nm.
Service Manual - Rocket III
12.5
 Loading...