DataWedge Configuration
96
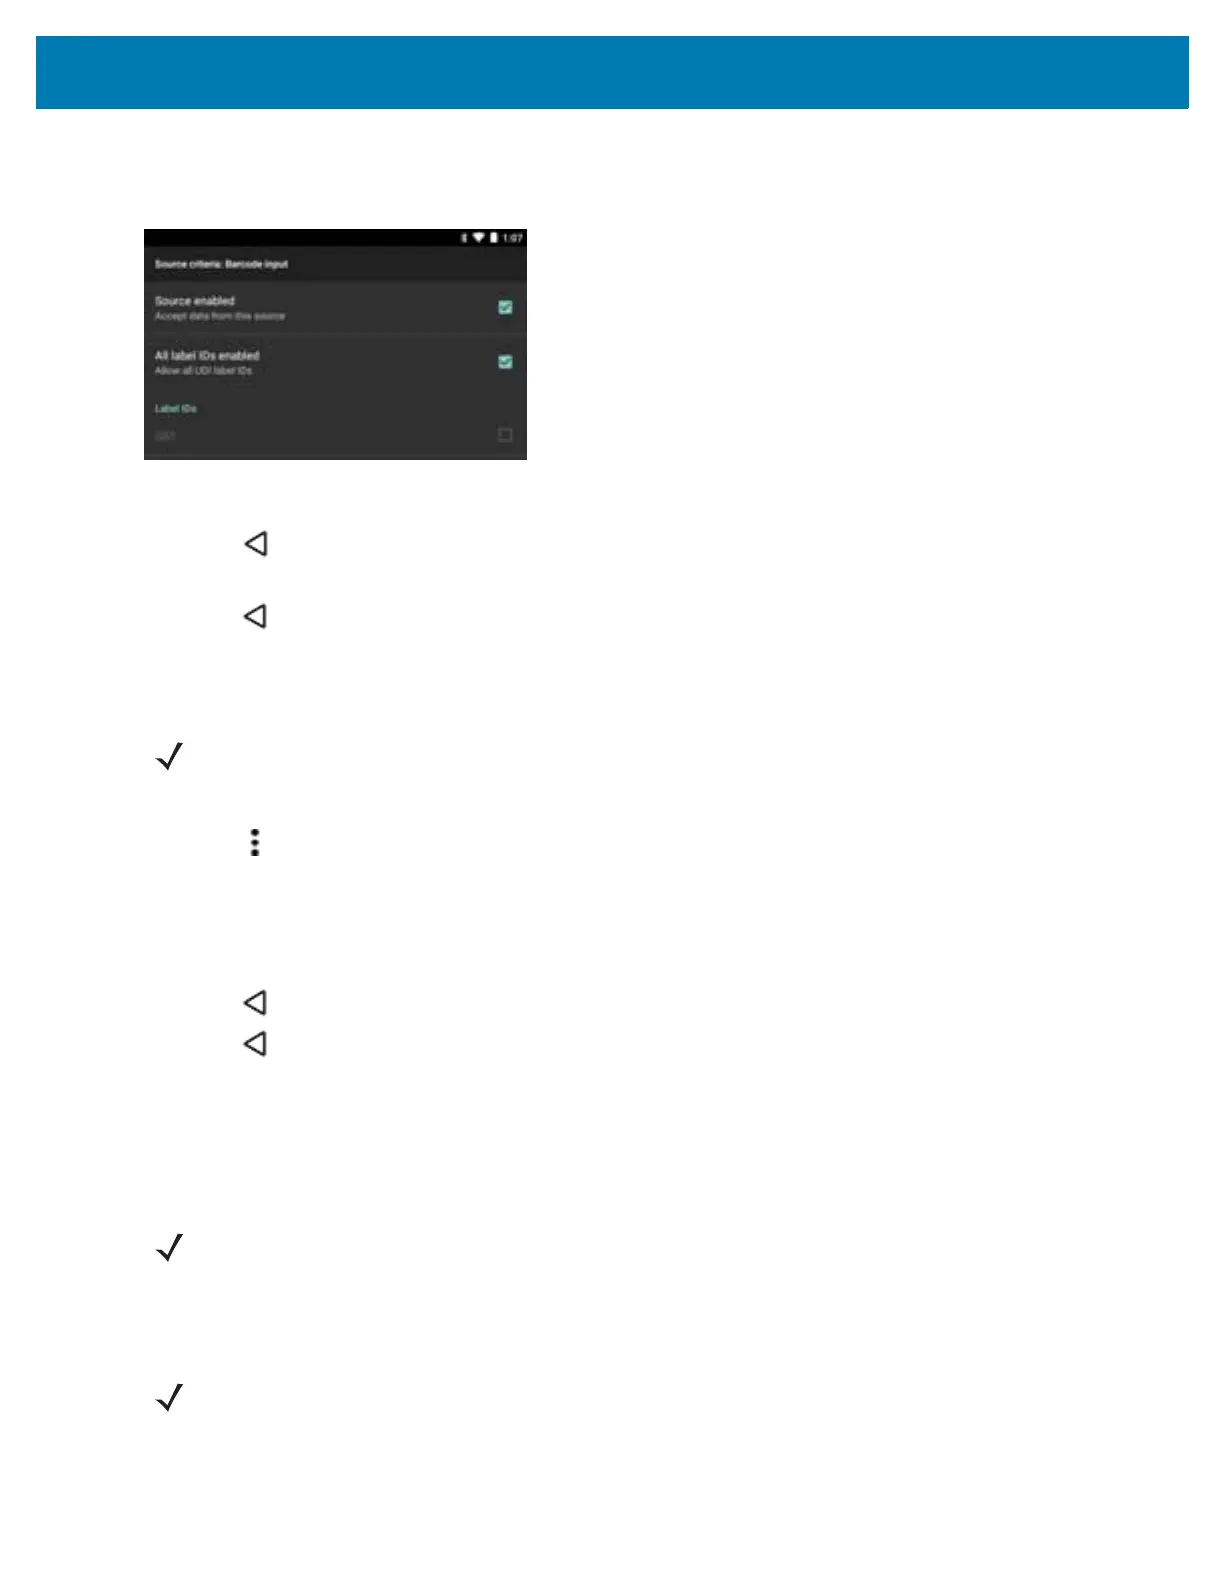
13. Touch the Source enabled checkbox to accept data from this source.
Figure 95 Barcode Input Screen
14. For barcode inputs, touch the All label IDs enabled checkbox to select all bar code symbologies. Deselect the
All label IDs enabled checkbox to individually select the symbologies.
15. Touch until the Rule screen appears.
16. If required, repeat steps to create another rule.
17. Touch until the Rule screen appears.
Defining an Action
1. Touch Actions.
2. Touch > New action.
3. In the New action menu, select an action to add to the Actions list. See Table 9 on page 97 for a list of
supported ADF actions.
4. Some Actions require additional information. Touch the Action to display additional information fields.
5. Repeat steps to create more actions.
6. Touch .
7. Touch .
Deleting a Rule
1. Touch and hold on a rule until the context menu appears.
2. Touch Delete to delete the rule from the Rules list.
Order Rules List
NOTE: By default the Send remaining action is in the Actions list.
NOTE: When there is no rule available for ADF plug-in or all rules are disabled, DataWedge passes decoded
data to the output plug-in without processing the data.
NOTE: When there are no rules defined, ADF passes the captured data through as is. In contrast, when rules
are defined but all are disabled, ADF does not pass any captured data through.
 Loading...