Corrective Maintenance
Main Logic Board
402
14207L-001 A ZM400/ZM600 Maintenance Manual 8/9/07
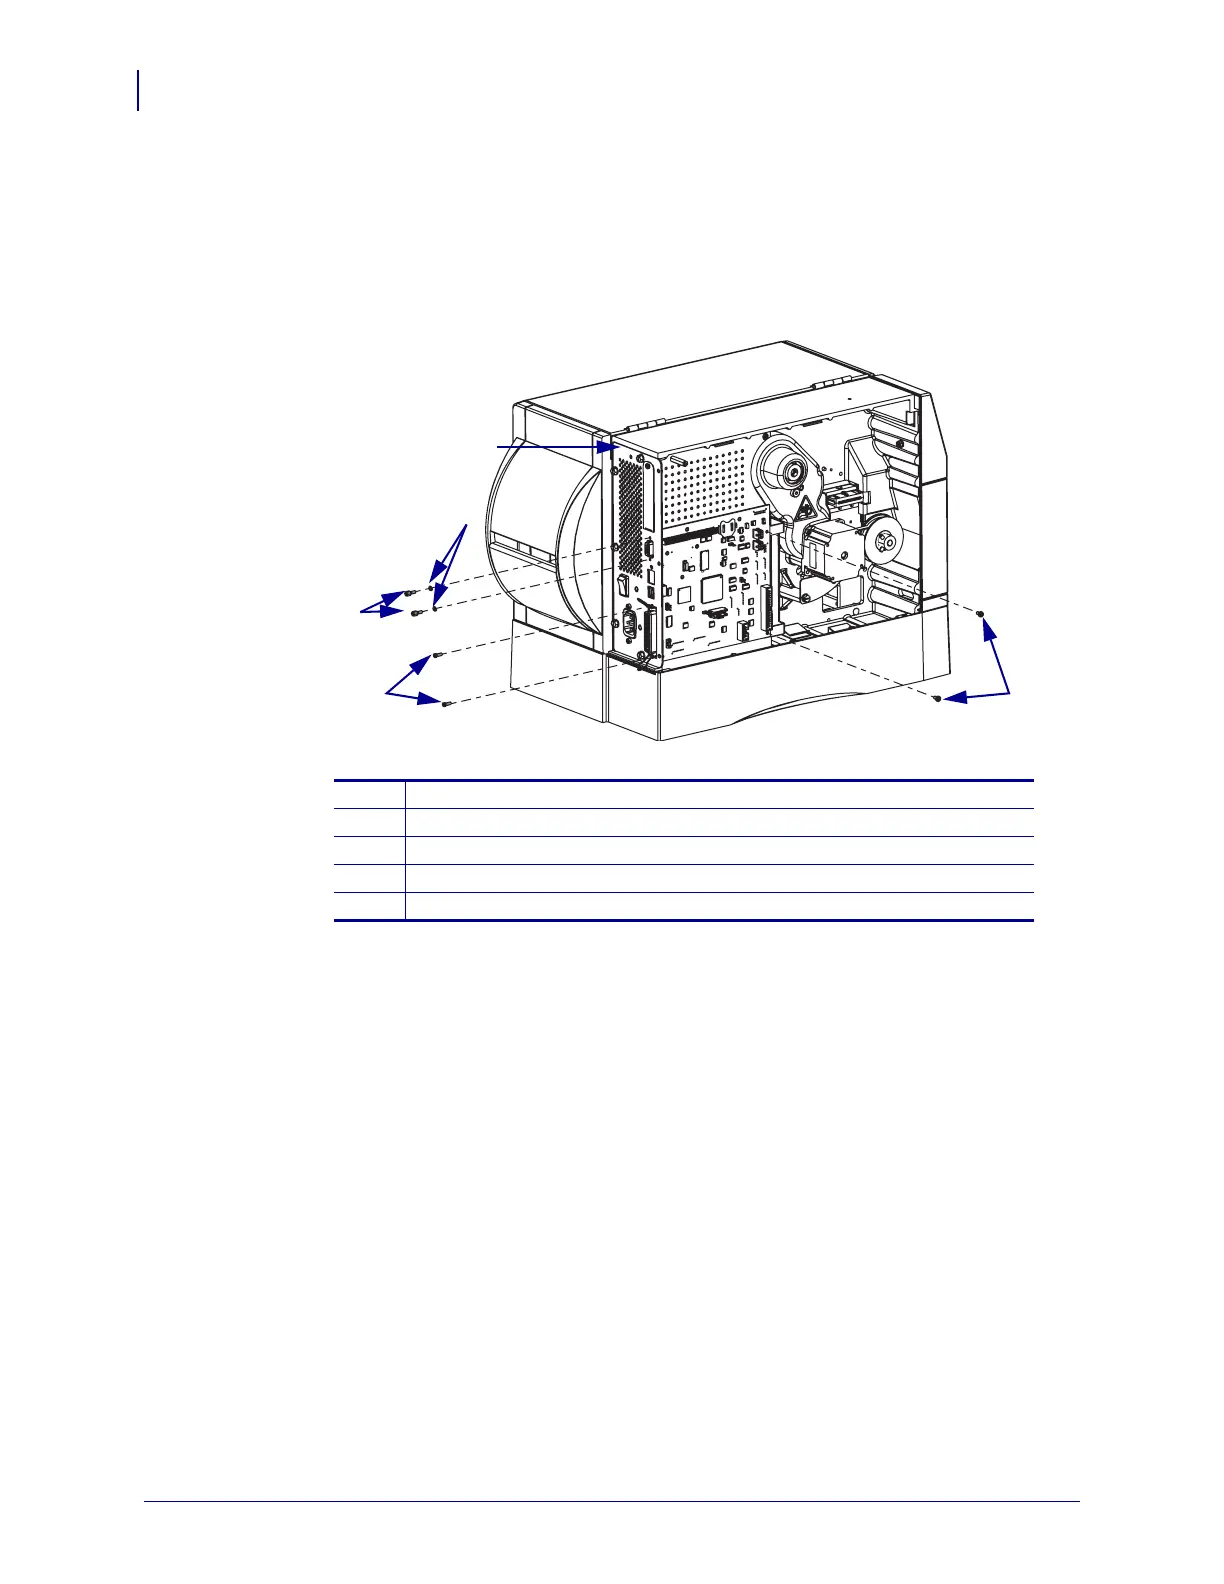
2. See Figure 260. Remove and discard the two mounting studs and washers securing the
9-pin serial port connector.
3. Remove and discard the two screws securing the 36-pin parallel port connector.
Figure 260 • Remove the Old MLB
4. Remove and discard the two mounting screws securing the MLB to the printer.
5. Pull out the front end of the board. As you do, guide its two connectors out of the rear
panel openings.
Install the New MLB Board
1. From the kit, remove the new MLB.
2. See Figure 260 on page 402. Align the new MLB with the rear panel and insert the two
connectors into the mounting holes.
3. Secure the MLB with the two mounting screws.
4. With two mounting studs, secure the serial port connector to the rear panel.
5. With two screws, secure the parallel port connector to the rear panel.
6. See Figure 259 on page 401. Reconnect the ribbon cables and small wire connections to
the MLB.
1
MLB mounting screws (2)
2
Parallel port mounting screws (2)
3
Serial port mounting studs (2)
4
Serial port mounting lock washers (2)
5
Rear panel
1
2
3
4
5
 Loading...