81
The GNX4’s 8-Track Recorder
Changing Track Status
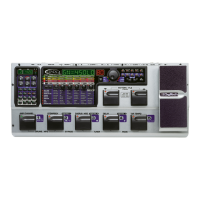
Each recorded track can be in 1 of 4 states; playback,record, merge, or off. Tracks with recorded material
can be turned on for playback (TRACK button is lit green),armed for recording (TRACK button is lit
red),armed for merging other recorded tracks to it (TRACK button is lit yellow) or turned off (button
is not lit).If a track does not have material recorded on it,it can only be enabled for recording,merge, or
turned off. To change the status of a track, do the following:
1.Press any TRACK button repeatedly until it lights green, red,or yellow. If the button lights green,
there is recorded material present. If the RECORD or PLAY button is pressed the material is played
back. If the button lights red and the RECORD button is pressed,audio will be recorded on this
track. If the button lights yellow, it merges tracks armed for playback, including recorded material
already present on this track.
Punching In/Punching Out
There may be times you want to replace a track section in the middle of a song. Rather than recording
on a new track at the very beginning and wasting recording time with silence, you can “punch in” the
phrase you want to record at a certain point on the track. To punch in record,follow these steps:
1.Arm the track that you want to punch in and record on (the TRACK button turns red).
2.Press the PLAY button. All tracks that are armed for playback and record begin playing, and the
TRACK button armed for recording begins flashing red.
3.When you reach the point in the playback that you want the recording to begin, press the RECORD
button. The TRACK button armed for recording lights solid red and recording begins on this track at
this point.
4.When you are finished recording,press the RECORD button again to disable the track armed for
recording (the track button flashes red) and continue listening to the playback.
Bouncing/Merging Tracks
Once you have recorded several tracks,you may want to combine them onto a single track or pair of
tracks to free up recording memory. This is done using the recorder’s Merge function. Merging is
essentially the same as bouncing tracks as you would on old analog 4 and 8-track tape recorders,only
without any signal degradation. You can merge playback tracks with recorded tracks and retain the
recorded material on the tracks you are merging to. This means you don’t need empty tracks to merge
to if all tracks have recorded material on them.
NOTE: Merging tracks is irreversible to the tracks that are merged to. It is wise to make
sure your individual track levels and pans are set prior to merging tracks with recorded
material present. Once tracks are merged,the individual track information cannot be
adjusted.
To merge recorded tracks,follow these steps:
1.Begin with the recorder stopped.
2. Arm the track(s) you want to merge for playback (TRACK buttons lit green).
3.Press the TRACK button(s) you want to merge to until they light yellow. Only a maximum of two
tracks at a time can be selected to merge to.
4.Press the RECORD button. The recorder begins merging the audio from the tracks armed for
playback onto the tracks armed for merge. Once merging has begun,it cannot be stopped until
playback through the entire song is completed.

 Loading...