Scanning Procedure
171
Scan
5
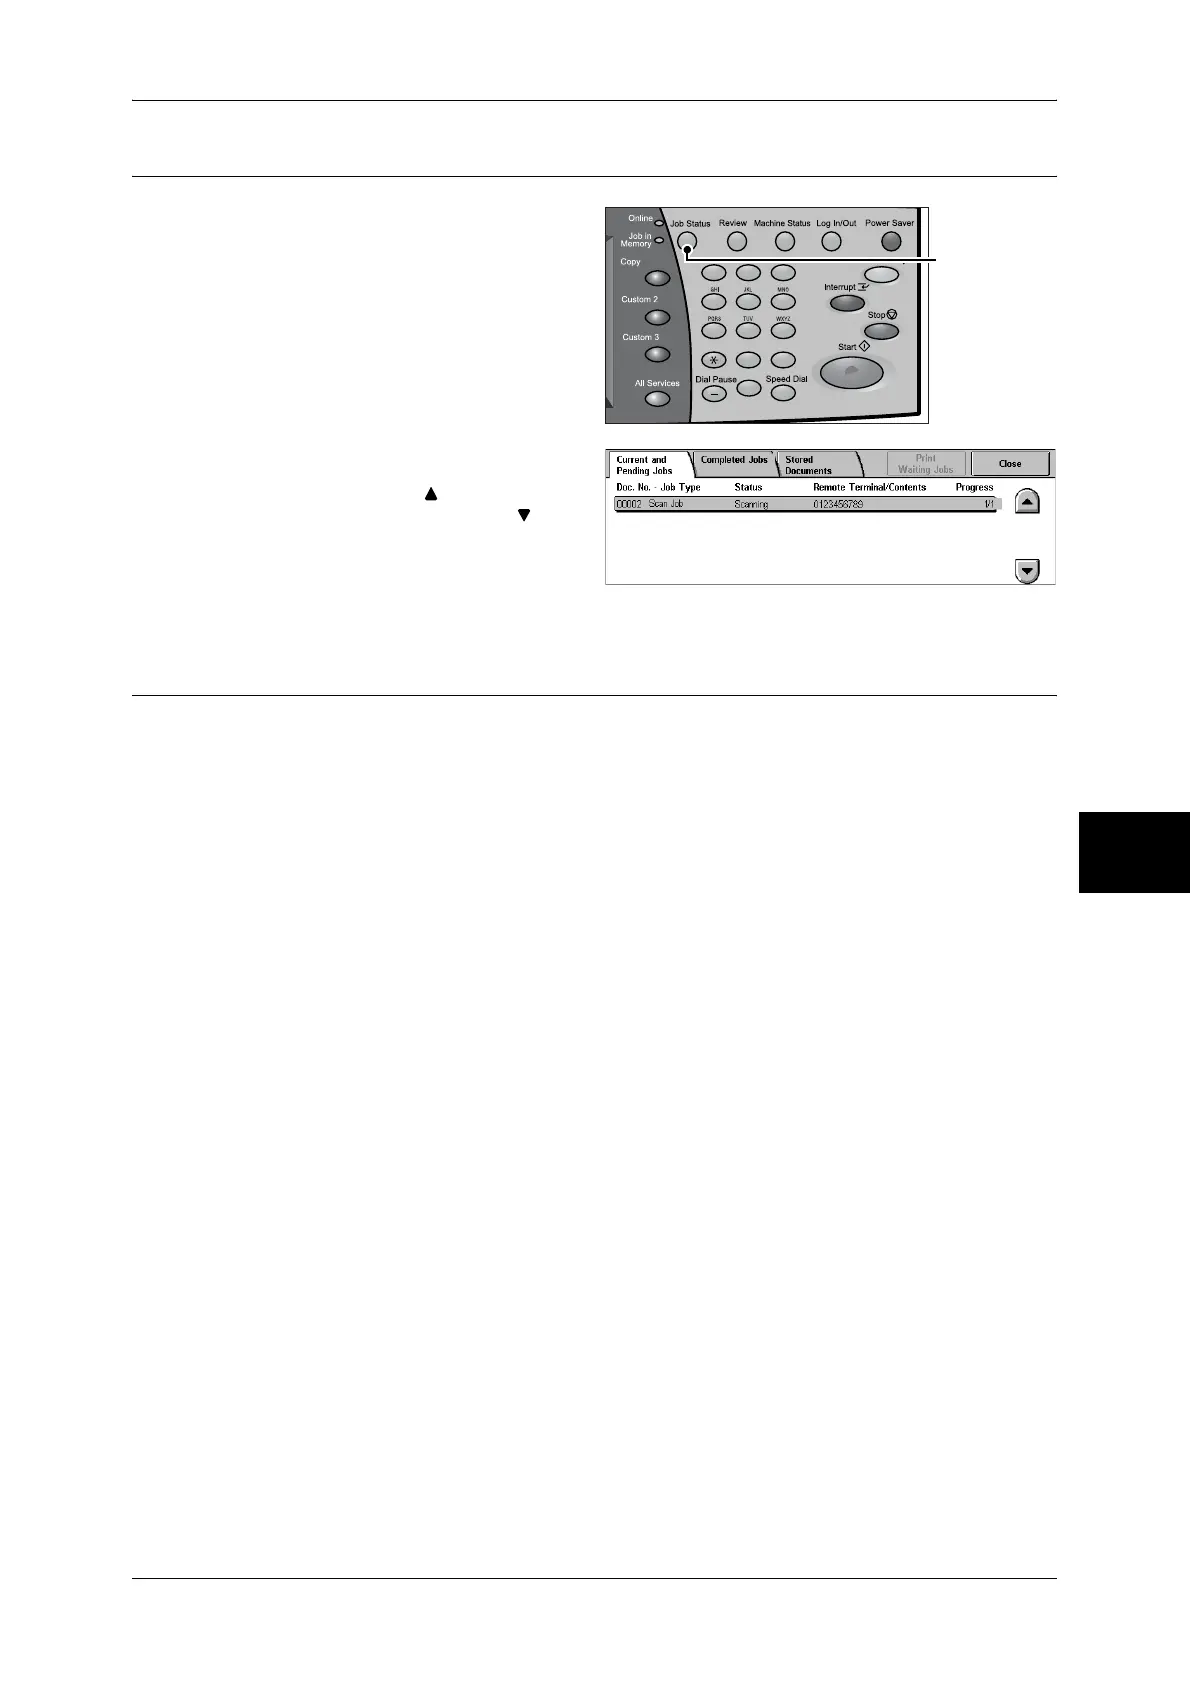
Step 4 Confirming the Scan Job in Job Status
1
Press the <Job Status> button.
2 Confirm the job status.
Note • Select [ ] to return to the
previous screen or [ ] to
move to the next screen.
Step 5 Saving the Scanned Data
When you select [Scan to Mailbox], the document stored in a mailbox of the machine
can be imported into your computer. Importing can be done in the following ways:
Import using application
Uses a network scan driver.
Refer to "Importing to a TWAIN Compatible Application" (P.237).
Import using Mailbox Viewer2
Uses Mailbox Viewer2 (Fuji Xerox application software).
Refer to "Importing Using Mailbox Viewer2" (P.239).
Import using CentreWare Internet Services
Uses CentreWare Internet Services.
Refer to "Importing Using CentreWare Internet Services" (P.241).
Import using WebDAV
Uses WebDAV.
Refer to "Importing with the WebDAV Protocol" (P.242).
123
456
789
0 #
C
<Job Status>
button
 Loading...