Printing and Deleting Stored Documents
369
Job Status
12
Charge Print
When you set to use the Charge Print feature under [Charge/Private Print Settings] >
[Receive Control], received print jobs are saved for each Billing ID. Any jobs that were
not given a Billing ID on the print driver are saved in [No User ID].
For more information, refer to "Charge / Private Print Settings" (P.357).
The following describes how to print and delete a document saved in Charge Print.
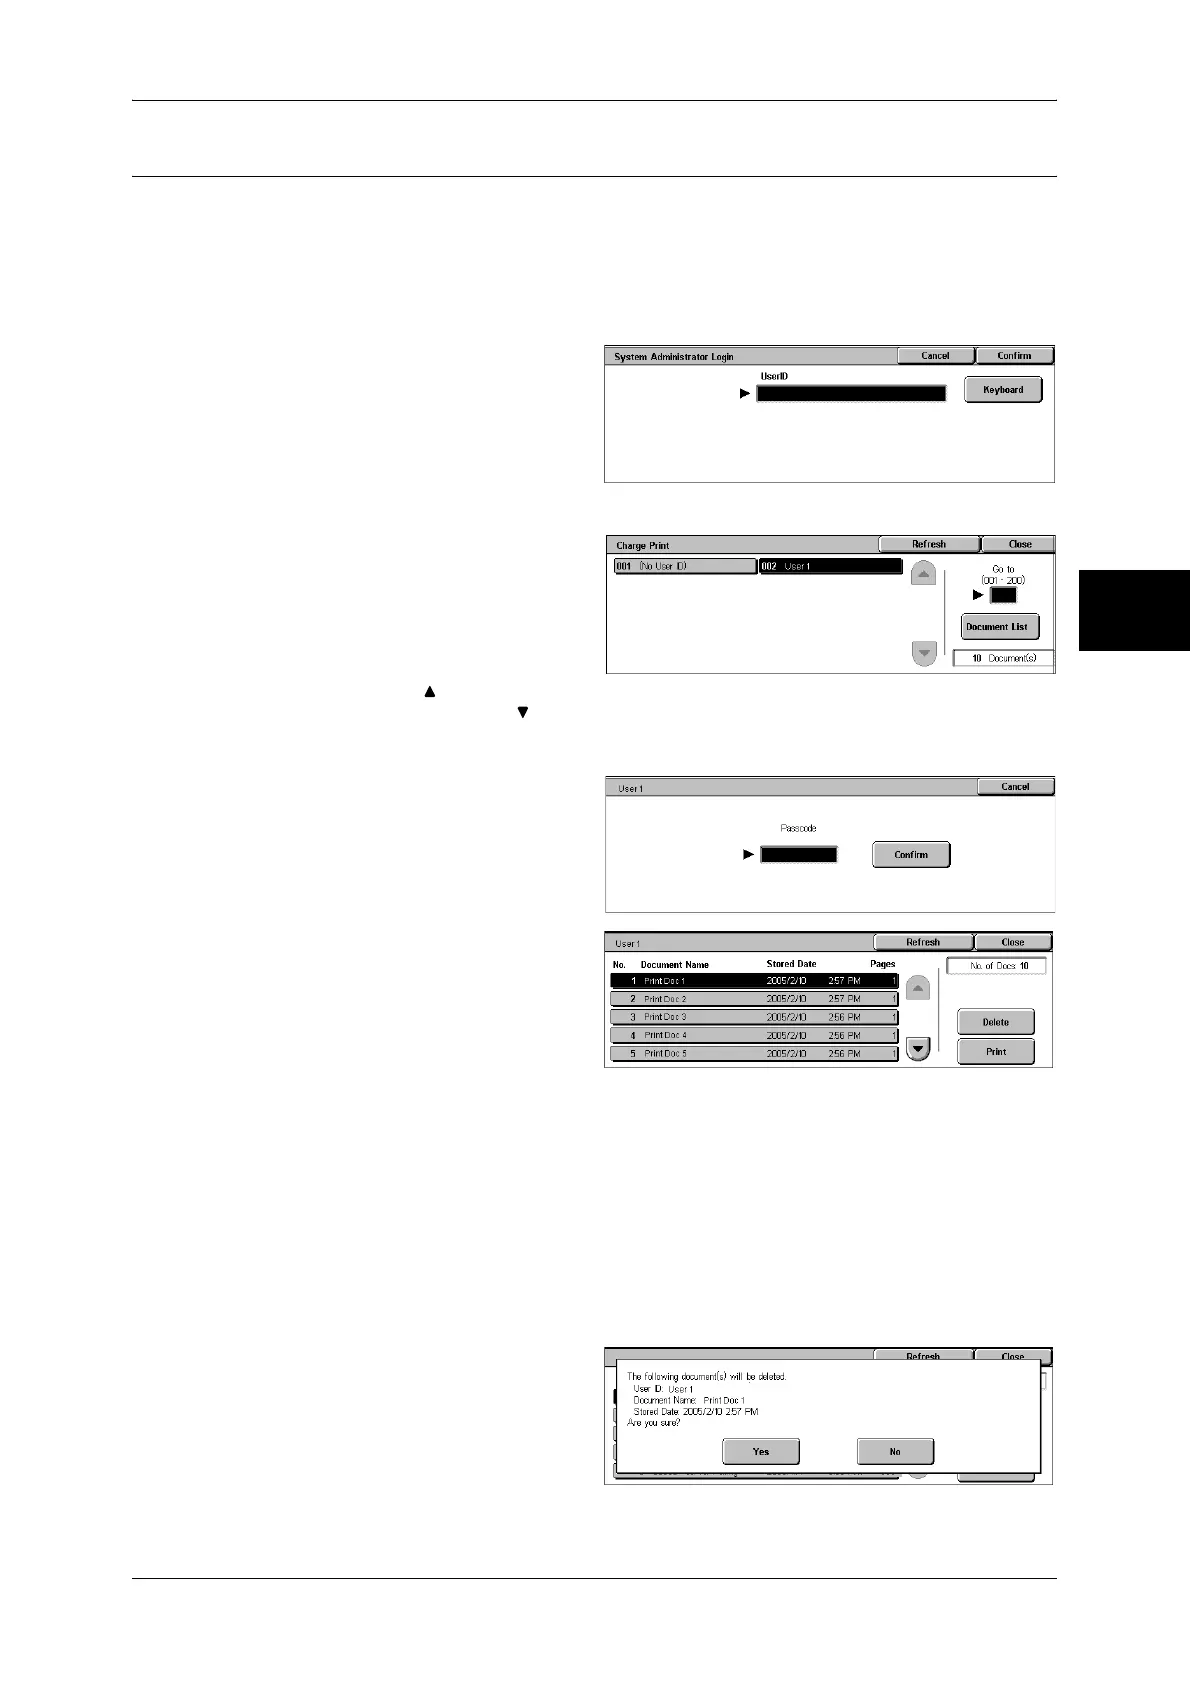
1 When printing the stored jobs, the
authentication is required. Press
the <Log In/Out> button. Enter the
target user ID using the numeric
keypad or the keyboard displayed
by pressing [Keyboard], and select
[Confirm].
2 Select [Charge Print].
3 Select the user to be checked, and
select [Document List].
Note • Select [Refresh] to display the
updated information.
• Select [ ] to return to the
previous screen or [ ] to move to the next screen.
• Entering a 3-digit user ID with the numeric keypad specifies the user directly.
4 Enter the passcode, and select
[Confirm].
Note • If no passcode is assigned,
the passcode entry screen will
not appear.
5 Select the document to be printed
or deleted.
6
Select any item.
Delete
Deletes the document stored with Charge Print.
Refer to "When [Delete] is Selected" (P.369).
Print
Prints the document stored with Charge Print.
Refer to "When [Print] is Selected" (P.370).
When [Delete] is Selected
1 Select [Yes].

 Loading...


