11. HOW TO MONITOR ROUTES
11-4
11.3 How to Select What Parts of a Route to Display
You can specify what parts of
the monitored route to display.
Click the [DISP], [SET] and
[Symbol DISP] buttons on the
InstantAccess bar™. Click the
[Route] tab.
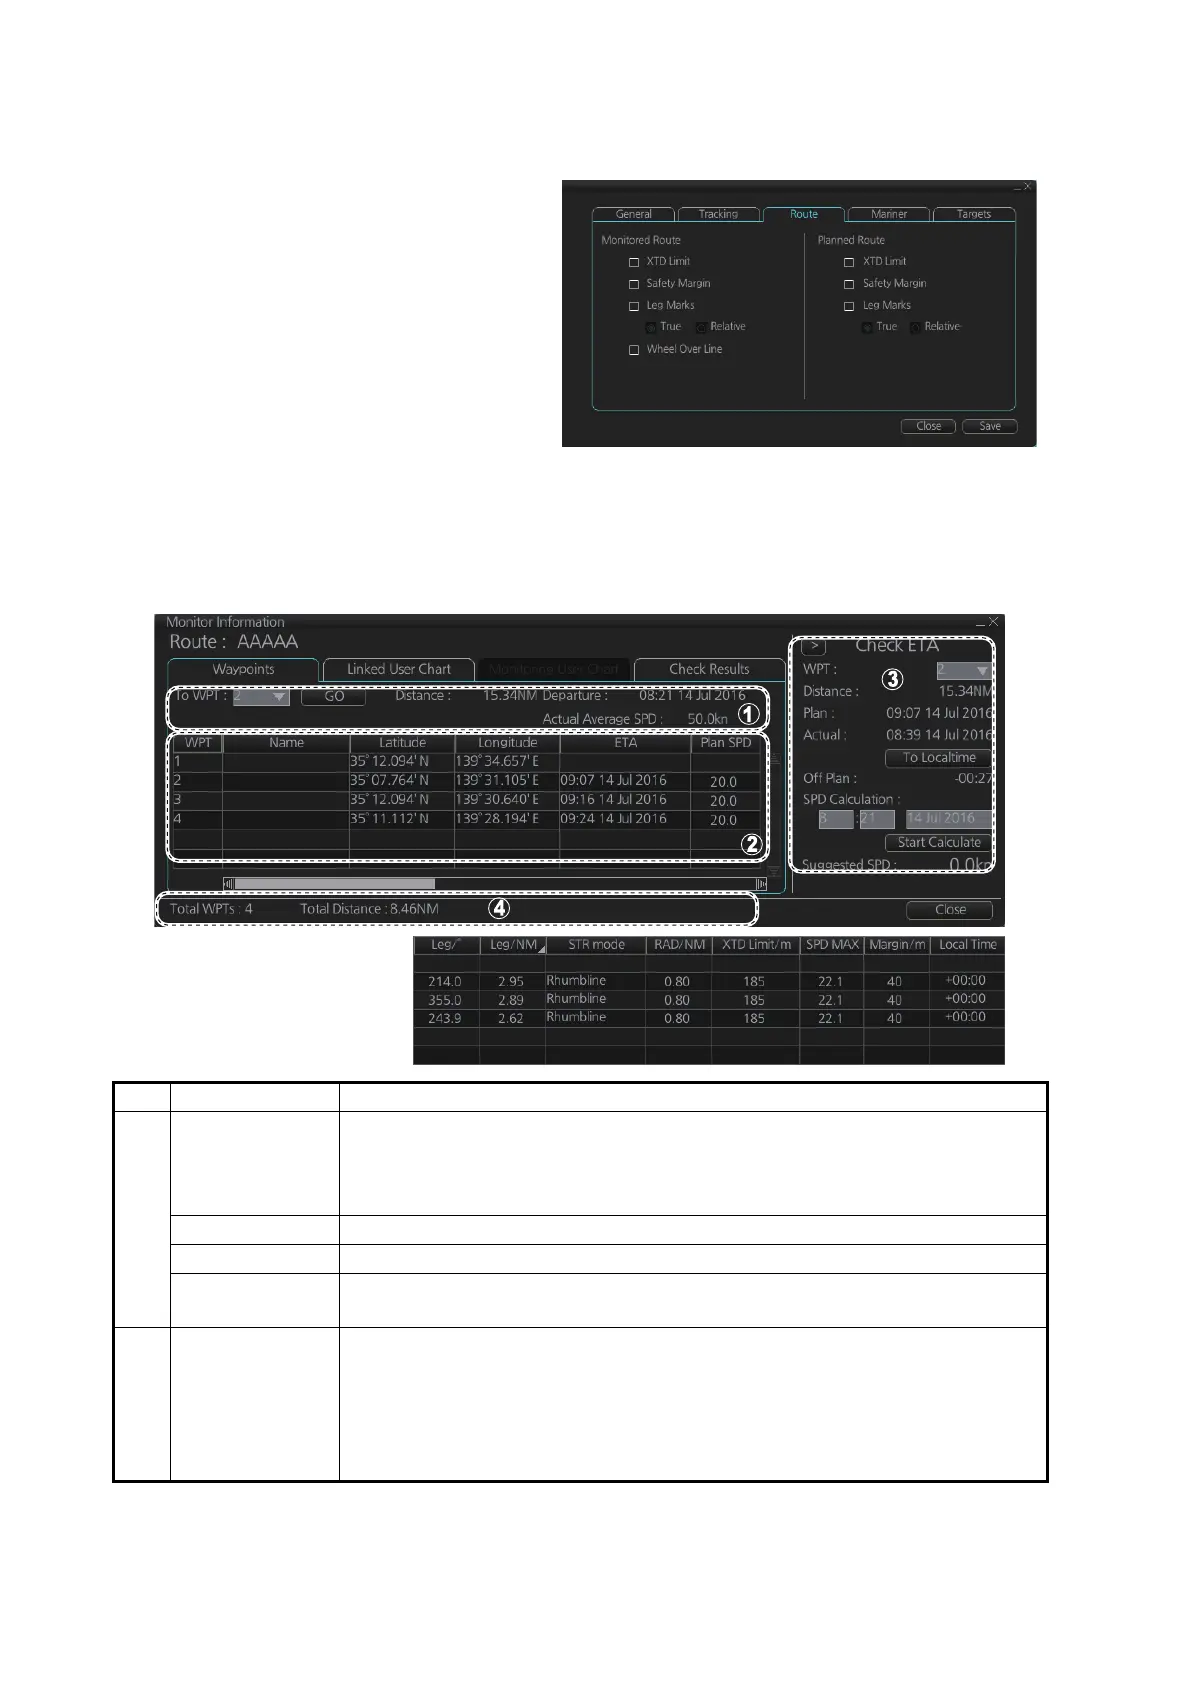
11.4 How to View Waypoint Information
Click the [Voyage] and [Monitor INFO] buttons on the InstantAccess bar™ to show the
[Monitor Information] dialog box. Click the [Waypoints] tab to show waypoint info.
No. Item Description
1 To WPT, GO
button
The system chooses a next waypoint automatically. Check that the To way-
point is the desired one. The system will automatically advance to a next
waypoint when you pass the To waypoint. The default To WPT is WPT2. If
you desire a different one, select it here and the click the [GO] button.
Distance Distance from current position to selected waypoint.
Departure The time the route was selected for monitoring.
Actual Aver-
age SPD
The average speed over the ground, measured every 30 seconds.
2 Waypoint list The waypoint list provides for each waypoint WPT no., name, latitude and
longitude position, ETA, plan speed, bearing and distance to leg*, steering
mode (rhumb line or great circle), radius, XTD limit, speed max, margin,
and local time.The bearing to a leg and the display method for leg distance
can be changed. For details, see section 9.4.1. *Can be changed. see [Leg/
NM] on page 9-5.
* Scroll list horizontally to
view items shown in the
right figure.
*

 Loading...