GE HEALTHCARE
D
IRECTION 5305880-100, REVISION 3 LOGIQ™ 100 PRO SERVICE MANUAL
Page 8-8 Section 8-3 - KEYBOARD
8-3-2-1 Optical Trackball Assembly
Procedure for LOGIQ™ 100 PRO
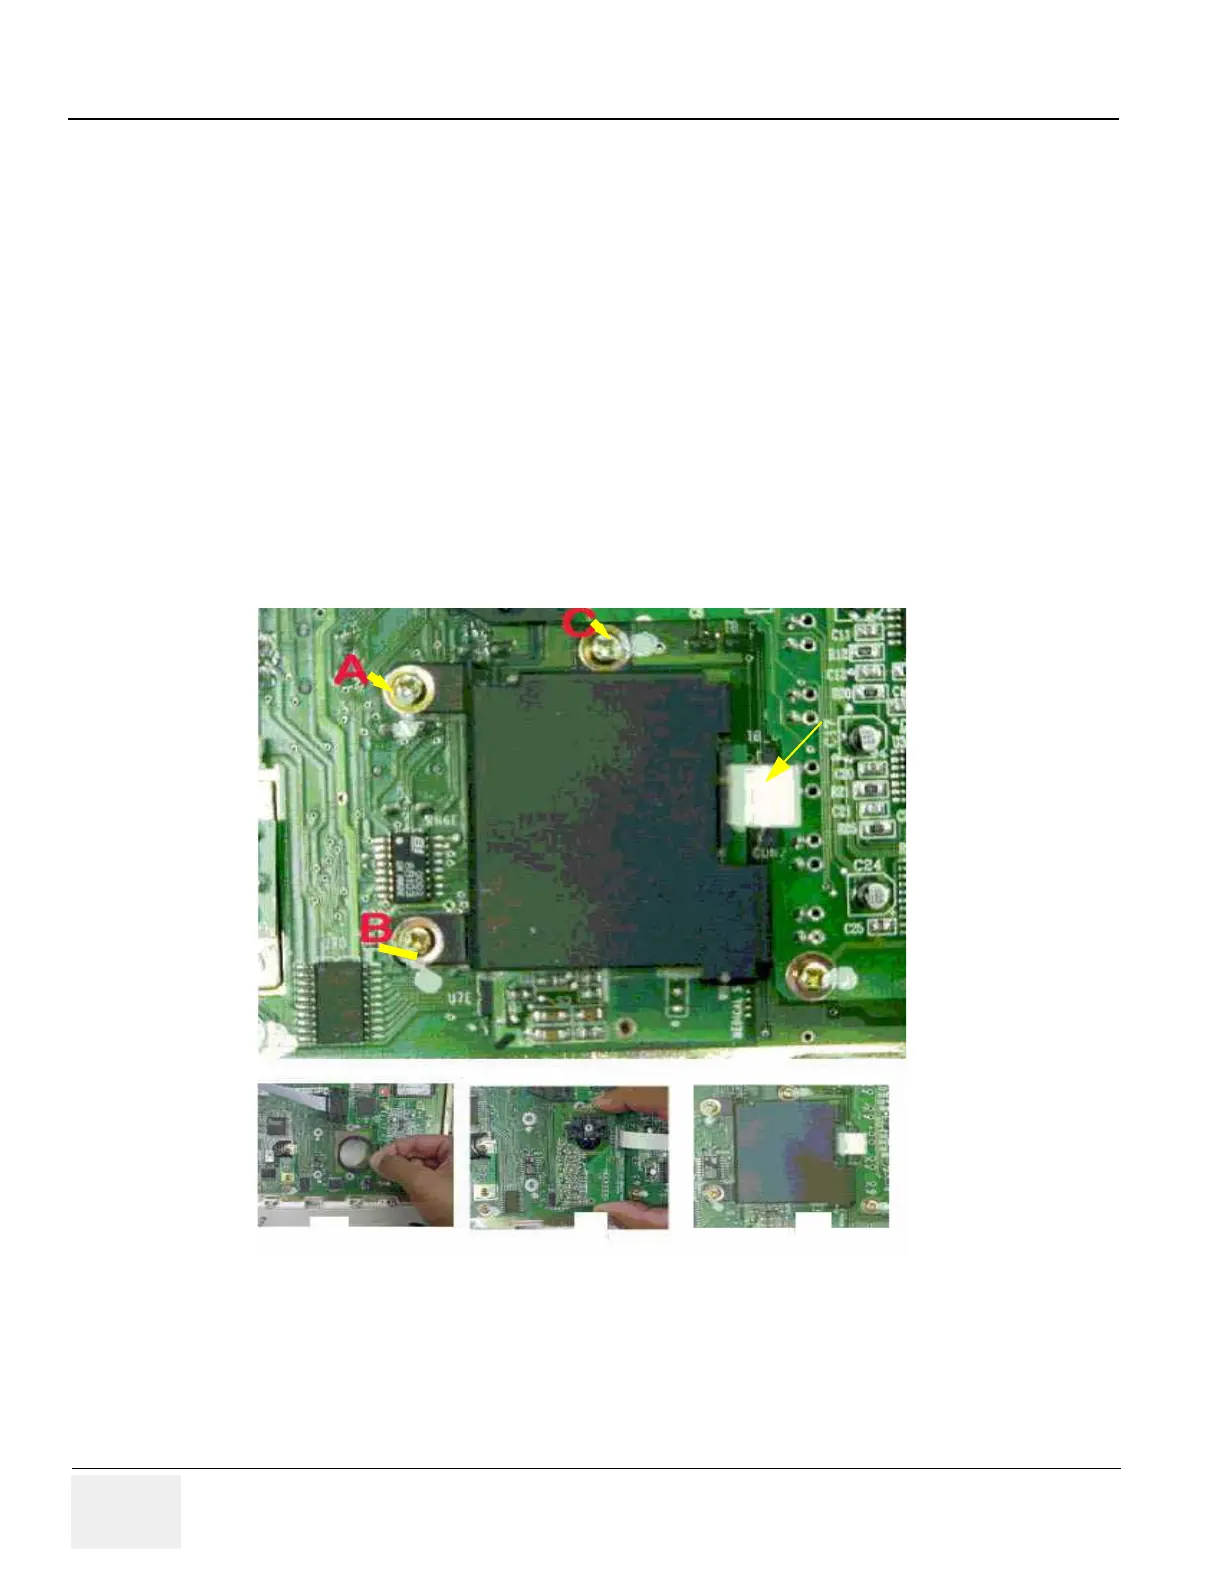
1.) Assemble TB Base Pad 2230750 (x). Refer Figure 8-4
2.) Assemble Optical Trackball PCB Assembly 2224019 (y) refer Figure 8-4
3.) Ensure that Trackball alignment is OK on the Key sheet.
4.) Assemble Trackball bracket assembly 22244032 (z) refer Figure 8-4
5.) Fix screws a,b & c at the location A,B & C in keyboard base plate.
6.) Fix the FPC cable 2139504 (D) as shown in Figure 8-4
7.) For assembly the keyboard PCB follow the reverse order of Section 8-3-2.
Note: When assembling the PCB to the base plate, M3x6 screws only should be used
because a wrong screw used will pierce the key sheet.
8.) For initializing the Optical Trackball Select Alps Trackball from the Trackball Selection
Menu in Service Diagnostics
Figure 8-4 Optical Trackball Assembly
z
y
x
D
A
B
State: RELEASE - Document is released and under formal Change Control. Changes are subject to the ECR/ECO Process.
See the GEHC Myworkshop System to determine the status of this document.
Approved Document - 5305880-100TPH_r3.pdf Page 137 of 197
 Loading...


