GE HEALTHCARE
D
IRECTION 5305880-100, REVISION 3 LOGIQ™ 100 PRO SERVICE MANUAL
Chapter 10 - Quality Assurance Page 10-19
10-6-6 Probe Leakage Current Test
10-6-6-1 Definition
This test measures the current that would flow to ground from any of the probes through a patient
who is being scanned and becomes grounded by touching some other grounded surface.
10-6-6-2 Generic Procedure for Leakage current
Measurements should be made with the ground open and closed, with power line polarity normal
and reversed, and with the unit Off and On. For each combination, the probe must be active to find
the worst case condition.
Note: Each probe will have some amount of leakage current, dependent on its design. Small
variations in probe leakage currents are normal from probe to probe. Other variations will
result from differences in line voltage and test lead placement.
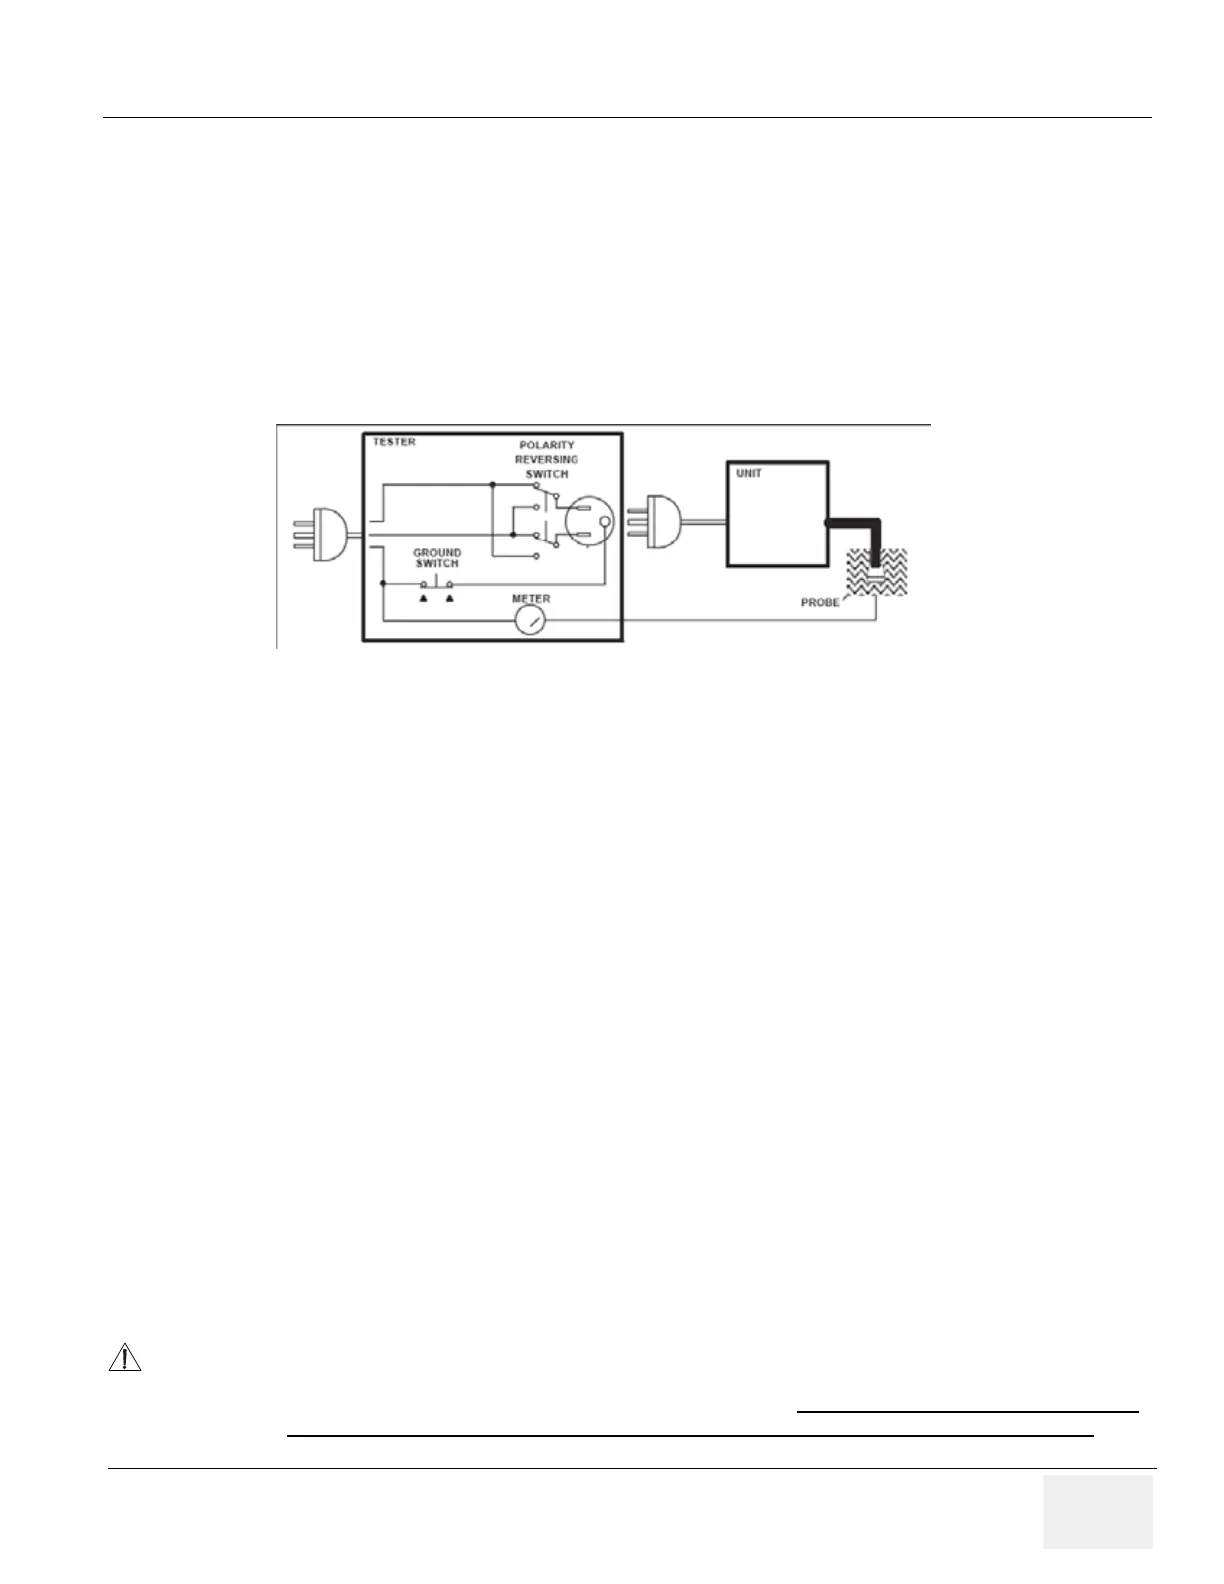
10-6-6-3 Meter Procedure Using Dale Meter to measure leakage current
The ultrasound probe's imaging area is immersed in a saline solution along with a grounding probe
from the test meter to complete the current path.The Saline solution is a mixture of water and salt.
The salt adds a free ion to the water, making it conductive. Normal saline solution is 0.9% salt or
1/2 gram salt per 1 liter of water. If saline is not available, a mixture of 1 quart of water with one or
more grams of table salt, mixed thoroughly, will substitute.
Follow these steps to test each probe for leakage current.
1.) Turn the LOGIQ™ 100 PRO unit OFF.
2.) Plug the unit’s mains powercord into the test meter, and plug the test meter into the tested AC
wall outlet.
3.) Plug the saline probe into the test meter's “CHASSIS” connector.
4.) Set the test meter’s "Function" switch to "CHASSIS".
5.) Connect the probe to be tested to the LOGIQ™ 100 PRO unit.
6.) Put the saline probe and the probe’s face(imaging area of the probe) into the saline bath.
CAUTION To avoid probe damage and possible electric shock,do not immerse probes into any liquid
beyond the level indicated in the probe users manual.
Do not touch the probe, conductive
liquid or any part of the unit under test while the LIFT GROUND switch is depressed.
Figure 10-6 Set Up for Probe Leakage Current
State: RELEASE - Document is released and under formal Change Control. Changes are subject to the ECR/ECO Process.
See the GEHC Myworkshop System to determine the status of this document.
Approved Document - 5305880-100TPH_r3.pdf Page 190 of 197
 Loading...


