GE MEDICAL SYSTEMS
D
IRECTION 2300000, REVISION 1 LOGIQ™ 5 SERVICE MANUAL
Chapter 6 Service Adjustment 6 - 9
6-5-2 LCD Adjustment
6-5-2-1 Tools
• Common pillips screwdrivers
• Allen/Unbraco wrench
• Long-nose gripper
6-5-2-2 Needed Manpower
• 1 person, 15 minutes + travel
6-5-2-3 Preparations
• Shut Down the System and switch off the Main Breaker at the rear as described in section 4-3-2 on
page 3.
• Remove the Keyboard Assy from the System. For more information, refer to the Chapter 8,
Replacement Procedure.
6-5-2-4 Removal Procedure
1.) Remove the OP side R Cover to access. Refer to section 8-5-9 on page 54.
2.) Access to the OSD Menu display button located at backside of the LCD.
CAUTION
Do not wear the ESD wrist strap when you remove a part of power supply unit. Turn OFF power
and unplug the power cord before removing a part of power supply unit. However be sure to turn
off power and wear the strap before you remove a circuit boards.
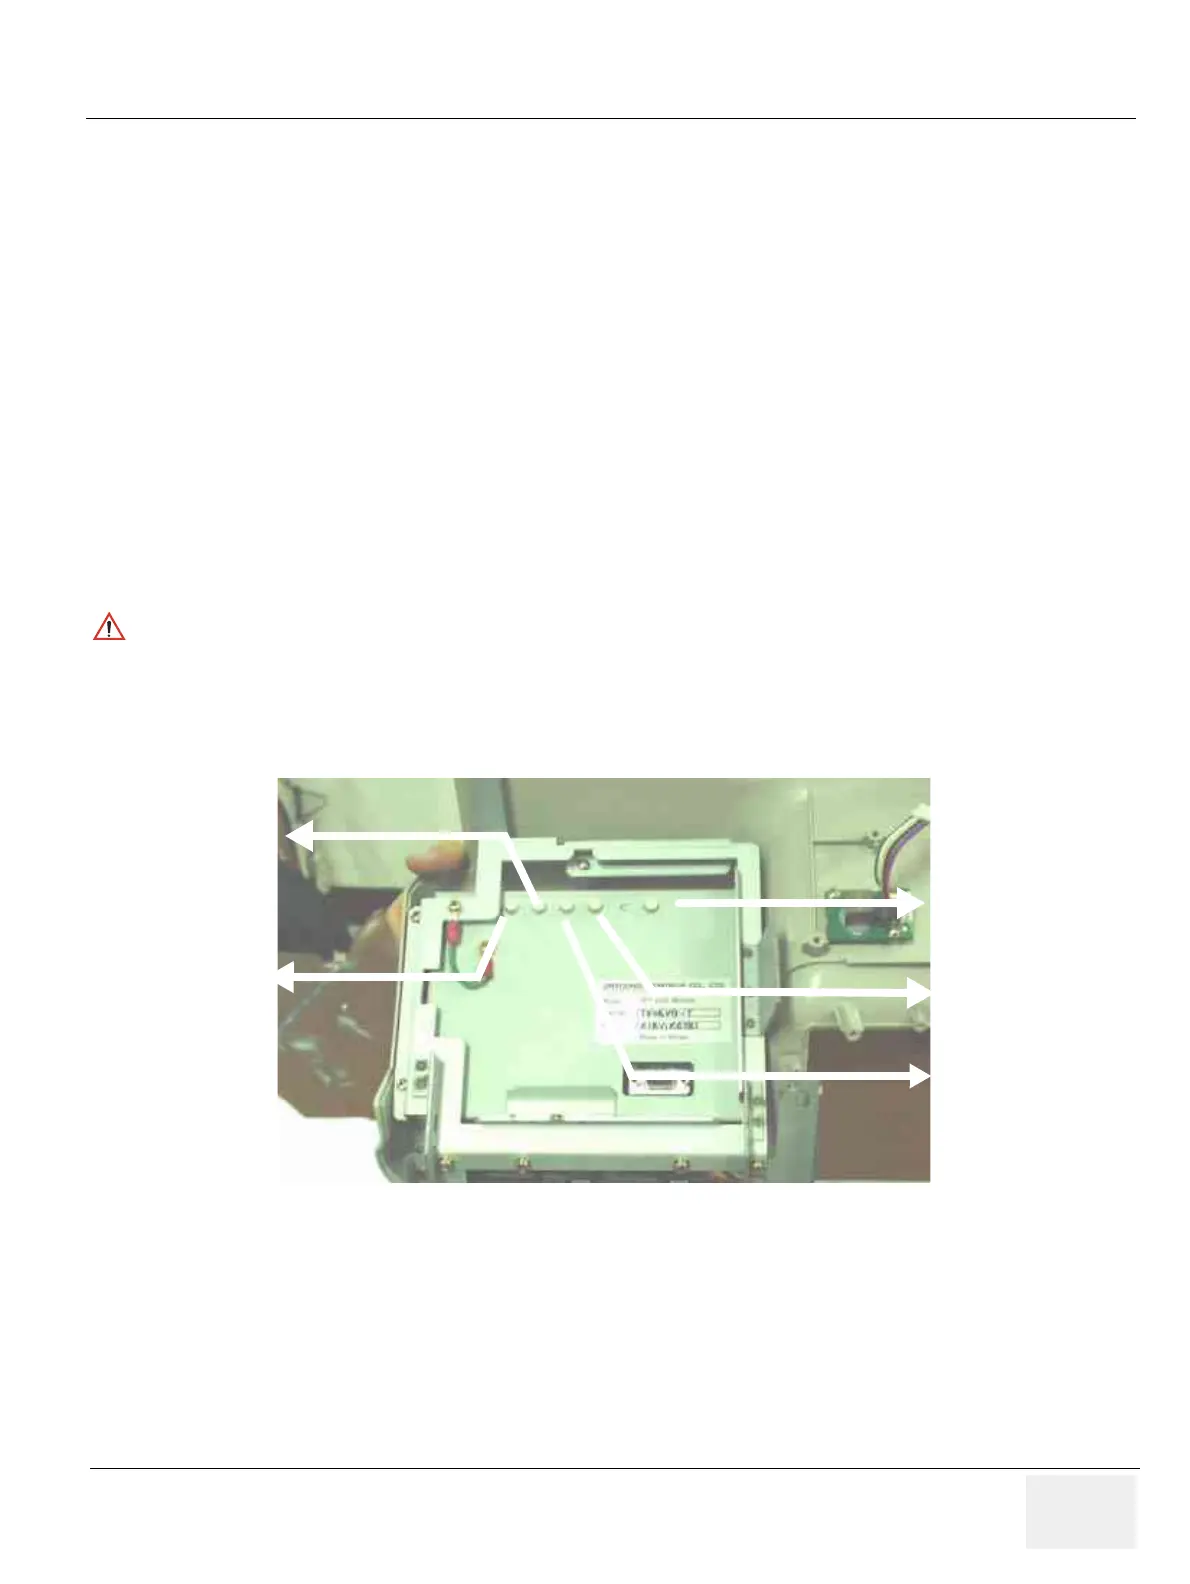
Figure 6-10 OSD Control
Power On/Off
OSD Menu Display
Menu Selection
Increase +
Move Right
Decrease -
Move Left
 Loading...


