General Procedures and Functional Checks
4-52 LOGIQ e – Basic Service Manual
5461614-100 English Rev. 6
Software Configuration Checks
Peripheral Checks
This section describes the final setup for the Peripherals and the
Operational Check-out. For Peripherals installation information,
See ‘Peripherals Installation’ on page 3-34 for more information.
Check that peripherals work as described below:
Color Printers
The Printers are controlled from the P2 on the system’s control
panel. The factory setting is P2 for the standard print.
Take Sony UP-D25MD Color Printer for an example to show the
control assignment procedure.
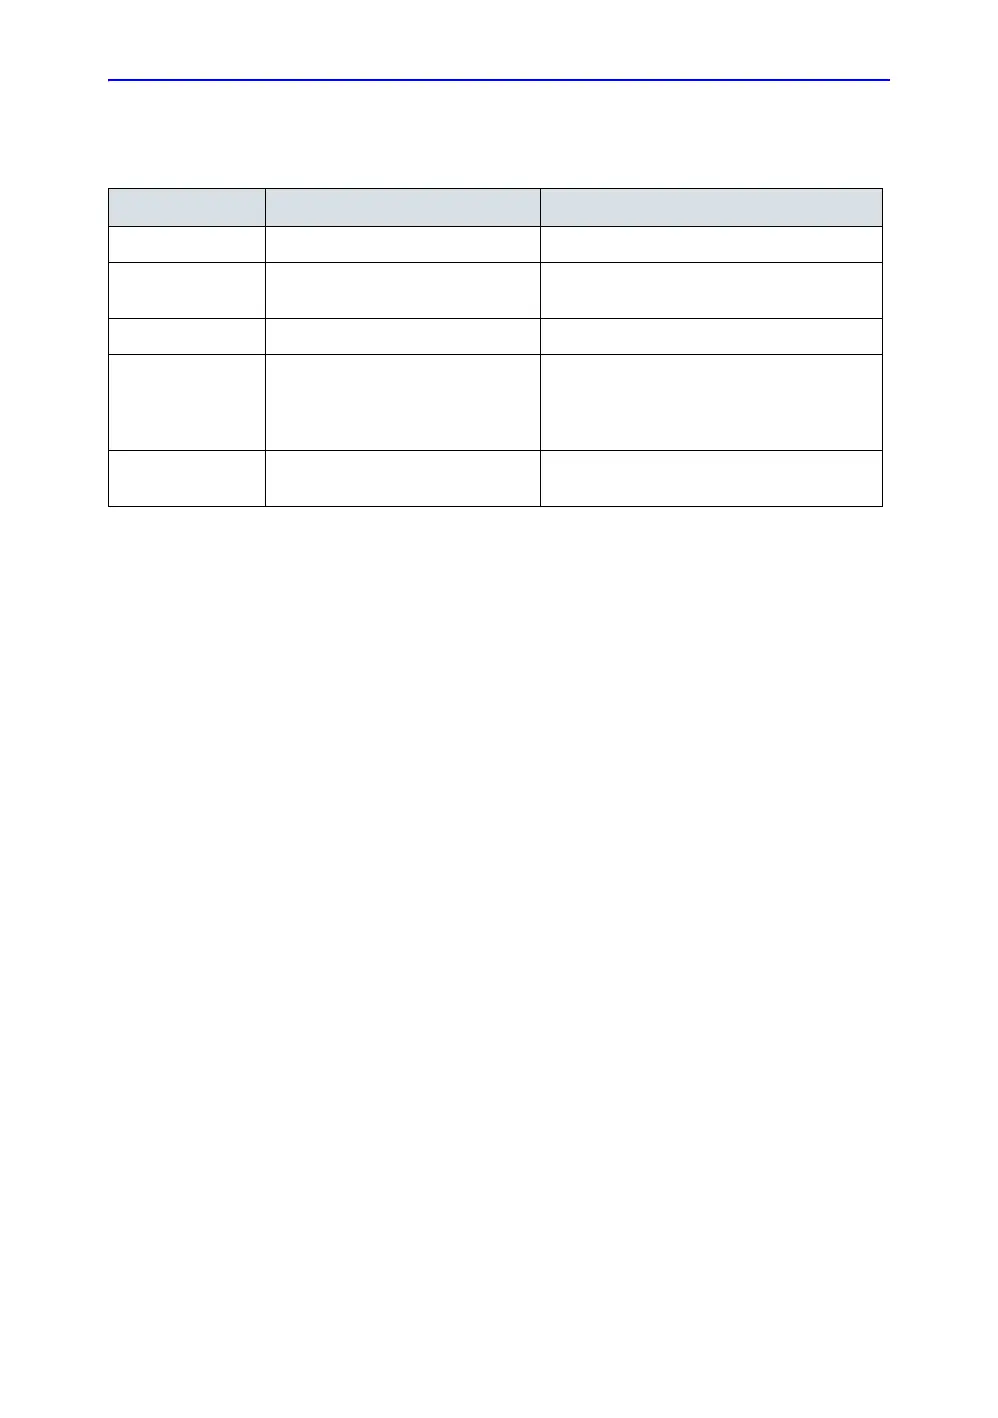
Table 4-10: Software Configuration Checks
Step Task to do Expected Result(s)
1. Check Date and Time setting Date and Time are correct
2. Check that Location (Hospital
Name) is correct
Location Name is correct
3. Check Language settings Desired Language is displayed
4. Check assignment of Printer Keys For LOGIQ e, the default function for Print1-3
Keys is P1 (store image); P2 (print); P3 (USB
Quick Save). Print1-3 Keys can also be
assigned as desired by the customer
5. Check that all of the customer’s
options are set up correct
All authorized functions are enabled

 Loading...


