Diagnostics/Troubleshooting
7-10 LOGIQ e – Basic Service Manual
5461614-100 English Rev. 6
Check and Record the P1 Key Function
Check the function of the Print1 Key in the event that the
customer may have made some custom settings.
1. Press Utility on the control panel.
2. Select Connectivity from the Utilities Menu.
3. Select the Button tab on the Connectivity screen.
4. In the Physical Print Buttons field, select Print1.
The Connectivity/Buttons Screen will be displayed.
If P1 is not set to Whole Screen, proceed to step 5 to record
the customer’s customized settings.
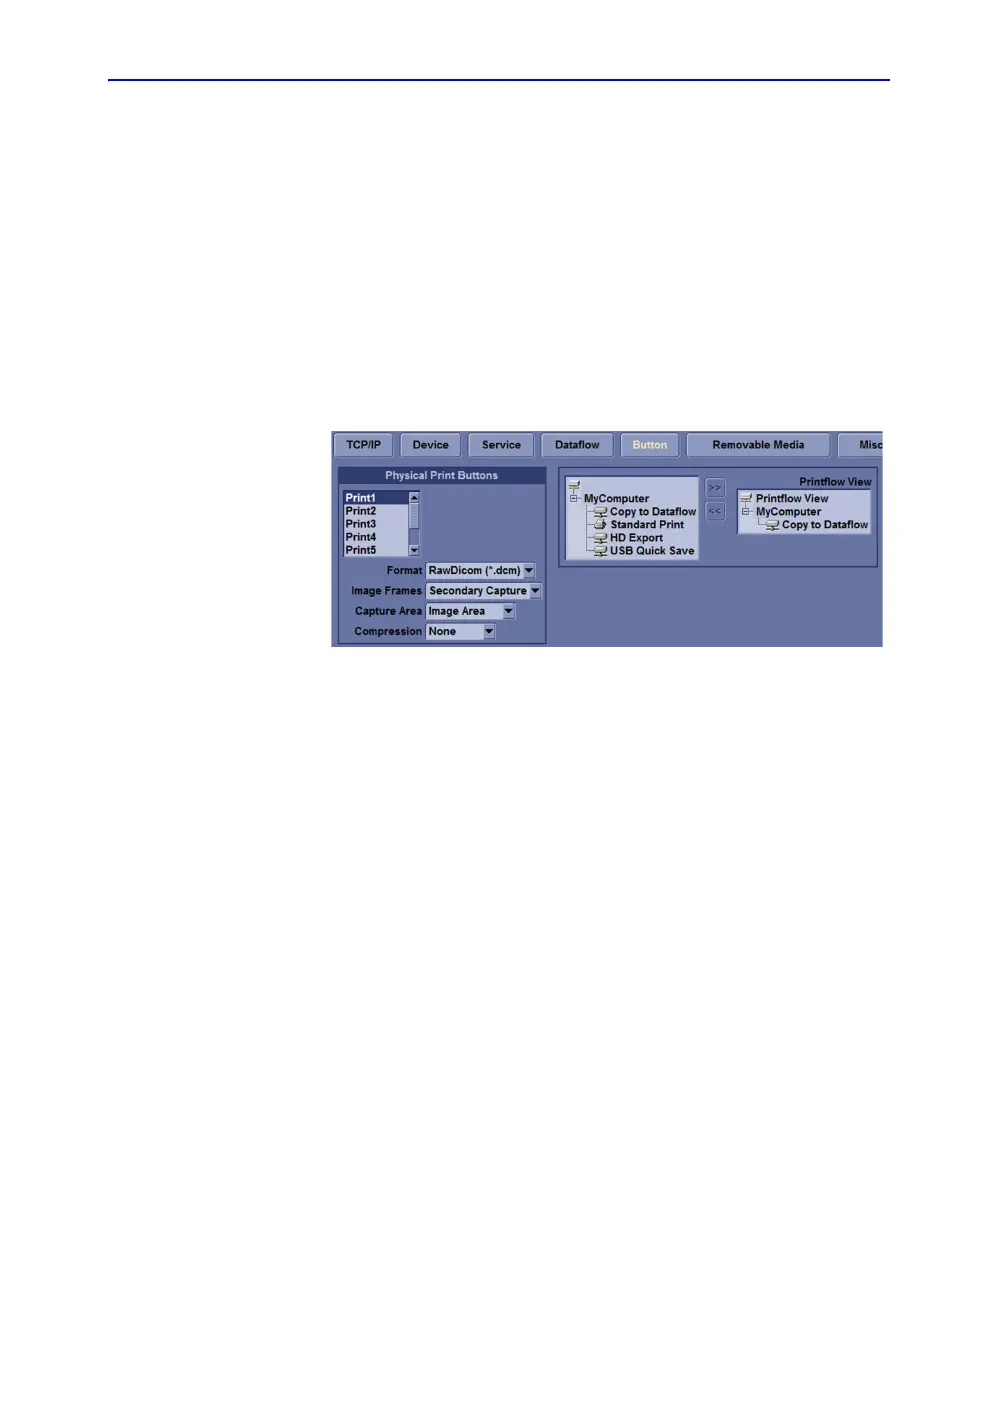
Figure 7-5. Connectivity/Button screen
5. In the Destinations section, record the service that is
displayed.
6. In the Physical Print Buttons section, record the
parameters related to the service.
Setting the P1 Key to Screen Capture
If the P1 Key is not set to screen capture:
1. While on the Connectivity screen, with the Buttons tab
displayed, go to the Destinations list.
2. From the list select Copy To Dataflow. Press [>>] to add
the selection to the Printflow View section.
3. Ensure that the Physical Print Buttons section for capture
Area is set to Whole Screen, secondary Capture and No
Image Compression.
4. The P1 Key should now be set up for whole screen capture,
sending the screens to the image buffer (clipboard).

 Loading...


