Diagnostics/Troubleshooting
7-12 LOGIQ e – Basic Service Manual
5461614-100 English Rev. 6
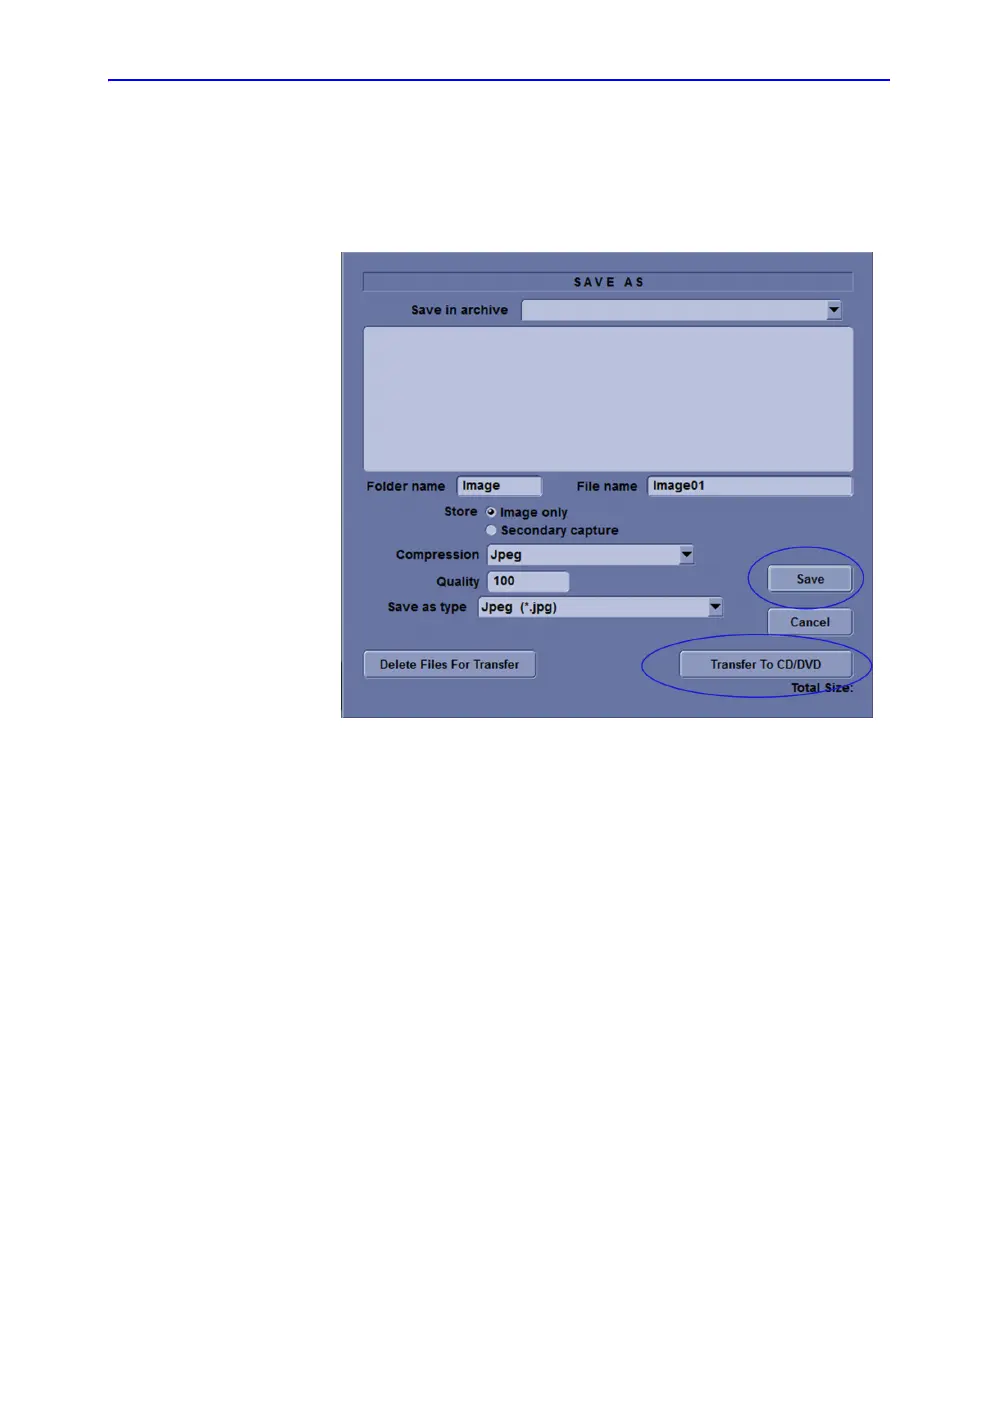
Capturing a Screen (continued)
6. A Save dialog box will be opened. Select Save first, and
Select Transfer to CD/DVD to save the image on the CD/
DVD
Figure 7-8. Save Dialog Box
Reset the P1 Key to Customer’s Functionality
If the customer had programmed the P3 Key to a function other
than screen capture, restore that functionality recorded in
section ‘Check and Record the P1 Key Function’ on page 7-10.
Refer to Figure 7-5 on page 7-10.
1. Select Utility on the control panel.
2. Select Connectivity -> Button.
3. In the Physical Print Buttons field, select Print1.
4. In the Destinations list, select the service(s) recorded in step
5, Section ‘Check and Record the P1 Key Function’ on
page 7-10.
5. In the Physical Print Buttons section, select the parameters
related to the service recorded in step 6, section ‘Check and
Record the P1 Key Function’ on page 7-10.

 Loading...


