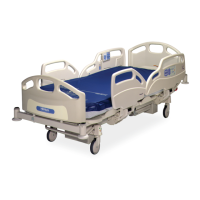
4.1 Sleep Deck
Chapter 4: Removal, Replacement, and Adjustment Procedures
CareAssist® and CareAssist® ES Bed Service Manual (MAN330 REV 4) Page 4 - 3
4
4.1 Sleep Deck
Tools required: #2 phillips head screwdriver
E-ring installation tool
10 mm wrench
Marking pen
Tape
Removal
1. Set the brakes.
2. Raise the head section to the high position.
3. Lower the knee and foot sections to the flat position.
Unplug the bed from its power source. Failure to do so could cause
personal injury or equipment damage.
4. Unplug the bed from its power source. Let the bed sit for 60 seconds for the
battery to time out.
5. For the foot section, grip the section (A) on either end and remove it from
the bed (see figure 4-1 on page 4-4).
6. For the thigh section, grip the section (B) on either end and remove it from
the bed.
7. For the seat section, perform the following:
a. Make sure the head section (D) is in the full up position.
b. Grip the seat section (C) on either end and remove it from the bed.
8. For beds equipped with bed exit, remove the tape switches (refer to
procedure 4.20).
9. For the head section (D), perform the following:
a. Using the CPR release, raise the head section (D) to the full up
position.
b. Remove the seat section (C).
c. Mark the CPR cables (G) as left or right for installation later.
 Loading...
