6.25
ENGINE
with Genuine Pure Polaris parts during assembly.
Refer General chapter for general inspection
procedures.
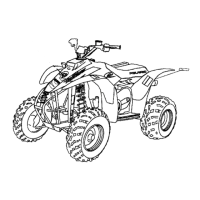
1. Remove the and disassemble engine
2. Remove the oil pump (1) and gasket (2).
3. Carefully pull out the brass bushing (3) and o-ring (4).
4. With the crankshaft installed, remove the impeller nut (5)
and washer (6).
5. Remove the impeller (7) and flat washer (8).
6. Remove the cross shaft (9) by hitting the shaft from the
waterpower side with a rubber hammer.
7. Press out the water pump shaft (10) out toward the oil
pump side.
8. Remove the mechanical water pump seal (11).
9. Pry out the seal (12) that is behind the mechanical seal.
10. Remove the thrust washers from the shaft (13).
500/600 LIBERTY WATER/OIL PUMP CROSS
SHAFT ASSEMBLY
1. Install the seal (8) into the case.
2. Insert the cross shaft (6) with the thrust washers (5,7) into
the case from the intake side.
3. Install the flanged pump bearing (3) with the o-ring (4) on
to the cross shaft.
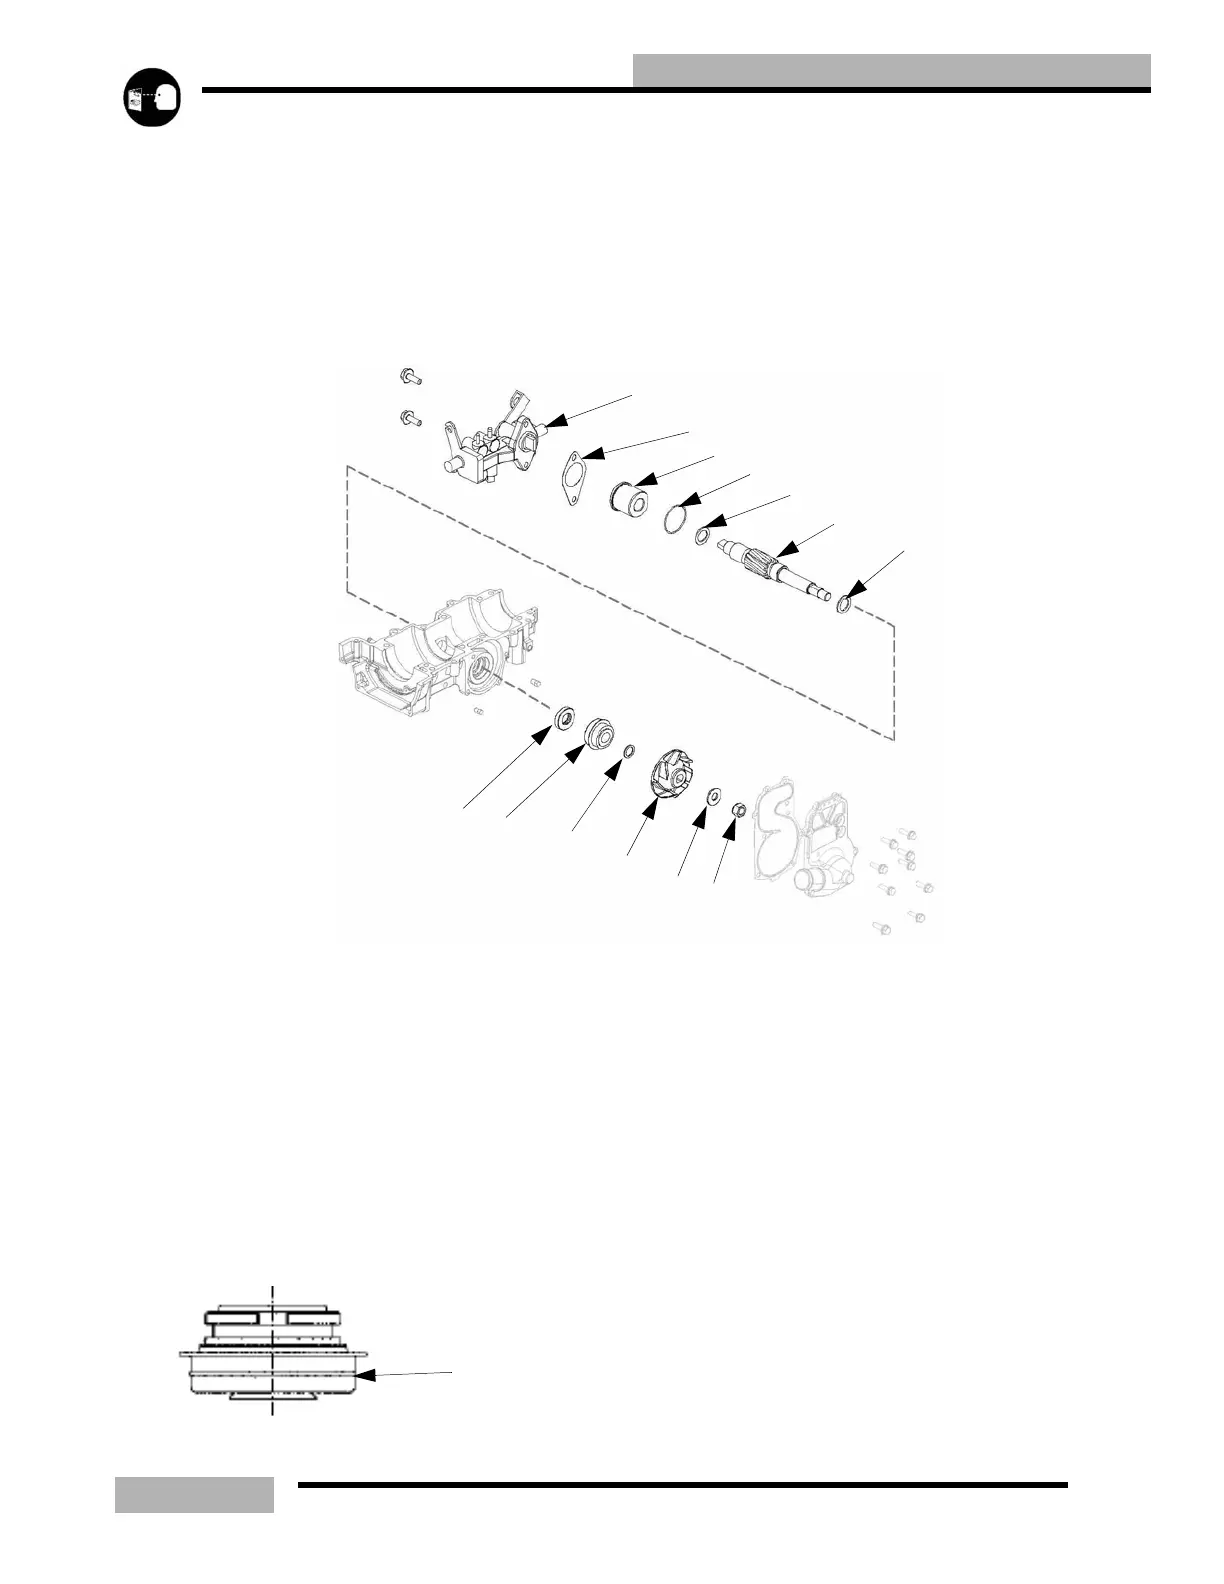
4. Install the water pump mechanical seal (9). Use water
pump seal installation tool PN 2872010 and press it into
the case. Make sure that the sealant on the seal is facing
toward the crankcase.
5. Install oil pump (1) with the gasket (2) onto the crankcase
and torque the bolts to 84 in-lb (31Nm).
6. Place the flat washer (10), impeller (11), washer (12) and
impeller nut (13) onto the other side of the cross shaft.
7. Torque the impeller nut (13) to 120 in-lb (44Nm).
600 LIBERTY CYLINDER STUD
INSTALLATION
If you are replacing the small block crankcase, the new case
will come with the studs loose, you will need to assemble the
cylinder studs to a determined length.
You will need to thread in the Dri-Lok treated portion of the
stud into the case. After stud assembly remove the Dri-Lok
residue from the case assembly before assembly.
1
2
3
4
5
6
7
8
9
10
11
12
13
120(13.6)
Sealant
Case side
Cover side

 Loading...