7.19
CLUTCHING
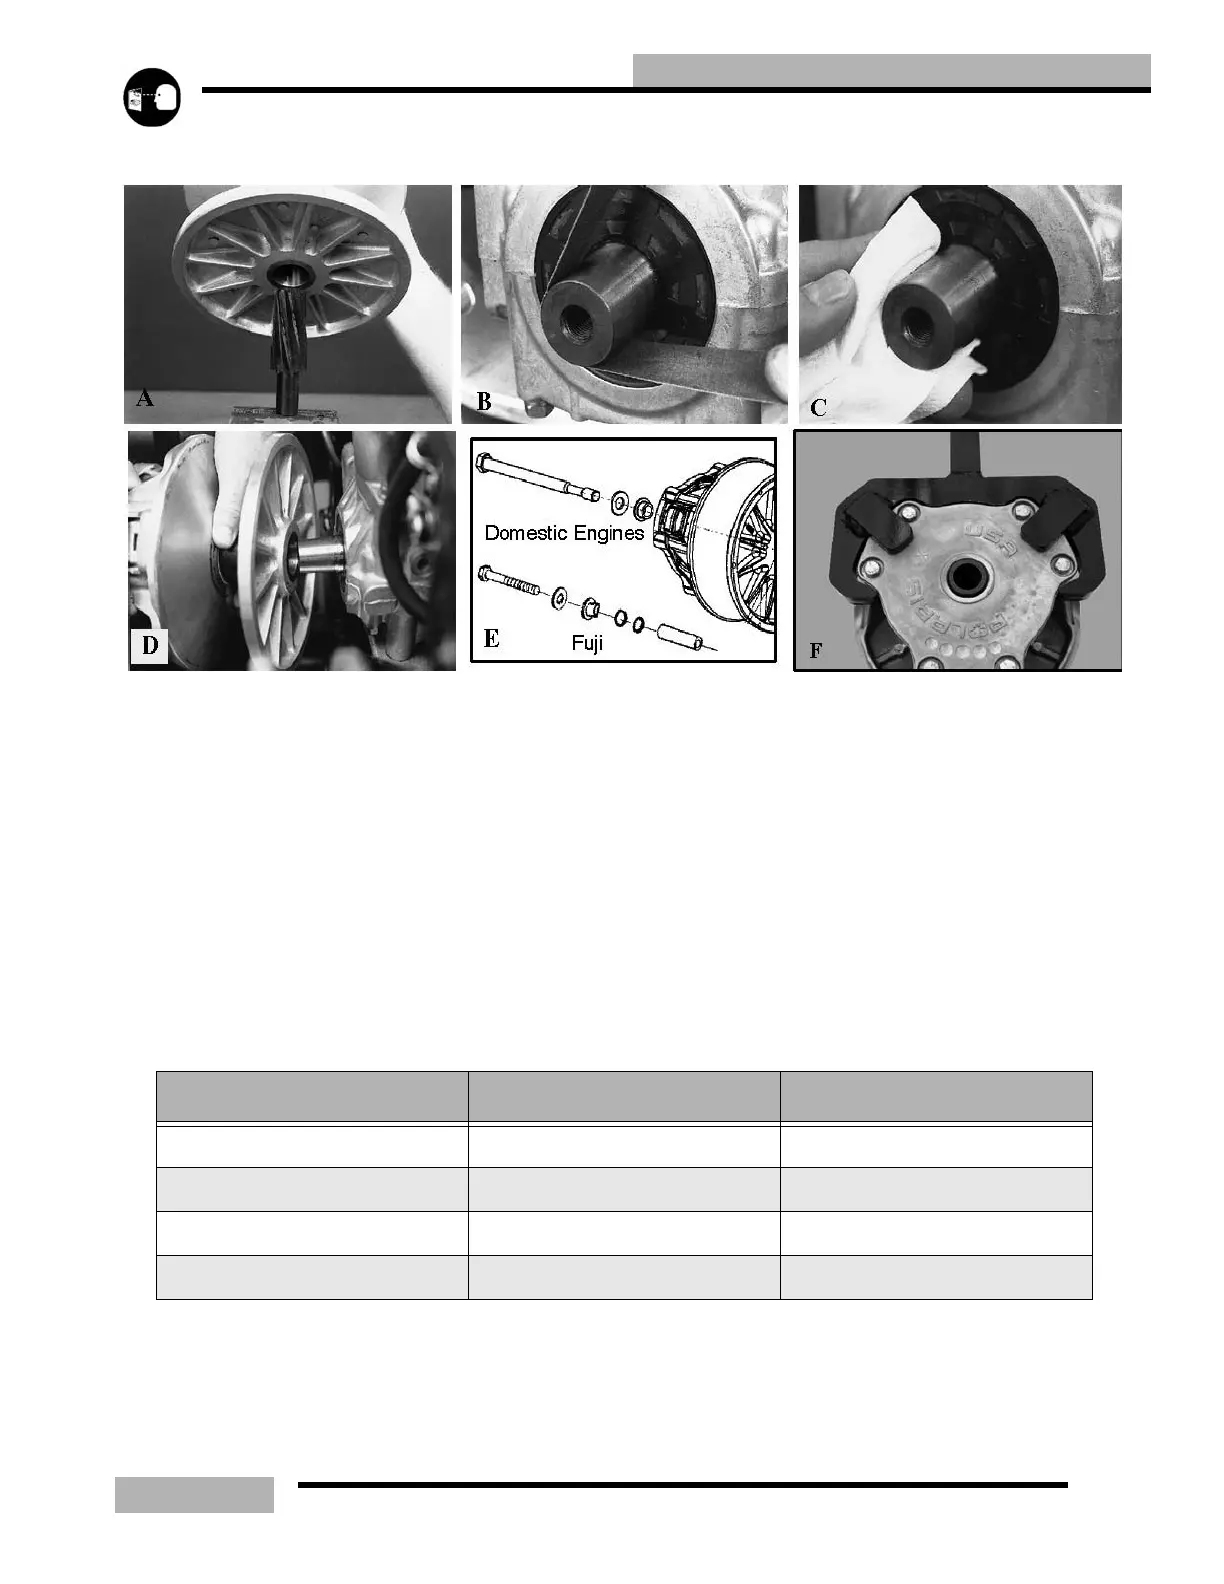
DRIVE CLUTCH INSTALLATION
NOTE: Always clean the clutch taper before re-
installing clutch on engine.
1. Place a clutch taper reamer (PN 2870576) in a vise (A) and
lubricate the cutting edges with cutting oil. Clean the
clutch taper by manually rotating the clutch clockwise on
the reamer one or two revolutions. Only use the weight of
the clutch and do not push down on the clutch while
turning. This will clean up any galling or scoring of the
bore taper.
2. Check crankshaft taper for galling or scoring. If necessary
clean the taper evenly with 200 grit emery cloth (B).
3. The clutch taper and the crankshaft taper should be clean
and dry. Do not use harsh cleaners which may cause clutch
taper to corrode, or damage to the crank seal. This may
cause difficulty when removing clutch in the future.
4. Clean clutch taper with lacquer thinner or isopropyl
alcohol (C).
5. Slide clutch fully onto crankshaft taper (D).
6. Install the retaining bolt with all spacers and washers or o-
rings (E) that were on the bolt when it was removed.
7. Hold the clutch with the holding wrench (F) PN 931417-
A. Re-check torque after first operation or test ride.
8. Torque retaining bolt to specification see Table 7-8.
9. Run engine then re-torque the retaining bolt to
specification.
Table 7-8: Drive Clutch Bolt Torque
ENGINE BOLT TORQUE
Fuji 340/500/550 7/16” - 20 40-45 ft-lb (55-62Nm)
Liberty 440/500/600 14 mm 50 ft-lb (68Nm)
Liberty 700 / 900 14mm 96 ft-lb
FS/FST 14mm 50 ft-lb (68Nm)

 Loading...