7.25
CLUTCHING
DRIVE SYSTEM ADJUSTMENTS
CLUTCH ALIGNMENT
The engine is mounted into the bulk head so that when the
torque of the belt is under power it, will produce clutches that
are aligned.
CLUTCH ALIGNMENT INSPECTION
1. Remove drive belt, See “DRIVE BELT REMOVAL
WITH TEAM CLUTCH” on page 7.5
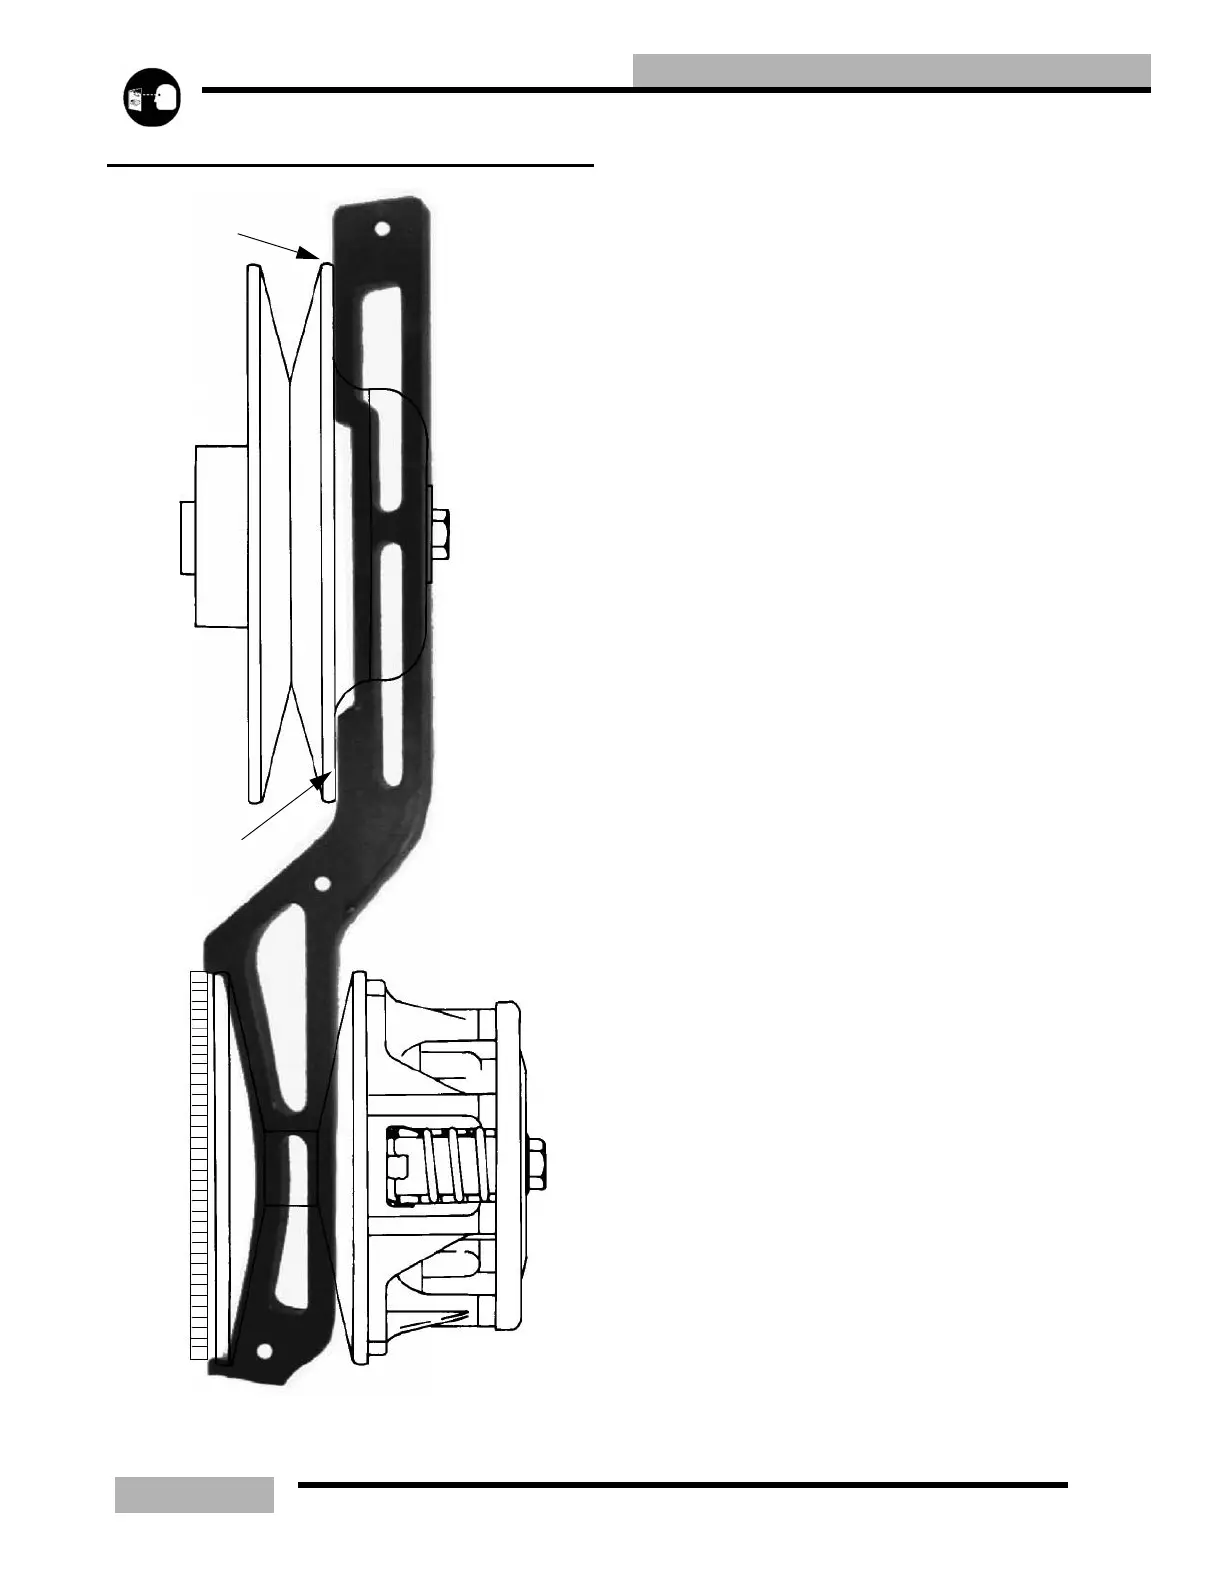
2. Install alignment tool PN PS-46998.
3. Ideal set up would be that both front and rear portions of
the clutch would be touching. If any gap is present it
should not exceed .060" (3mm) at the rear and .025”
(.63mm).
CLUTCH ALIGNMENT ADJUSTMENT
1. Loosen engine mounting bolts.
2. Adjust the engine torque stop until the clutches are in
proper alignment.
3. Tighten engine mounts securely.
4. Re-check both clutch offset and clutch alignment.
5. Verify proper torque stop adjustment. See “TORQUE
STOP” on page 3.24
CLUTCH OFFSET
Clutch off set is a combination of engine mounting, clutch
sheave angles, clutch diameters and casting thickness. These
are built into the alignment tool PN PS-46998.
OFF SET ADJUSTMENT
1. Determine direction driven clutch needs to be adjusted.
(Refer to Clutch Offset Inspection procedure above).
2. Remove driven clutch retaining bolt, and remove driven
clutch.
3. Add or take out washers on jackshaft between the driven
clutch and jackshaft bearing to achieve proper offset.
4. Most models require the driven clutch to float on the
jackshaft. After adjusting offset, add or remove shim
washers from the retaining bolt to provide a +/- 0.030”
(.75mm) of float on the jackshaft.
0 - .060”
0 - .025”
CLUTCH ALINGMENT TOOL

 Loading...