7.6
CLUTCHING
DRIVE BELT REMOVAL WITH POLARIS
DRIVEN CLUTCH
To ensure belt life, install belts so they operate in the same
direction of rotation. Position the identification numbers so
that you can read them standing on left side of machine. This
will keep the belt rotating in the same direction. If belt has
been operated with numbers readable from right side of
machine, re-install belt in this direction.
Before attempting to remove the drive belt, make certain that
the snowmobile was in forward motion. Turn the key off so
that the engine has come to a complete stop.
1. Remove the clutch guard retaining pin and open the clutch
guard.
2. Apply and lock the parking brake.
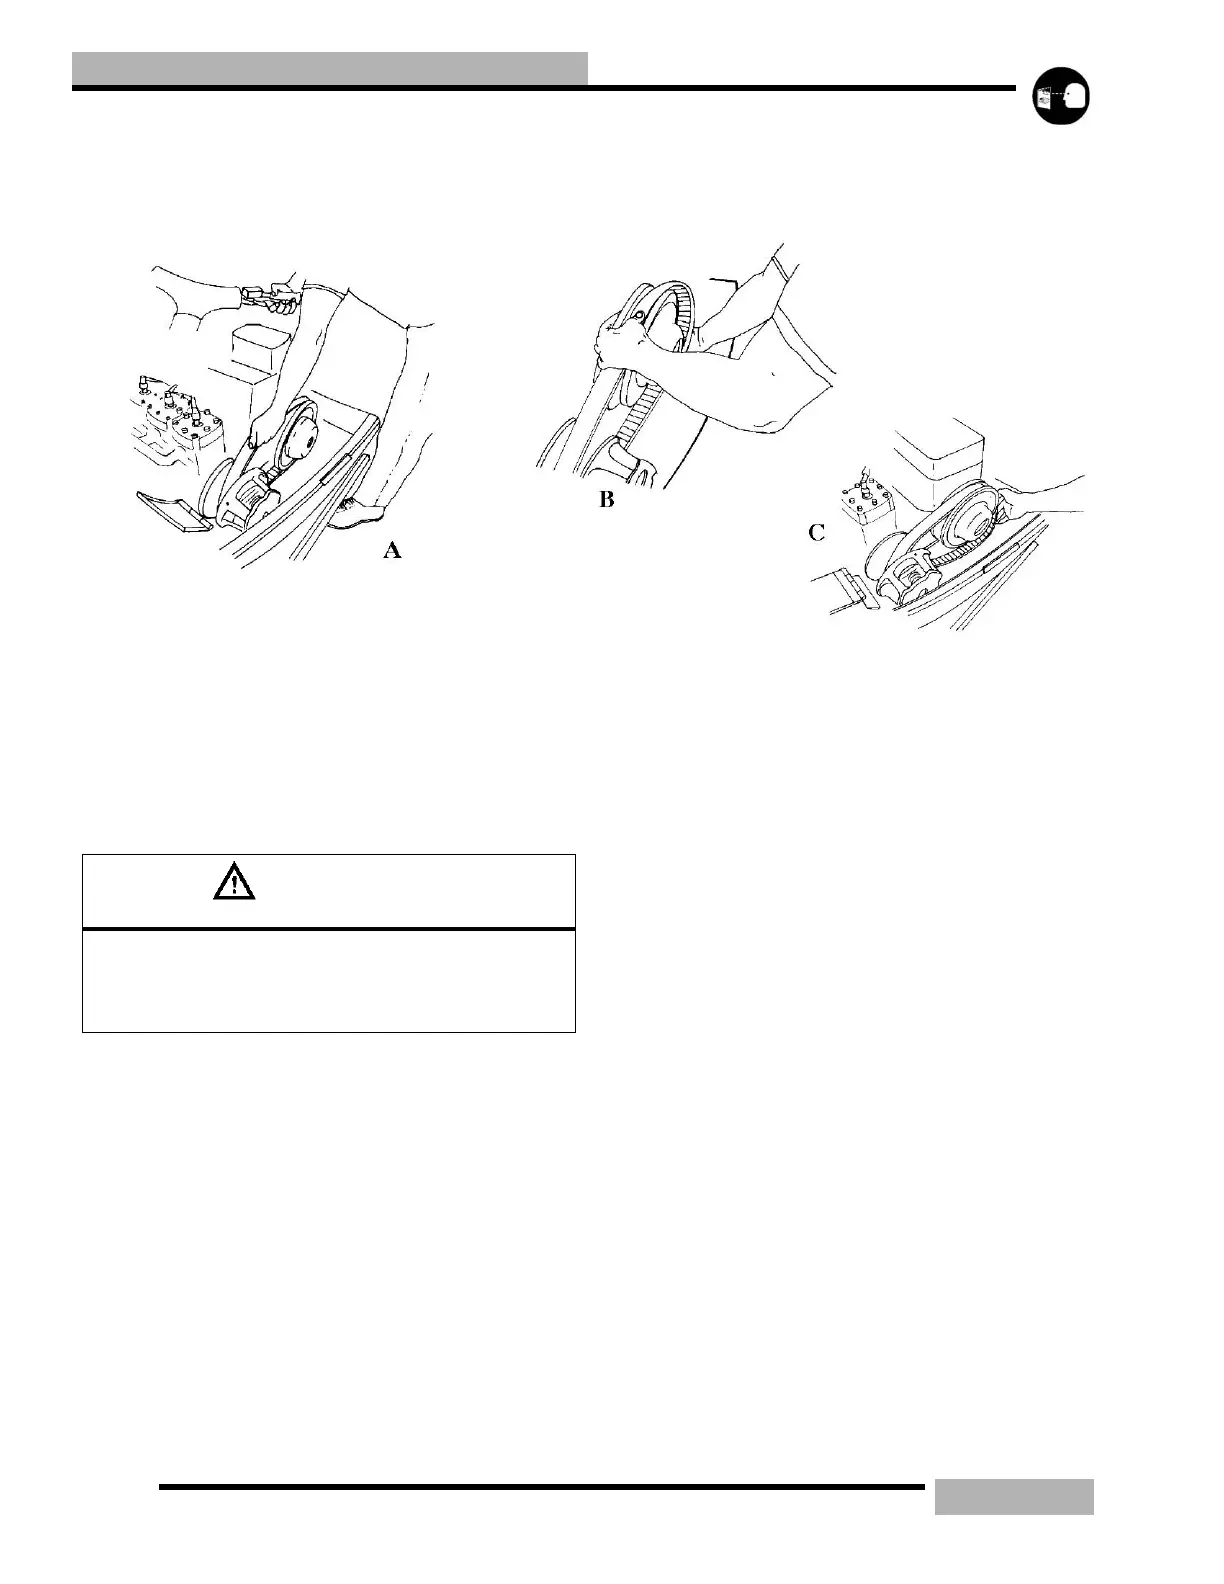
3. Grasp belt firmly midway between clutches and pull
upward and rearward to open the driven clutch sheaves
(A). Remove the belt from the driven clutch and then from
the drive clutch (B, C).
4. Release the parking brake.
BELT INSTALLATION (POLARIS DRIVEN
CLUTCH)
1. Drop the drive belt over the drive clutch and pull back the
slack (C).
2. Turn the driven clutch moveable sheave clockwise while
at the same time pushing inward and forcing the belt down
between the sheaves.
3. Hold the belt down between the sheaves and roll the
bottom portion over the outer clutch sheave. Once
installed, be sure to work the belt to the outer edge of the
sheave.
4. Be sure to release parking brake if applied.
5. Close the clutch guard and reinstall the retaining pin.
WARNING
Inspect the condition of the drive belt and clutch
sheaves for damage wear, or belt residue during pre-
ride inspections. Clean with a non-oil base cleaner
such as isopropyl alcohol

 Loading...