8.15
FINAL DRIVE
21. Remove angle drive housing, adaptor key, flangette,
gasket, and bearing from drive shaft and tunnel.
NOTE: It is not necessary to remove speedometer
cable from angle drive. Replace adaptor key any time
drive train assembly is serviced.
22. Tip machine back onto floor.
23. Remove bolt retaining rear of bumper to foot rest.
24. Bend muffler mount out of the way to allow transmission
removal.
25. Remove three transmission retaining bolts. Note all
alignment shim quantities and locations for reassembly.
NOTE: Retaining bolts have to be held in place from
underside while removing nuts. The lower front bolt
cannot be removed at this time. It must be lowered to
the drive sprocket.
26. Lift and maneuver transmission to free drive shaft coupler.
27. Lower drive shaft and remove lower front bolt.
28. Maneuver transmission until it can be removed from the
unit. Use care not to damage coolant lines.
29. With transmission removed, tip unit onto right side. Notice
direction of track rotation for reassembly. The arrow in the
photo at right indicates track bottom, rear of unit.
30. Remove front and rear carrier shafts.
31. Remove suspension by pulling rear of track out of tunnel.
Slide suspension forward to driveshaft. Lift up and out at
the rear.
NOTE: NOTE: On some models it may be necessary
to unhook rear torque arm springs to allow torque
arm to lower.
32. Inspect transmission, brakes, suspension and track for
excessive wear. Check bearings for excessive movement
or rough feeling. Replace if necessary.
INSPECTION
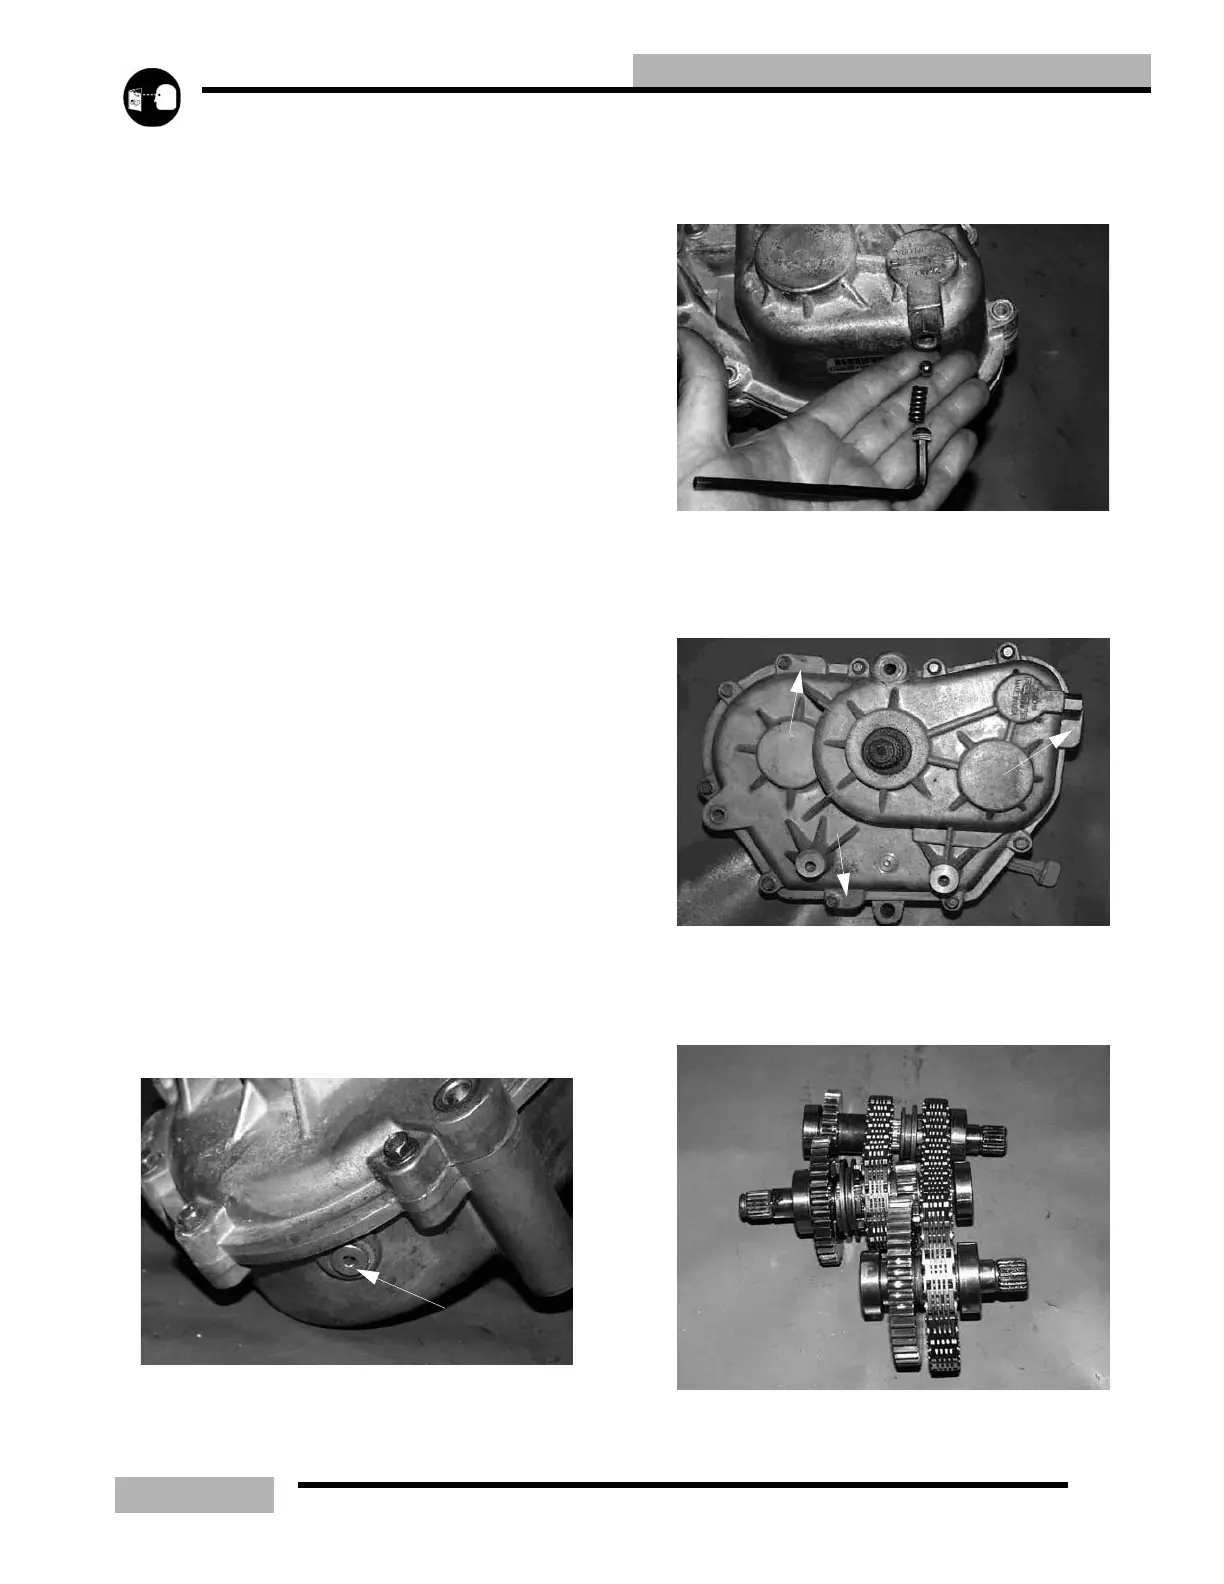
1. Remove drain plug (1) and drain transmission oil into
suitable container.
2. Remove snap ring, spacer washer, and brake disc.
NOTE: Note position of spacer washers behind disc
for proper alignment upon reassembly.
3. Remove detente spring and ball.
4. Remove case bolts evenly in a criss-cross pattern.
5. Tap cases apart with soft faced hammer in the reinforced
areas (2). Tap end of brake shaft to be sure it remains in
case.
6. Remove shift arm.
7. Remove shaft and gear assembly (6) from case by tapping
with a soft faced hammer evenly on end of shafts.
1
5
6

 Loading...