If you want to manually start the recording using a function key, you can assign the keys with S (switchover)
or P (trigger pulse).
Siemens recommends to preferably use the setting P (trigger pulse), also see 7.2.3 Function Description).
Recording is started by pressing the routed function key on the operation panel and the activated recorder
records the current signal profile.
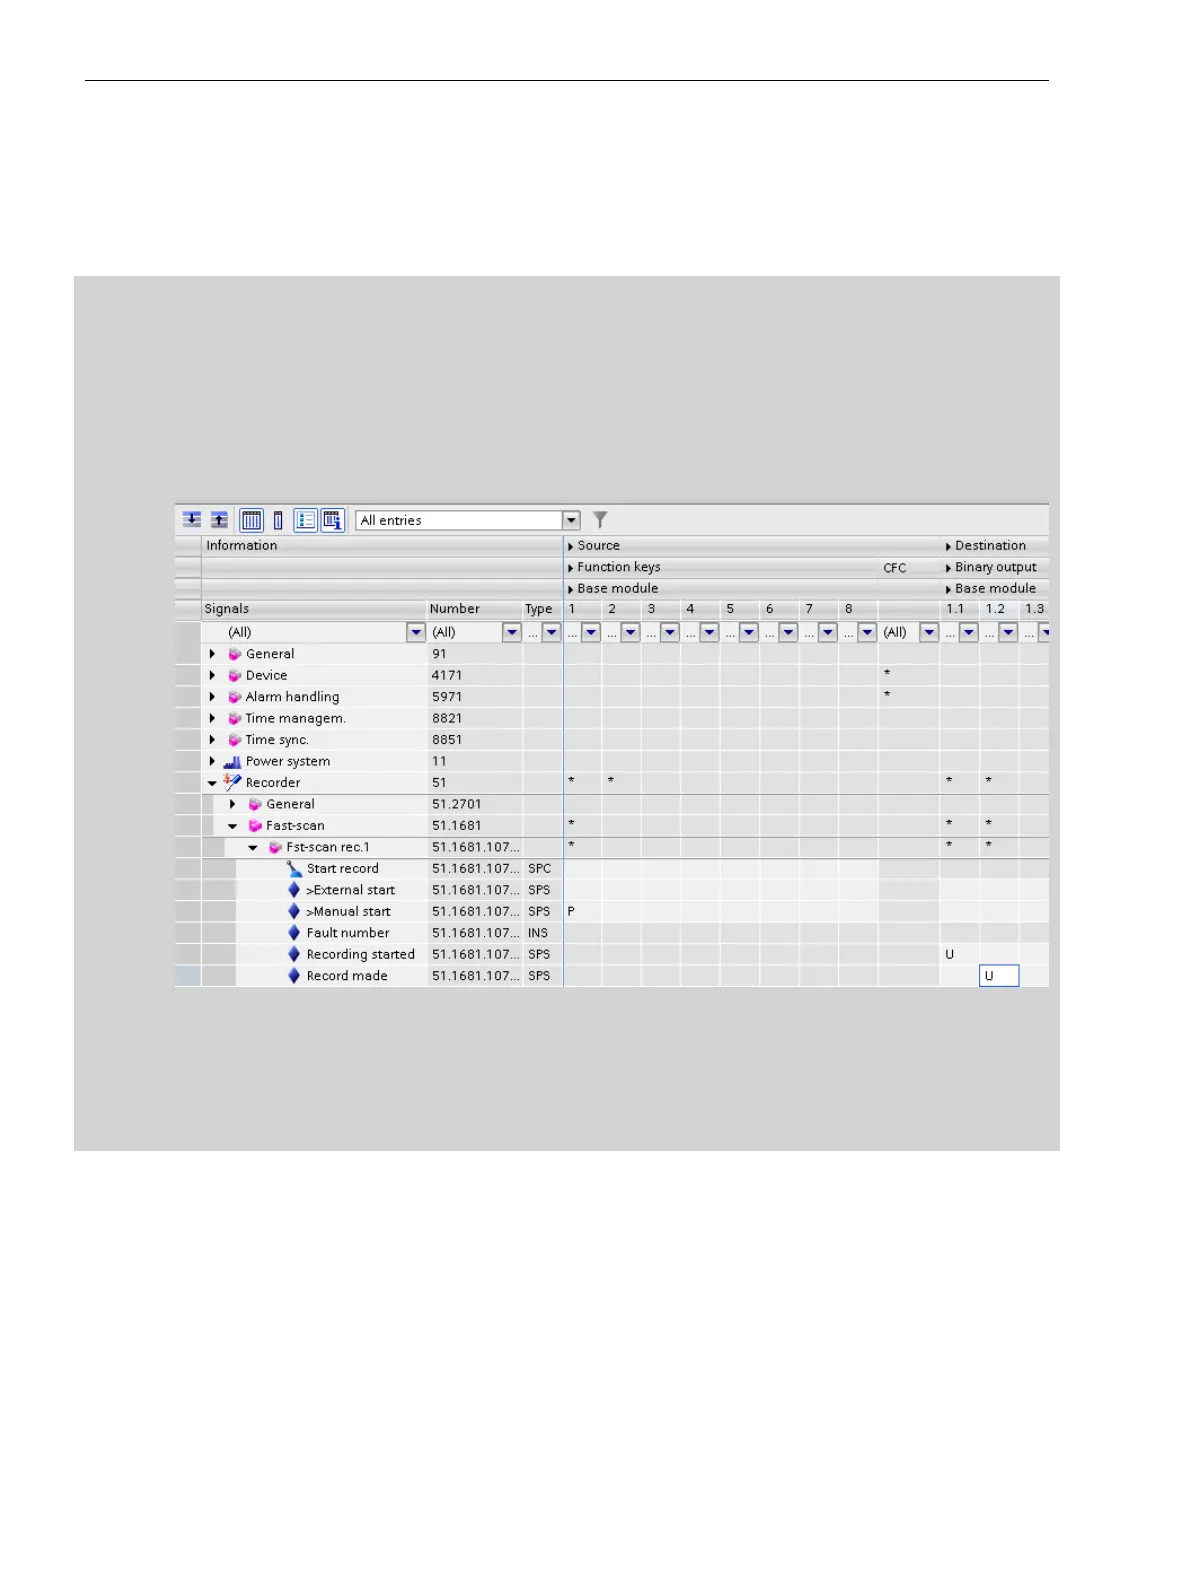
EXAMPLE of Setting the Manual Trigger
•
Open the information routing
•
Open the function group Recording-> Function Fast-scan recorder.-> Function block Fst-scan rec..
Route the signal
>Manual start
.
•
For example, set the trigger pulse (P) in the tab Function keys to the function key F1. Then route the
signals
Recording started
and
Recording ended
to LED1 and LED2.
This is already the default in the application template.
[schanddi-280113-01.tif, 1, en_US]
Figure 7-47 Routing the Signal >Manual Start
The assignments for the function key and the LEDs are completed with these steps.
•
The signal
Recording started
lights up as long as the recording is running.
The signal
Recording finished
lights briefly after the recording is finished.
Manual Trigger Tripping by DIGSI 5
You can start the manual trigger tripping from the DIGSI 5 interface by proceeding as follows in your project:
•
Place the mouse cursor on your project and right-click Connect with Device.
•
Next, go to the project tree and open the Online access tab.
•
Click 7KE85 (assigned).
•
Click Fast and slow-scan fault records.
•
In the menu bar, click Start fault records.
•
A dialog window opens: Select the relevant fault records (Fast Scan, Slow Scan).
•
The fault records can now be displayed in SIGRA.
Fault Recorder
7.3 Function Description Analog and Binary Triggers
266 SIPROTEC 5, Fault Recorder, Manual
C53000-G5040-C018-5, Edition 11.2017

 Loading...