P
r
o
t
e
c
t
e
d
b
y
c
o
p
y
r
i
g
h
t
.
C
o
p
y
i
n
g
f
o
r
p
r
i
v
a
t
e
o
r
c
o
m
m
e
r
c
i
a
l
p
u
r
p
o
s
e
s
,
i
n
p
a
r
t
o
r
i
n
w
h
o
l
e
,
i
s
n
o
t
p
e
r
m
i
t
t
e
d
u
n
l
e
s
s
a
u
t
h
o
r
i
s
e
d
b
y
V
o
l
k
s
w
a
g
e
n
A
G
.
V
o
l
k
s
w
a
g
e
n
A
G
d
o
e
s
n
o
t
g
u
a
r
a
n
t
e
e
o
r
a
c
c
e
p
t
a
n
y
l
i
a
b
i
l
i
t
y
w
i
t
h
r
e
s
p
e
c
t
t
o
t
h
e
c
o
r
r
e
c
t
n
e
s
s
o
f
i
n
f
o
r
m
a
t
i
o
n
i
n
t
h
i
s
d
o
c
u
m
e
n
t
.
C
o
p
y
r
i
g
h
t
b
y
V
o
l
k
s
w
a
g
e
n
A
G
.
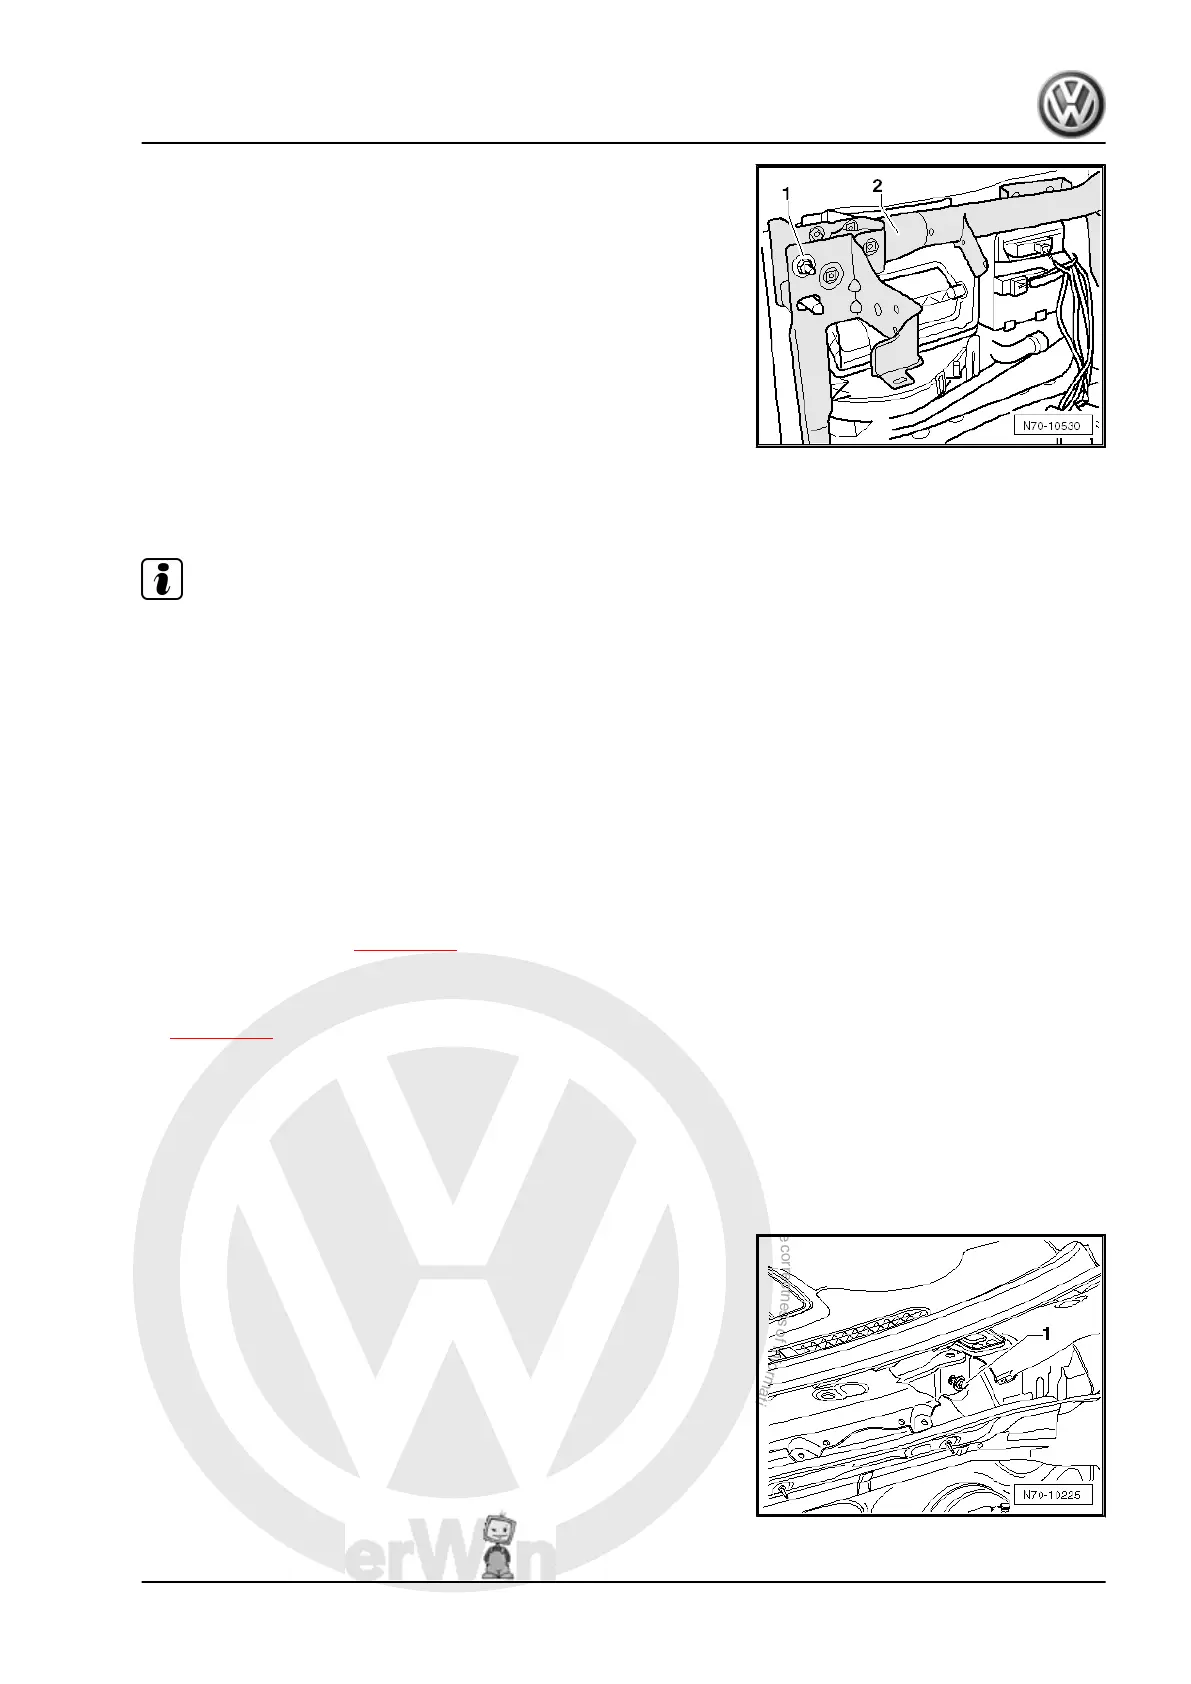
– Unscrew nut -1- on front passenger side (20 Nm).
– Release wiring harness fasteners, depending on vehicle
equipment level, from cross member.
– With aid of second mechanic, carefully lift cross member -2-
out of vehicle.
1.3.2 Installing
– Install in reverse order of removal.
Note
Before securing cross member, align member using marks made
during removal.
1.4 Removing and installing dash panel
cross member (LHD models)
If you release or remove and install electrical cables, produce
sketches or take photos. This guarantees installation in the orig‐
inal position.
1.4.1 Removing
– Disconnect vehicle battery ⇒ Electrical system; Rep. Gr. 27 ;
Disconnecting and reconnecting battery .
– Remove dash panel ⇒ page 183 .
Golf 2009 ▸
– Remove knee airbag bracket (Golf 2009 ▸) RHD models
⇒ page 132
All vehicles
– Remove wiper arms ⇒ Electrical system; Rep. Gr. 92 ; Wind‐
screen wiper system; Removing and installing windscreen
wiper system; Removing wiper arms .
– Remove plenum chamber cover ⇒ General body repairs, ex‐
terior; Rep. Gr. 50 ; Plenum chamber cover; Removing ple‐
num chamber cover .
– Unscrew bolt -1- in plenum chamber (20 Nm).
– Press out the two spreader pins -3- upwards.
Golf 2004 ➤ , Golf 2009 ➤
General body repairs, interior - Edition 05.2010
1. Dash panel 195
 Loading...