P
r
o
t
e
c
t
e
d
b
y
c
o
p
y
r
i
g
h
t
.
C
o
p
y
i
n
g
f
o
r
p
r
i
v
a
t
e
o
r
c
o
m
m
e
r
c
i
a
l
p
u
r
p
o
s
e
s
,
i
n
p
a
r
t
o
r
i
n
w
h
o
l
e
,
i
s
n
o
t
p
e
r
m
i
t
t
e
d
u
n
l
e
s
s
a
u
t
h
o
r
i
s
e
d
b
y
V
o
l
k
s
w
a
g
e
n
A
G
.
V
o
l
k
s
w
a
g
e
n
A
G
d
o
e
s
n
o
t
g
u
a
r
a
n
t
e
e
o
r
a
c
c
e
p
t
a
n
y
l
i
a
b
i
l
i
t
y
w
i
t
h
r
e
s
p
e
c
t
t
o
t
h
e
c
o
r
r
e
c
t
n
e
s
s
o
f
i
n
f
o
r
m
a
t
i
o
n
i
n
t
h
i
s
d
o
c
u
m
e
n
t
.
C
o
p
y
r
i
g
h
t
b
y
V
o
l
k
s
w
a
g
e
n
A
G
.
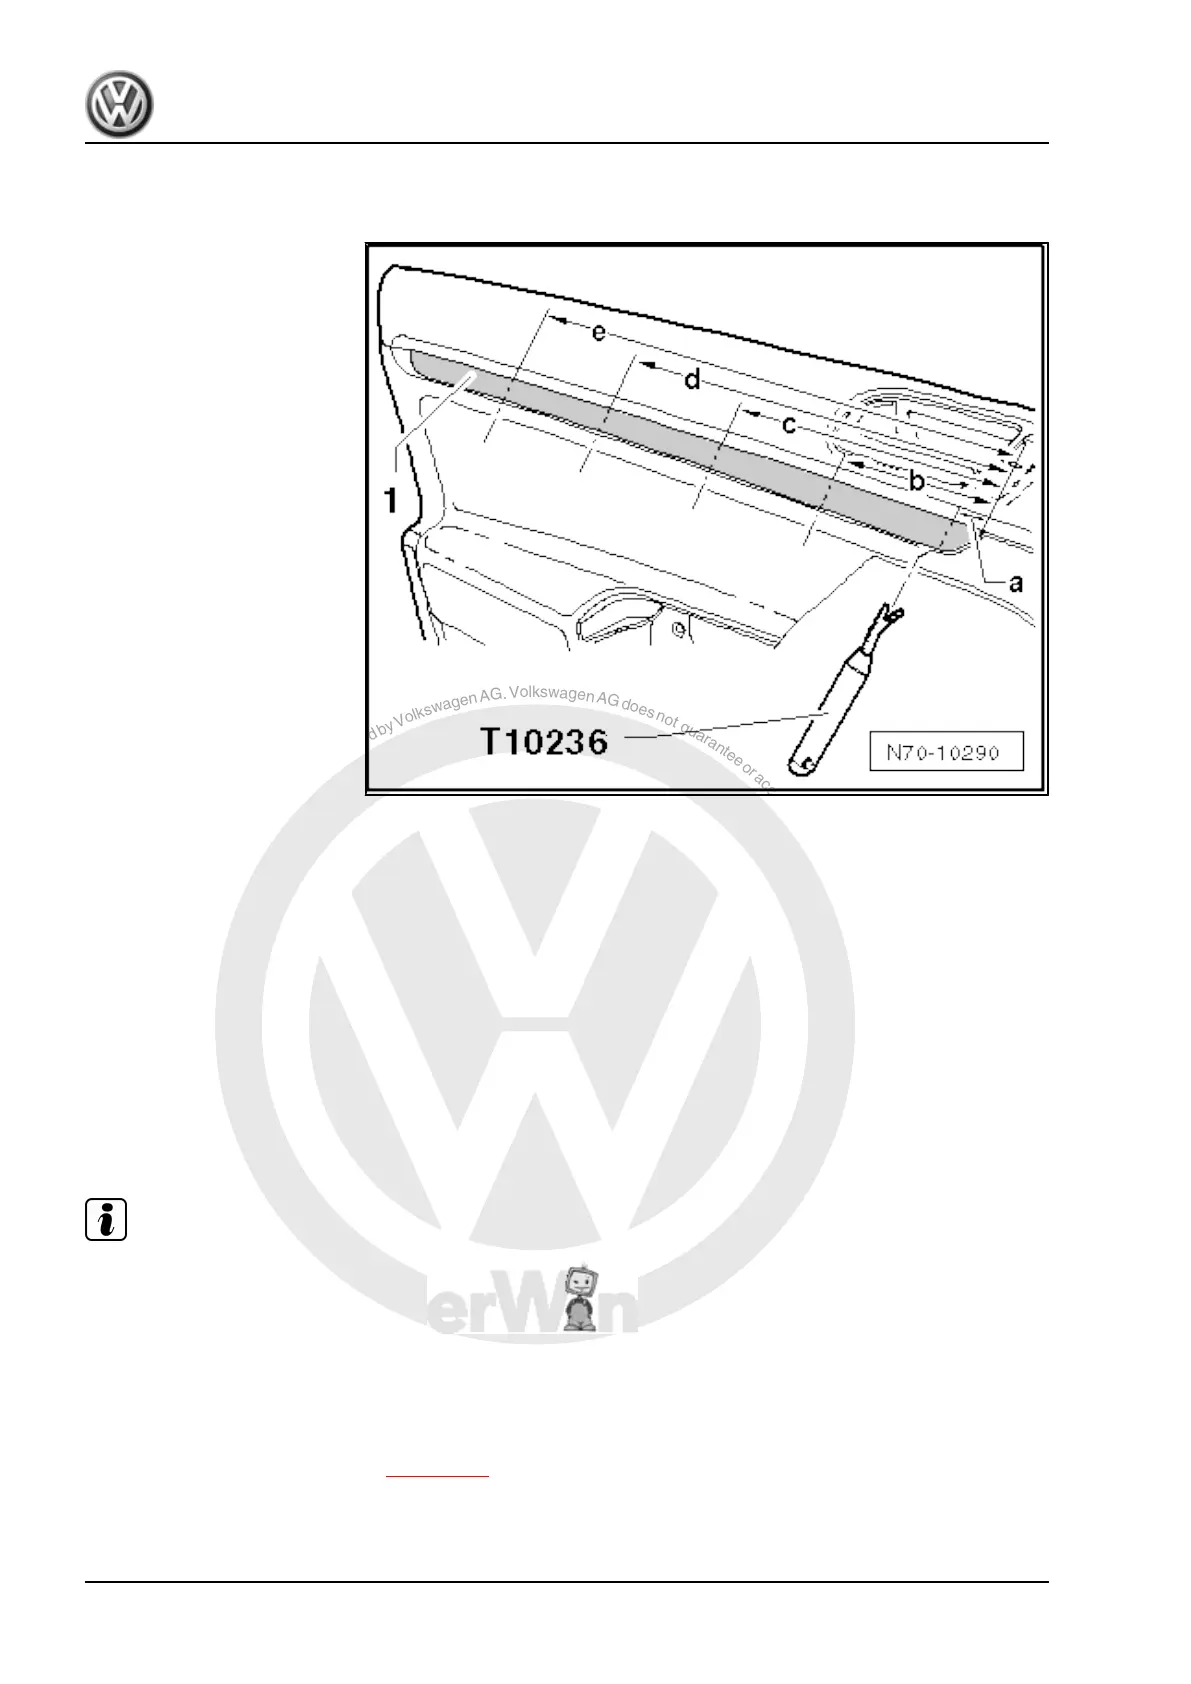
– Carefully lever trim strip -1- out of mountings 24 mm from front
edge -dimension a- using release tool -T10236- .
– Lever trim strip out of remaining mountings as described. Di‐
mensions:
♦ -Dimension b = 120 mm-
♦ -Dimension c = 230 mm-
♦ -Dimension d = 338 mm-
♦ -Dimension e = 445 mm-
– Pull trim strip out of door lining in direction of travel.
2.4.2 Installing
– Install in reverse order of removal.
2.5 Removing and installing rear door trim
Note
Removal and installation of trim is described for the right rear
door. Follow same instructions for trim on left side door as ap‐
propriate.
2.5.1 Removing
– Switch off ignition.
Only vehicles with manual window regulators
– Remove window crank handle ⇒ page 210 .
– Using a removal wedge -3409- , lever upper part of handle
recess -1- out of door handle in door trim.
Golf 2004 ➤ , Golf 2009 ➤
General body repairs, interior - Edition 05.2010
208 Rep. Gr.70 - Trim, insulation
 Loading...