P
r
o
t
e
c
t
e
d
b
y
c
o
p
y
r
i
g
h
t
.
C
o
p
y
i
n
g
f
o
r
p
r
i
v
a
t
e
o
r
c
o
m
m
e
r
c
i
a
l
p
u
r
p
o
s
e
s
,
i
n
p
a
r
t
o
r
i
n
w
h
o
l
e
,
i
s
n
o
t
p
e
r
m
i
t
t
e
d
u
n
l
e
s
s
a
u
t
h
o
r
i
s
e
d
b
y
V
o
l
k
s
w
a
g
e
n
A
G
.
V
o
l
k
s
w
a
g
e
n
A
G
d
o
e
s
n
o
t
g
u
a
r
a
n
t
e
e
o
r
a
c
c
e
p
t
a
n
y
l
i
a
b
i
l
i
t
y
w
i
t
h
r
e
s
p
e
c
t
t
o
t
h
e
c
o
r
r
e
c
t
n
e
s
s
o
f
i
n
f
o
r
m
a
t
i
o
n
i
n
t
h
i
s
d
o
c
u
m
e
n
t
.
C
o
p
y
r
i
g
h
t
b
y
V
o
l
k
s
w
a
g
e
n
A
G
.
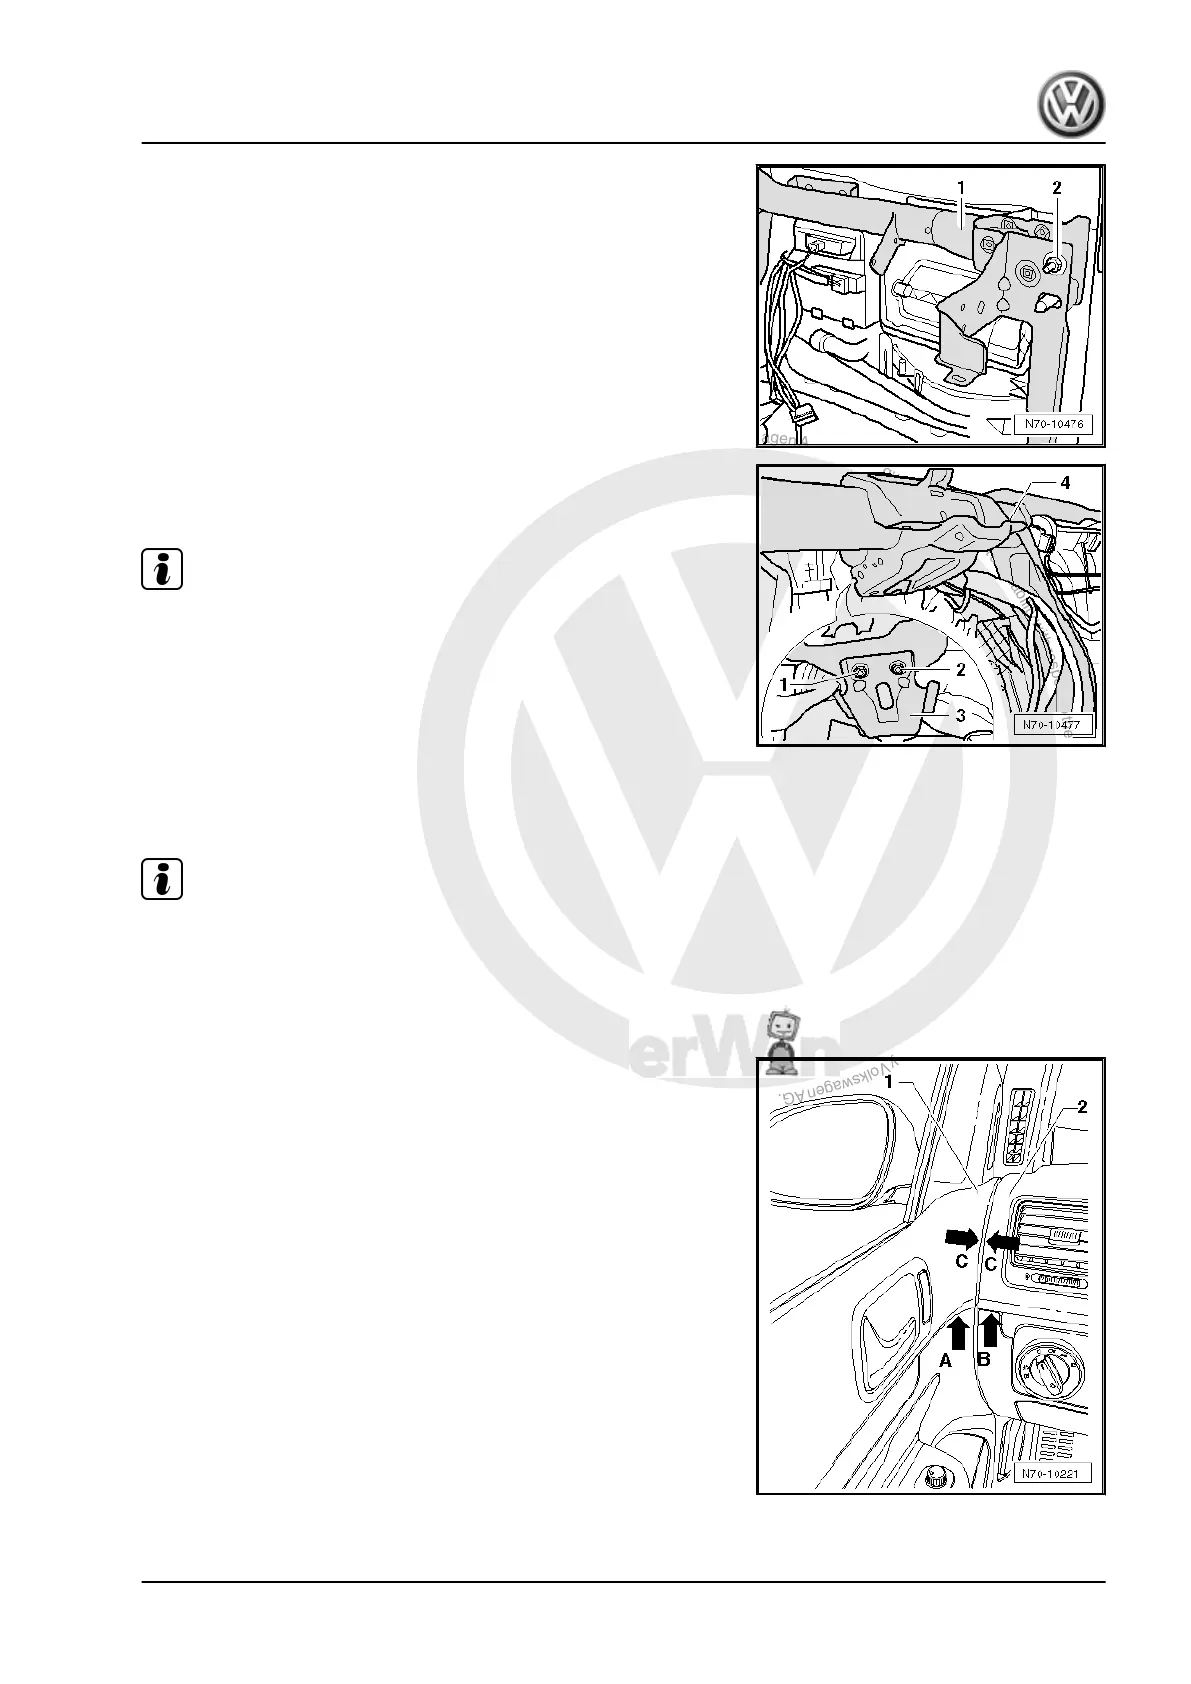
– Unscrew nut -2- on front passenger side (20 Nm).
– Release wiring harness fasteners, depending on vehicle
equipment level, from cross member.
– Pull cross member -1- about 2 cm to the rear.
– Remove bolts -1- and -2- (9 Nm).
– Remove support plate -3- from cross member -4-.
Note
When removing cross member, note position of electrical lines
and their attachment; produce sketches or take photos if neces‐
sary!
– With aid of second mechanic, carefully lift cross member -4-
out of vehicle.
1.4.2 Installing
– Install in reverse order of removal.
Note
Before securing cross member, align member using marks made
during removal.
1.5 Aligning dash panel in vehicle (Golf
2004 ▸)
The height of the dash panel is set correctly when no offset exists
between the gap of the door trim -arrow A- and dash panel
-arrow B-.
The difference in height between the upper edge of the door trim
-1- and the upper edge of the dash panel -2- is 3 mm ±1 mm.
There is no requirement to adjust the position of the dash panel
to increase the gap between the door trim and the dash panel
-arrow C-.
Golf 2004 ➤ , Golf 2009 ➤
General body repairs, interior - Edition 05.2010
1. Dash panel 199
 Loading...