P
r
o
t
e
c
t
e
d
b
y
c
o
p
y
r
i
g
h
t
.
C
o
p
y
i
n
g
f
o
r
p
r
i
v
a
t
e
o
r
c
o
m
m
e
r
c
i
a
l
p
u
r
p
o
s
e
s
,
i
n
p
a
r
t
o
r
i
n
w
h
o
l
e
,
i
s
n
o
t
p
e
r
m
i
t
t
e
d
u
n
l
e
s
s
a
u
t
h
o
r
i
s
e
d
b
y
V
o
l
k
s
w
a
g
e
n
A
G
.
V
o
l
k
s
w
a
g
e
n
A
G
d
o
e
s
n
o
t
g
u
a
r
a
n
t
e
e
o
r
a
c
c
e
p
t
a
n
y
l
i
a
b
i
l
i
t
y
w
i
t
h
r
e
s
p
e
c
t
t
o
t
h
e
c
o
r
r
e
c
t
n
e
s
s
o
f
i
n
f
o
r
m
a
t
i
o
n
i
n
t
h
i
s
d
o
c
u
m
e
n
t
.
C
o
p
y
r
i
g
h
t
b
y
V
o
l
k
s
w
a
g
e
n
A
G
.
♦ Vehicles with 2 doors: ⇒ page 212
♦ Vehicles with 4 doors: ⇒ page 215
– Remove rear door trim ⇒ page 208 .
– Remove weld points of trim strip with an appropriate milling
cutter.
– Loosen trim strip from trim.
Installing
– Insert strip trim into door trim and secure with lock washers.
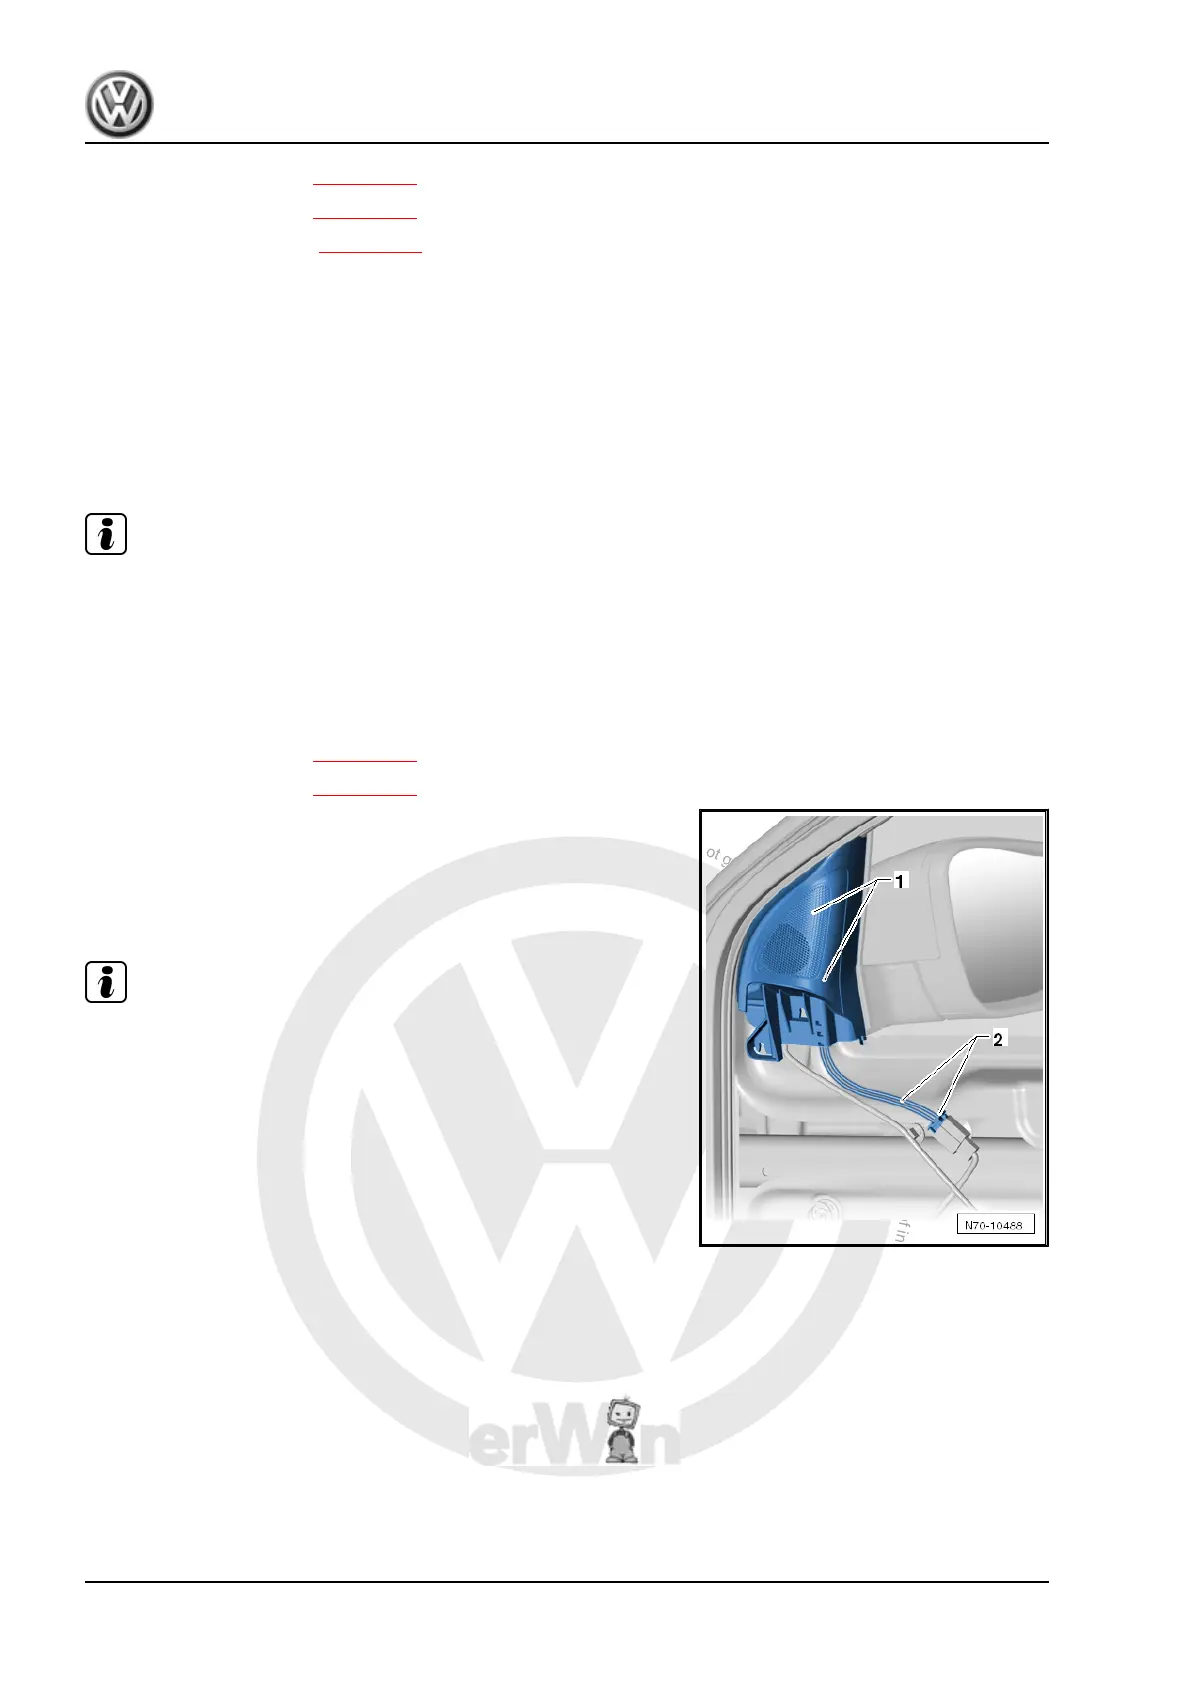
3.6 Removing and installing front door trim
cover
Note
Removal and installation are described for the right vehicle side.
Follow same instructions for the left side as appropriate.
Removing
– Switch off ignition.
– Remove front door trim:
♦ Vehicles with 2 doors: ⇒ page 212
♦ Vehicles with 4 doors: ⇒ page 215
– Pull door trim cover -1- out of mountings in door panel.
– Disconnect wiring harness -2-.
Installing
– Install in reverse order of removal.
Note
Before installing, check fasteners for damage and renew if nec‐
essary.
Golf 2004 ➤ , Golf 2009 ➤
General body repairs, interior - Edition 05.2010
222 Rep. Gr.70 - Trim, insulation
 Loading...