P
r
o
t
e
c
t
e
d
b
y
c
o
p
y
r
i
g
h
t
.
C
o
p
y
i
n
g
f
o
r
p
r
i
v
a
t
e
o
r
c
o
m
m
e
r
c
i
a
l
p
u
r
p
o
s
e
s
,
i
n
p
a
r
t
o
r
i
n
w
h
o
l
e
,
i
s
n
o
t
p
e
r
m
i
t
t
e
d
u
n
l
e
s
s
a
u
t
h
o
r
i
s
e
d
b
y
V
o
l
k
s
w
a
g
e
n
A
G
.
V
o
l
k
s
w
a
g
e
n
A
G
d
o
e
s
n
o
t
g
u
a
r
a
n
t
e
e
o
r
a
c
c
e
p
t
a
n
y
l
i
a
b
i
l
i
t
y
w
i
t
h
r
e
s
p
e
c
t
t
o
t
h
e
c
o
r
r
e
c
t
n
e
s
s
o
f
i
n
f
o
r
m
a
t
i
o
n
i
n
t
h
i
s
d
o
c
u
m
e
n
t
.
C
o
p
y
r
i
g
h
t
b
y
V
o
l
k
s
w
a
g
e
n
A
G
.
1.8.2 Installing
– Install in reverse order of removal.
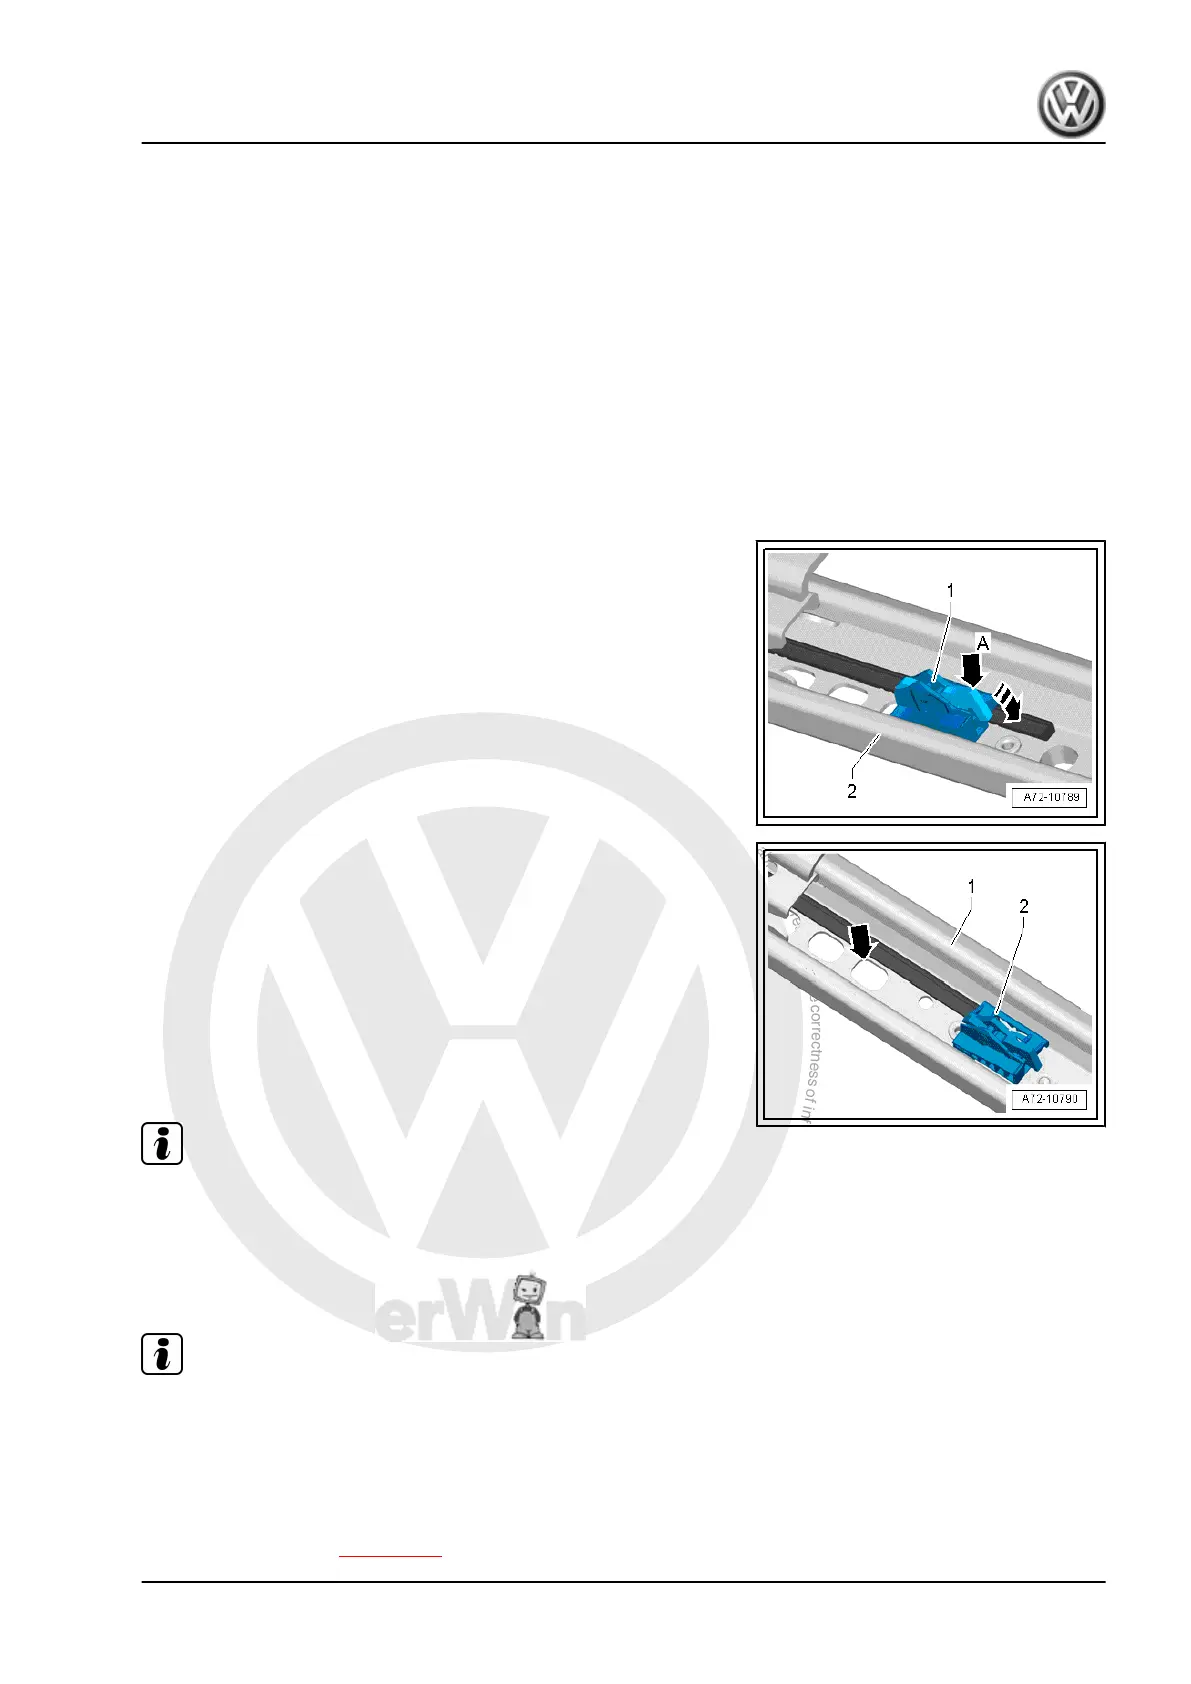
1.9 Removing and installing slider (2 door
models)
Removing
– Disengage seat longitudinal adjustment.
– Push front seat backwards onto stop in rearmost position.
– Disengage front seat with handle for easy entry.
– Fold backrest forwards and, at the same time, push seat to
foremost position.
– Unscrew rear bolt from seat on tunnel side.
– Push rocker -arrow A- off slider in -direction of arrow- and dis‐
engage it.
– Pull slider -1- backwards out of seat rail -2- by tilting slightly in
direction of tunnel.
Installing
– Insert slider in seat rail -1- by tilting slightly in direction of tun‐
nel.
– Engage slider in rearmost detent hole -arrow-.
– Tighten rear bolt from seat on tunnel side (40 Nm)
– Fold back backrest and, when doing this, slide seat backwards
into rearmost position (easy entry system).
– Disengage seat longitudinal adjustment and move front seat
into desired seating position.
Note
Special adjustment of the slider is not necessary.
1.10 Removing and installing seat drawer
mounting
Note
Removal and installation is described for the left vehicle side.
Follow same instructions for the right side as appropriate.
1.10.1 Removing
– Remove drawer -1- from mountings.
– Remove front seat ⇒ page 260 .
Golf 2004 ➤ , Golf 2009 ➤
General body repairs, interior - Edition 05.2010
1. Front seats 271
 Loading...