04/2016
4-39
Phaser 4600/4620/4622 Printer Service Manual
REP 7.21, REP 7.22
4 Repairs and Adjustments
Revised
REP 7.21 Tray Separator Clutch
Parts List on PL 7.10 Item 7
Removal
1. Open the Tray.
2. Open the separator cover.
3. Remove the Separator Roller, REP 7.20.
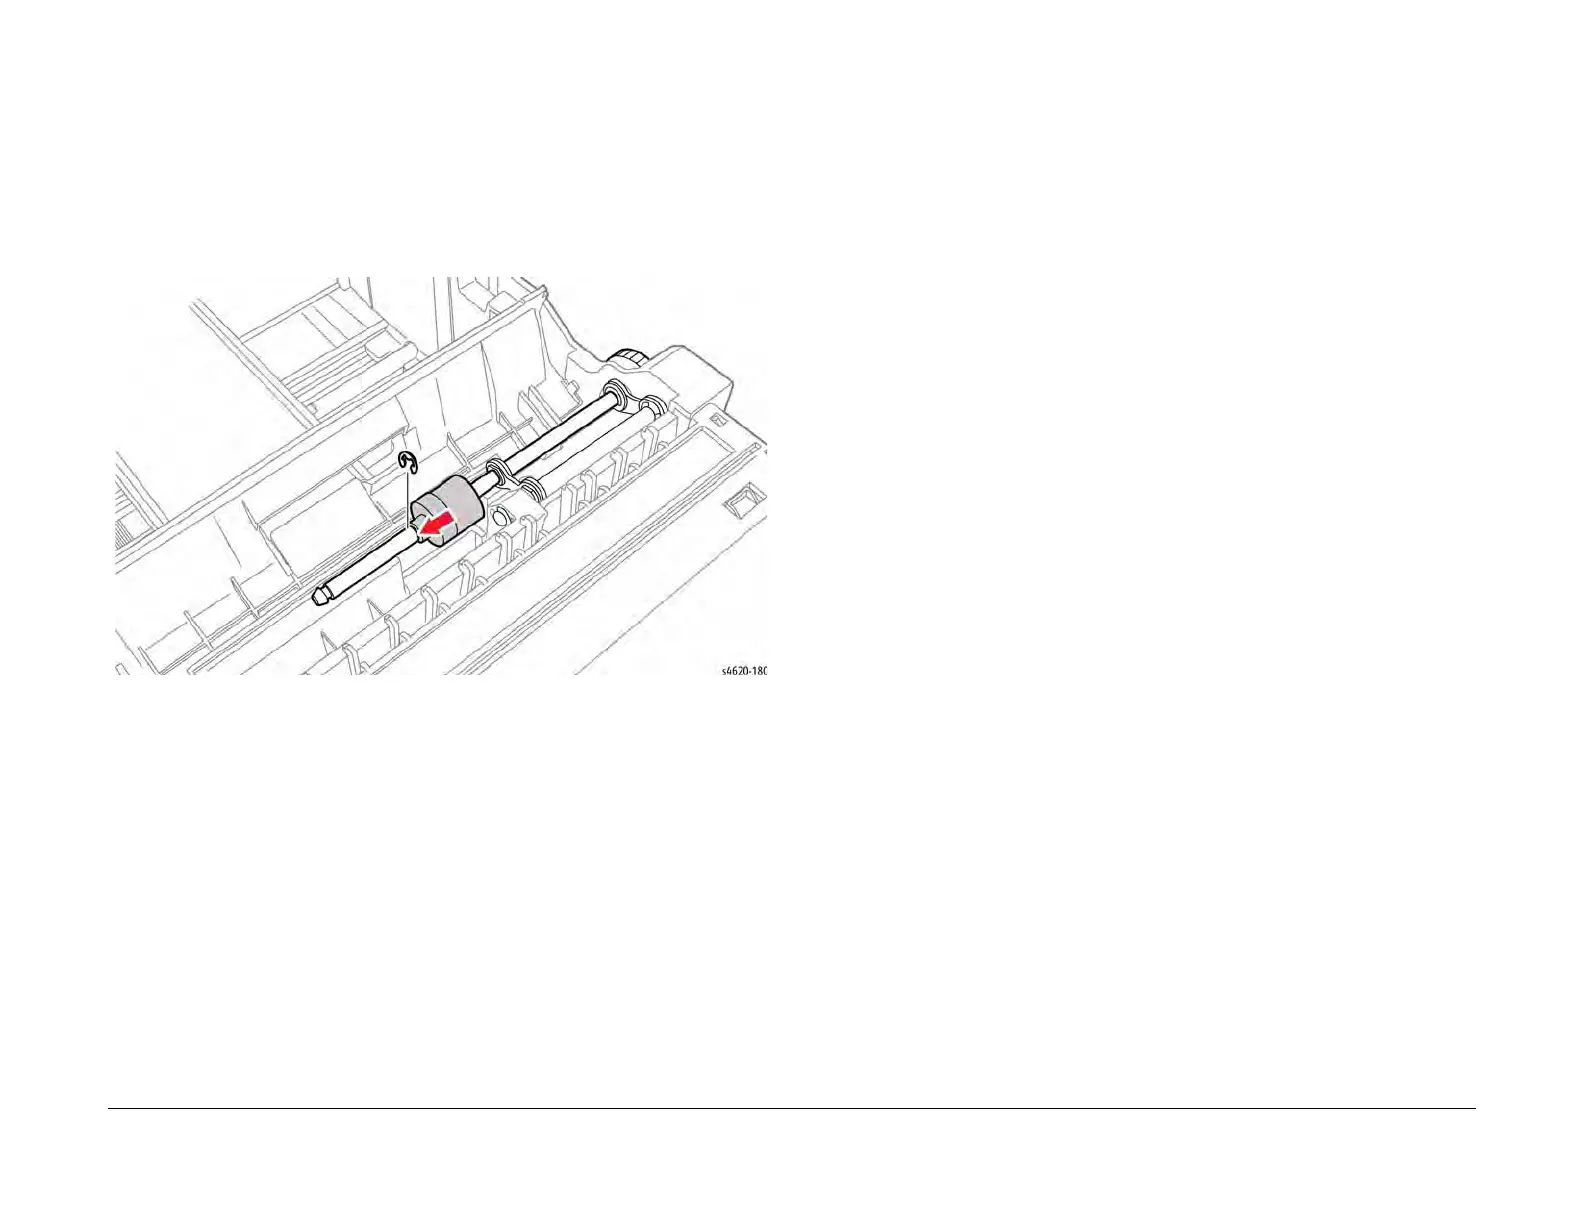
4. Remove the E-clip that secures the clutch to the shaft and slide the clutch off the shaft,
Figure 1.
Figure 1 Remove the Separator Clutch
REP 7.22 Tray Front Cover
Parts List on PL 7.10 Item 1
Removal
1. Remove the Tray.
2. Remove 2 screws (plastic) and release 4 hooks that secure the cover to the tray.
3. Release the media level indicator from the opening and remove the cover, Figure 1
 Loading...


