04/2016
4-52
Phaser 4600/4620/4622 Printer Service Manual
REP 7.37
Revised
4 Repairs and Adjustments
REP 7.37 Feeder Stack Height Sensor
Parts List on PL 8.20 Item 2
Removal
WARNING
Use safe handling procedures when removing the module. Refer to GP 15. The module
is heavy.
WARNING
Switch off the electricity to the machine. Disconnect the power cord from the customer
supply while performing tasks that do not need electricity. Electricity can cause death or
injury. Moving parts can cause injury.
1. Separate the option feeder from the printer, GP 15.
2. Remove the Tray.
3. Remove the Front Cover, REP 7.24.
4. Remove the Right Cover, REP 7.25.
5. Remove the Rear Cover, REP 7.27.
6. Remove the right side frame, REP 7.34.
7. Remove the Take Away Clutch, REP 8.40.
8. Remove the Feed Clutch, REP 8.41.
9. Remove the Feed Drive Assembly, REP 8.42.
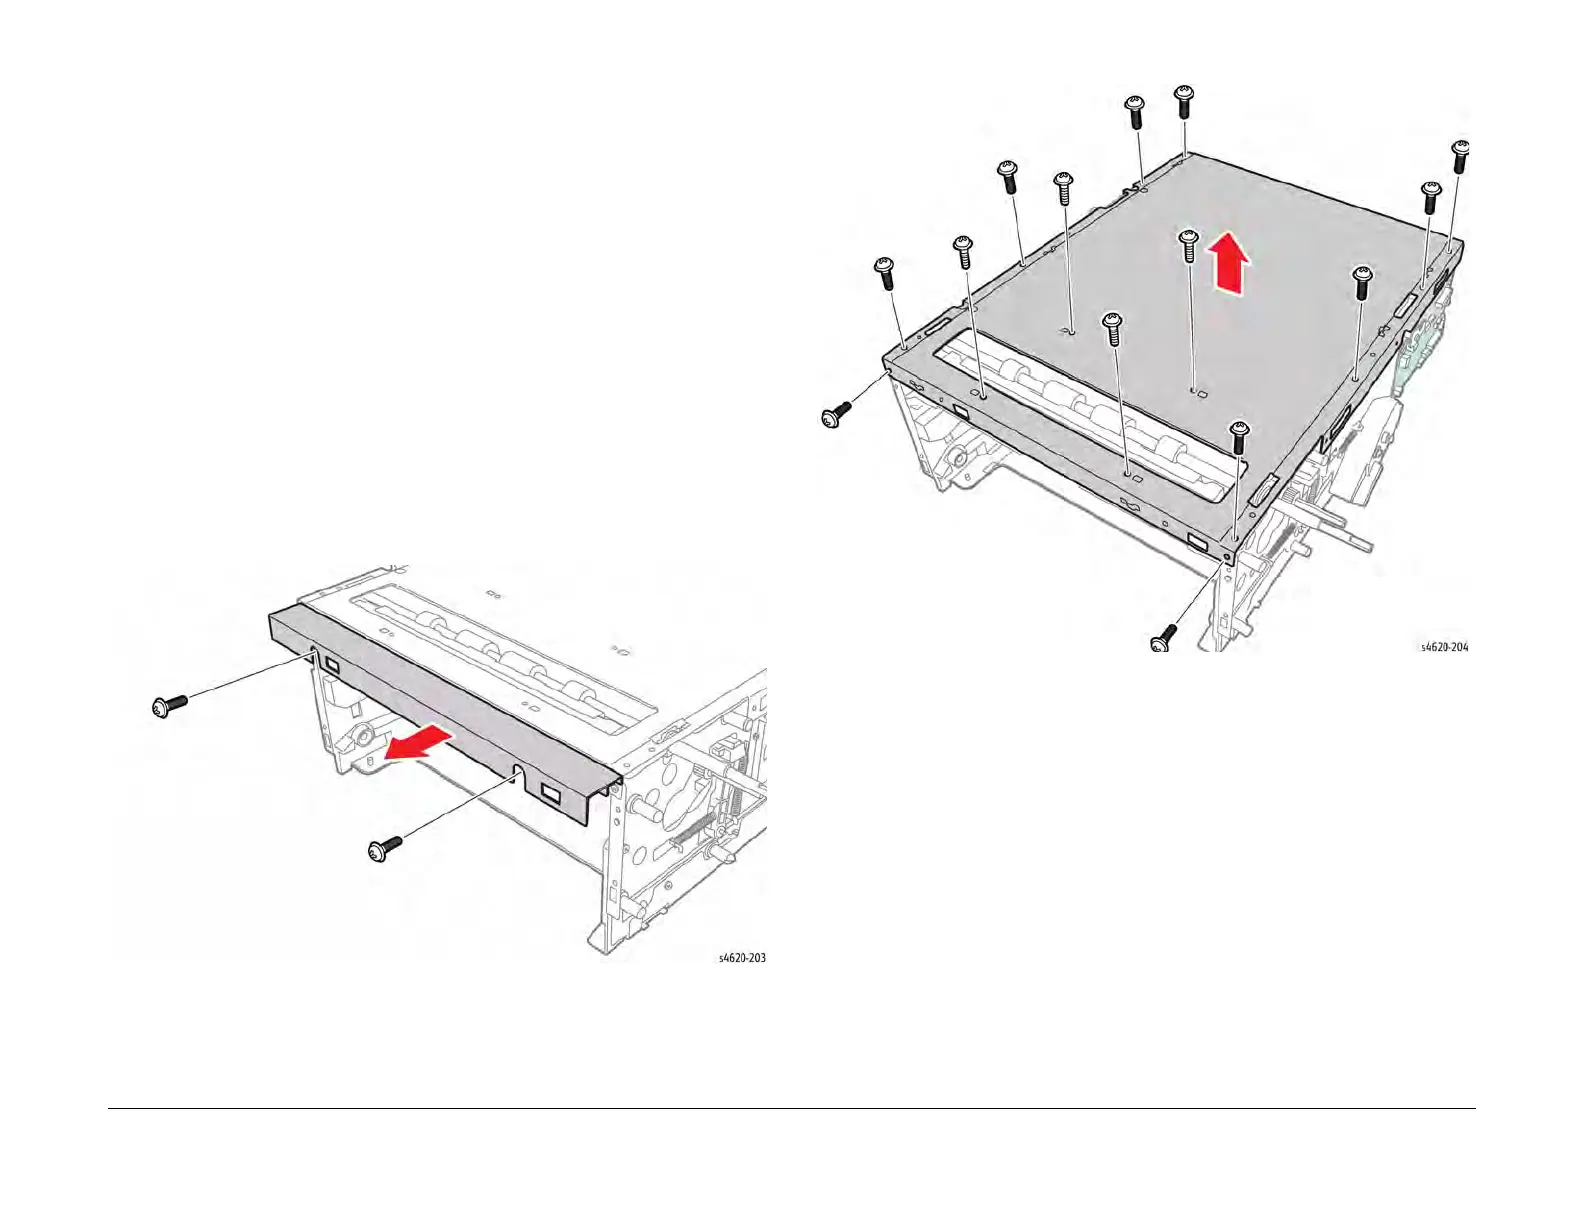
10. Remove the 2 screws that secure front frame rail to the chassis, Figure 1.
Figure 1 Remove the frame rail
11. Remove 10 (metal) and 4 (plastic) screws that secure the cover to the chassis, Figure 2.
Figure 2 Remove the top cover
12. Remove the Feed Assembly, REP 8.46.
13. Turn the assembly over and release the hook that secures the sensor to the Feed Assem-
bly, Figure 3.
 Loading...


