Version 7.2 111 Mediant 1000B Gateway & E-SBC
User's Manual 10. Configuring SSL/TLS Certificates
3. In the table, select the required TLS Context index row, and then click the Change
Certificate link located below the table; the Context Certificates page appears.
4. Scroll down to the Upload Certificate Files From Your Computer group:
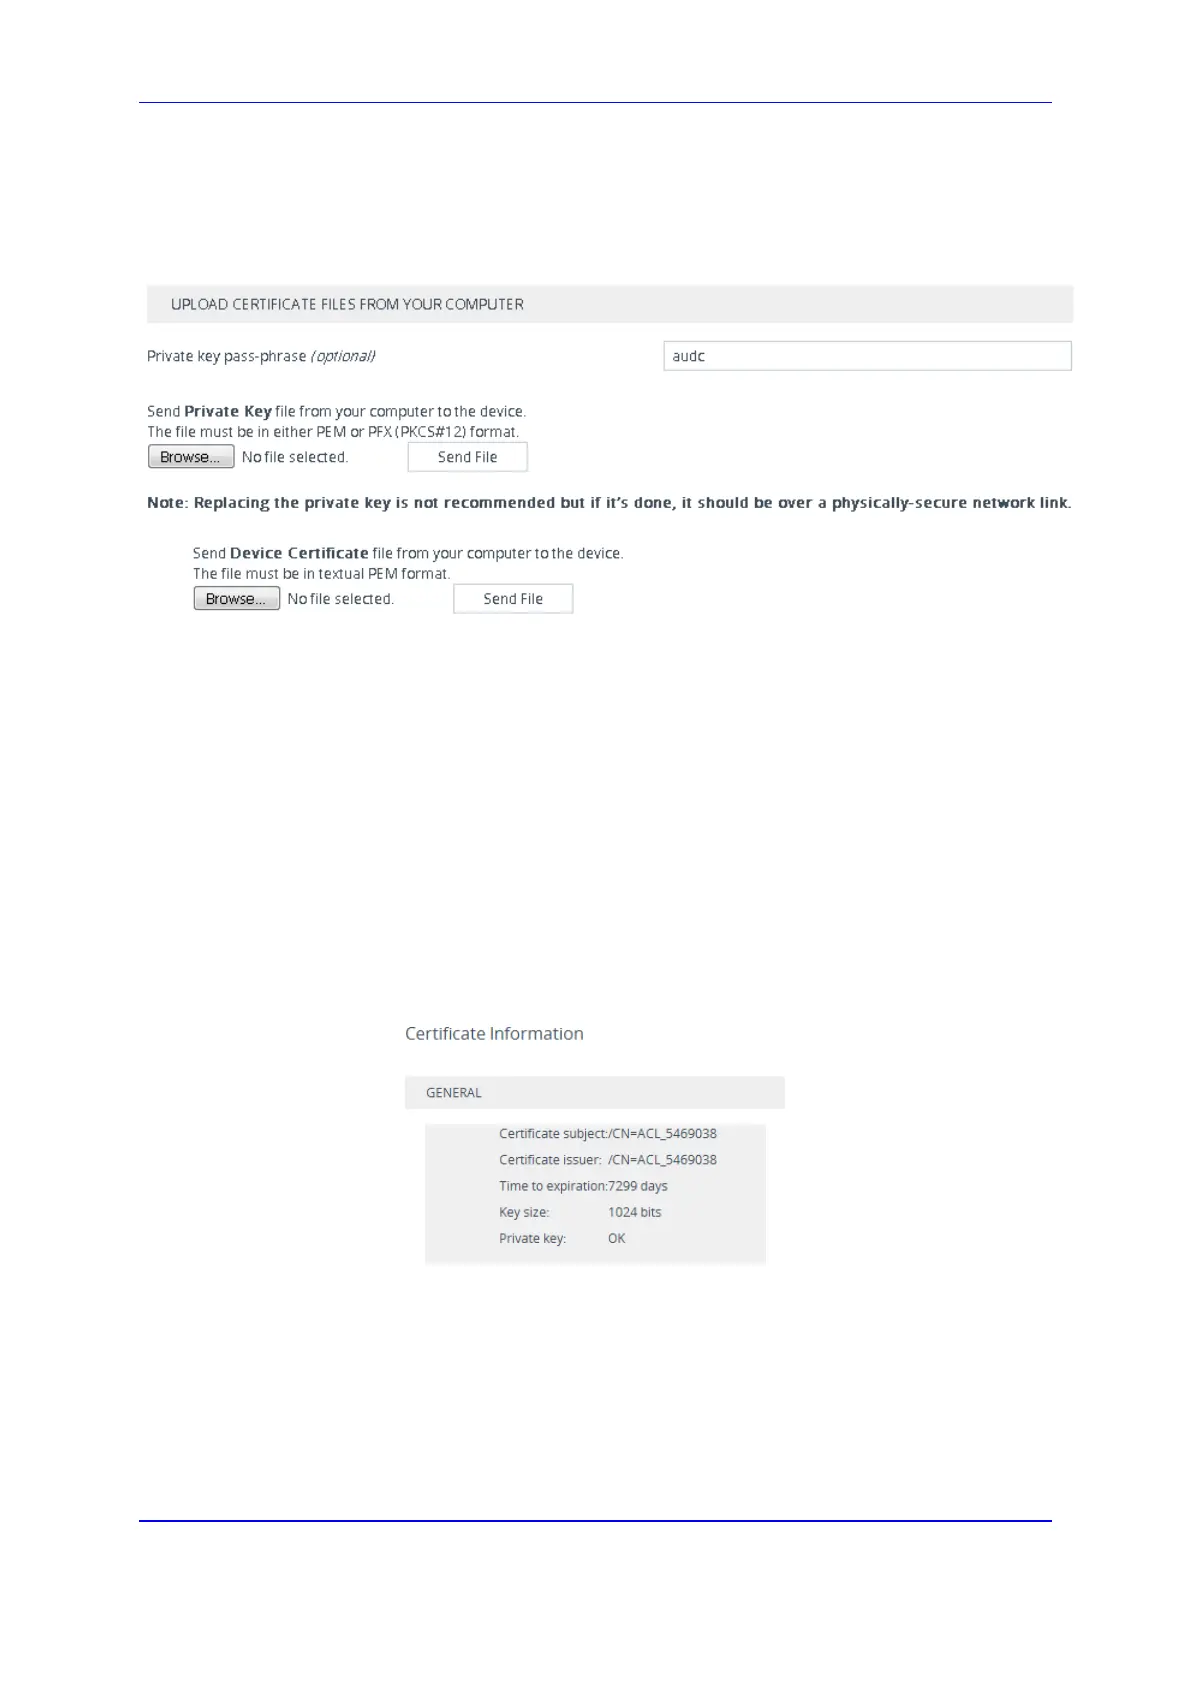
Figure 10-4: Upload Certificate Files from your Computer Group
5. Fill in the 'Private key pass-phrase' field, if required.
6. Click the Browse button corresponding to the 'Send Private Key file ...' text, navigate
to the private key file (Step 1), and then click Send File.
7. If the security administrator has provided you with a device certificate file, load it using
the Browse button corresponding to the 'Send Device Certificate file ...' text.
8. After the files successfully load to the device, save the configuration with a device
reset.
9. Verify that the private key is correct:
a. Open the TLS Contexts table.
b. Select the required TLS Context index row.
c. Click the Certificate Information link located below the table.
d. Make sure that the 'Private key' field displays "OK"; otherwise, consult with your
security administrator.
Figure 10-5: Verifying Private Key
10.5 Generating Private Keys for TLS Contexts
You can let the device generate the private key for a TLS Context. The private key can be
generated for CSR or self-signed certificates.
To generate a new private key for a TLS Context:
1. Open the TLS Contexts table (see ''Configuring TLS Certificate Contexts'' on page
 Loading...