Epson Stylus Pro 7900/7910/9900/9910 User’s Guide
Introduction
11
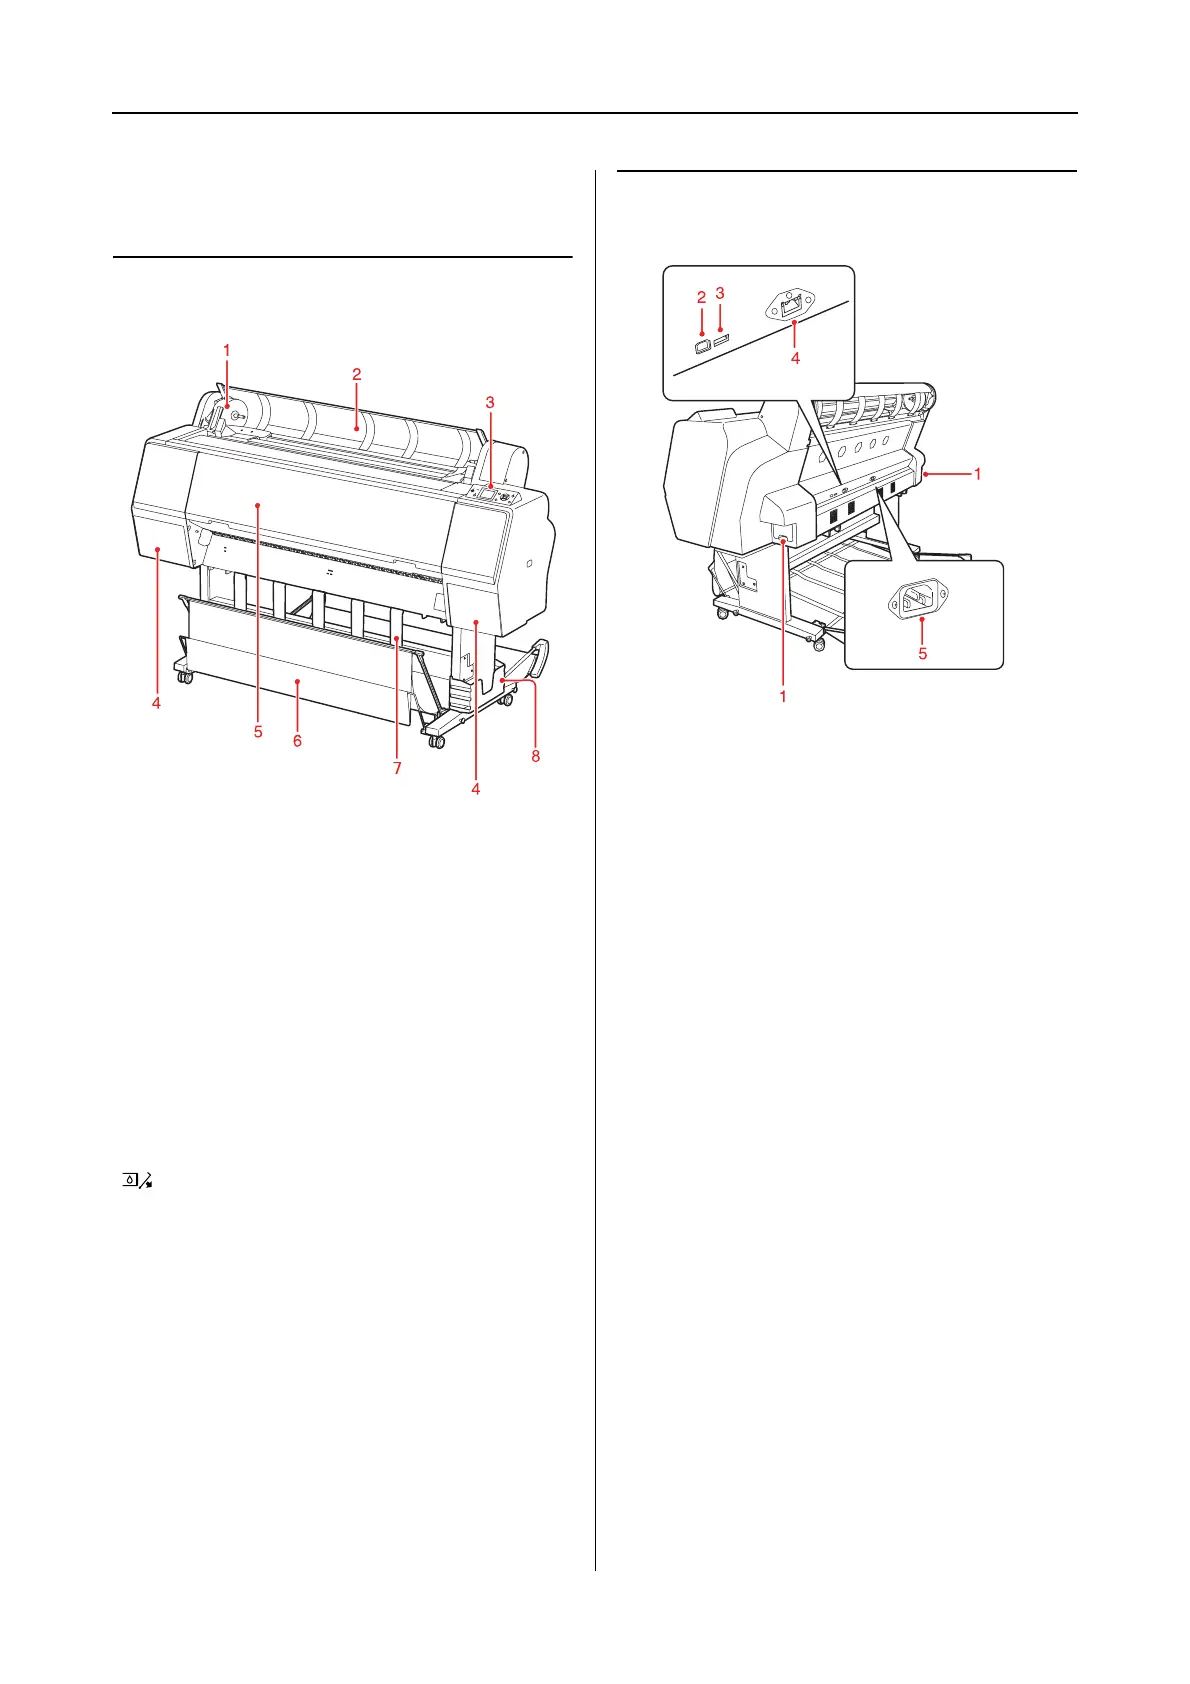
Printer Parts
Front section
1. Adapter holder
Fix the roll paper when setting the roll paper.
2. Roll paper cover
Open the roll paper cover when you set or remove
the roll paper.
3. Control panel
The control panel consists of buttons, lights, and a
liquid crystal display (LCD).
4. Ink cover (on both sides)
Open the ink cover when installing the ink
cartridges. It slightly opens when you push the
button on the printer’s control panel.
5. Front cover
Open the front cover when you remove jammed
paper.
6. Paper basket
Receives the ejected paper.
7. Paper guides
Use the paper guides to lead the paper for feeding
forward or backward.
8. Manual box
Place the manual in here. You can set it either on
the left or right side of the stand.
Rear section
1. Maintenance tanks (on both sides and the
center)
The tank where the waste ink goes into. There are
two maintenance tanks on both sides of Epson
Stylus Pro 9900/9910. There is one maintenance
tank on the right side of Epson Stylus Pro
7900/7910.
2. USB interface connector
Connects the computer and printer with a USB
interface cable.
3. Option interface connector
Connects the printer and options with a cable.
4. Network interface connector
Connects the printer to the network with a
network interface cable.
5. AC inlet
Plug the power cord.

 Loading...