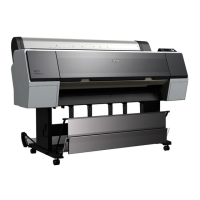
Epson Stylus Pro 7900/7910/9900/9910 User’s Guide
Variety of Printings
157
Printing with Non-Epson
Media
When using non-Epson media, make the paper
settings according to the paper characteristics
before printing. There are two ways to make
settings and to print.
❏ Register the custom paper in the Menu mode
using the printer's control panel, and print
using the registered setting.
The registered contents are stored when this
product is turned off. You can register up to
10 types of custom paper.
❏ Make setting using the Paper Configuration
dialog box in the printer driver.
Windows:
Set the Media Settings in the Main menu.
See “Saving as a custom media” on page
161
Mac OS X:
Set in the Layout dialog.
See the printer driver online help for details.
Setting the custom paper in
the printer
There are two ways to register a custom size
paper.
❏ Register the custom paper on the LCD panel
of the printer. Set the items for PAPER SETUP
menu.
❏ Register the custom paper by using EPSON
LFP Remote Panel 2. When using EPSON LFP
Remote Panel 2, you can easily register the
custom paper to the memory in this product
from the computer. See the EPSON LFP
Remote Panel 2 online help for details.
This section explains how to register the custom
paper from the printer’s control panel.
The registered number is displayed on the LCD
panel.
A
Load the paper that you want to use.
Make sure to set the paper that is actually
used.
B
Enter the CUSTOM PAPER menu.
1. Press the button to enter the Menu
mode.
2. Press the / button to display PAPER
SETUP, and then press the button.
3. Press the / button to display
CUSTOM PAPER, and press the button.
Note:
❏ Make sure to check the paper characteristics such
as paper tension, ink fixing, or paper thickness
before setting the custom paper. See the
description that comes with the paper for
information on the paper characteristics.
❏ The settings you make on the printer driver have
priority over the settings you make on the
printer's control panel.
❏ If bidirectional printing does not print evenly on
the custom paper you have registered, use
unidirectional printing. Select Quality Options
for the Print Quality setting to show the Quality
Options dialog box. Then, clear the High Speed
check box.
Note:
The printer becomes in the READY state when you
press the button at any point of making the
following settings. The settings you have made so far
are registered as the custom settings (including
unchanged settings).

 Loading...


