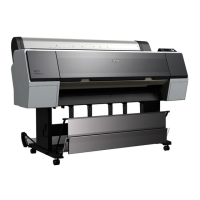
Epson Stylus Pro 7900/7910/9900/9910 User’s Guide
Maintenance
87
If you have not used your
printer for more than six
months
❏ When activating AUTO NOZZLE CHECK in the
panel settings, the printer checks the print
head nozzles for clogging, and performs print
head cleaning automatically if needed.
❏ If you have not used your printer for a long
time, print a nozzle check pattern to check for
clogging. If the nozzle check pattern is not
good, perform head cleaning before printing
your data.
See “Nozzle check” on page 76
See “Head cleaning” on page 78
See “Power cleaning” on page 80
❏ You need to perform head cleaning a few
times before the nozzle check pattern is
correctly printed. If the nozzles are still
clogged after performing head cleaning three
times, perform power cleaning.
See “Head cleaning” on page 78
See “Power cleaning” on page 80
❏ After performing the head cleaning a few
times, turn off the printer and leave it
overnight or longer, so that the ink may
dissolve.
❏ If the nozzles are still clogged after trying the
instructions above, contact your Epson
dealer.
Protecting the print head
This printer has a capping function that
automatically puts a cap on the print head to keep
it away from drying.
If the print head is left uncapped, the print quality
may decline. When you are not using the printer,
make sure the print head is located on the far
right so that it is capped.
See “Capping function” on page 81
Transporting the Printer
When transporting the printer, repack the printer
using the original box and packing materials to
protect from shock and vibration.
Repacking the printer
A
Turn off the printer, and then unplug the
cables such as the power cord.
B
Remove the roll paper and roll media
adapter if they are set in the printer.
C
Remove the paper basket if it is installed.
D
Remove the optional Auto Take-up Reel
Unit or SpectroProofer Mounter if they are
installed.
E
Open the front cover to install the
protective material for fixing the print head,
and then close the cover.
See the Unpacking and Setup Guide
c
Caution:
❏ Do not remove the ink cartridges;
otherwise, the print head nozzles may dry
up or ink may leak from the cartridge.
❏ Be careful not to touch the parts unless you
needed to; otherwise, the printer may be
damaged.

 Loading...


