8. CHART ALERTS
8-5
8.3 Route Planning
The system will calculate chart alerts using user-defined channel limit for routes. Dan-
ger areas are shown highlighted if safety contour or user-chosen chart alert areas are
crossed by the planned route. For more information on route planning, see chapter 9.
Note: If your voyage is going to take a long time or you are planning it much earlier
than it is to take place, use the Display Date and Update Review dates corresponding
to the dates you are going to sail. See section 5.2.2 for how to set Display Date and
Update Review dates.
8.3.1 Chart alerts for route planning
You can generate a list of chart alerts that cross by the planned route. This can be
done as follows:
1. Enter safety contour you want to use.
2. Plan a route; define waypoints and other necessary information. See chapter 9 for
route planning.
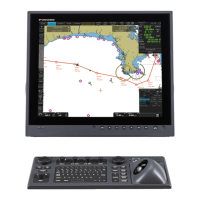
3. Select dangerous objects to be monitored during route monitoring, on the [Alert
Parameters] page in the [Route Plan] dialog box, shown below. Click the box be-
low each object to show or hide the check mark.
When the route is checked, alert objects with a check mark which have their alert
activated are highlighted on the chart display. Alert objects with no check mark are
not highlighted.
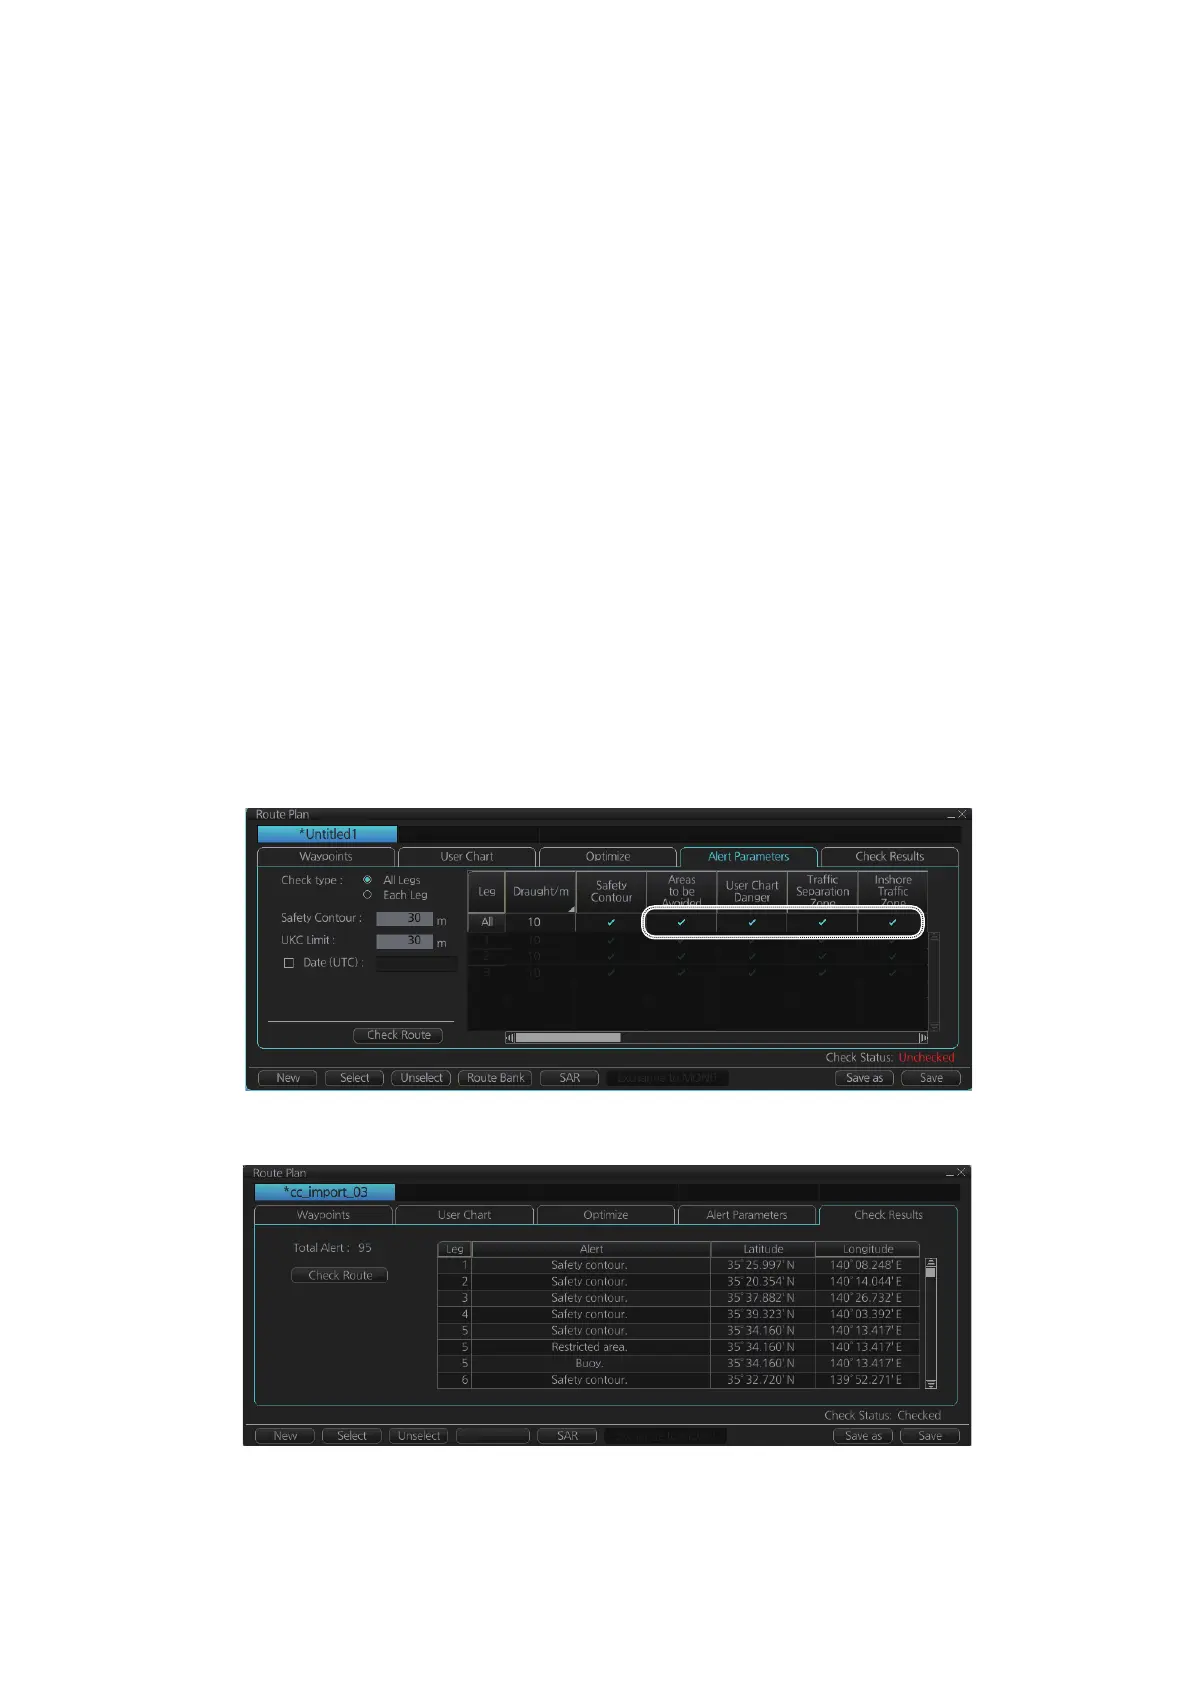
4. Click the [Check Route] button to generate a list of chart alerts. The results appear
on the [Check Results] page.
The figure above shows the alerts to be monitored. If there are alerts included in
the planned route, check alerts leg by leg, or check alerts by using category of
alert.
Route Bank
 Loading...